
Jump to a section
- 1. Getting Started
- 2. Getting Around the App
- 3. The Hub (Home)
- 4. Your Profile
- 5. Agenda & Sessions
- 6. Community & Networking
- 7. Requests & Chat Approvals
- 8. Messaging
- 9. Passport Challenge
- 10. Exhibitors, Sponsors & Speakers
- 11. Announcements & Notifications
- 12. Favorites
- 13. Notes
- 14. Exhibitor Tools
- 15. Icon Glossary
1. Getting Started
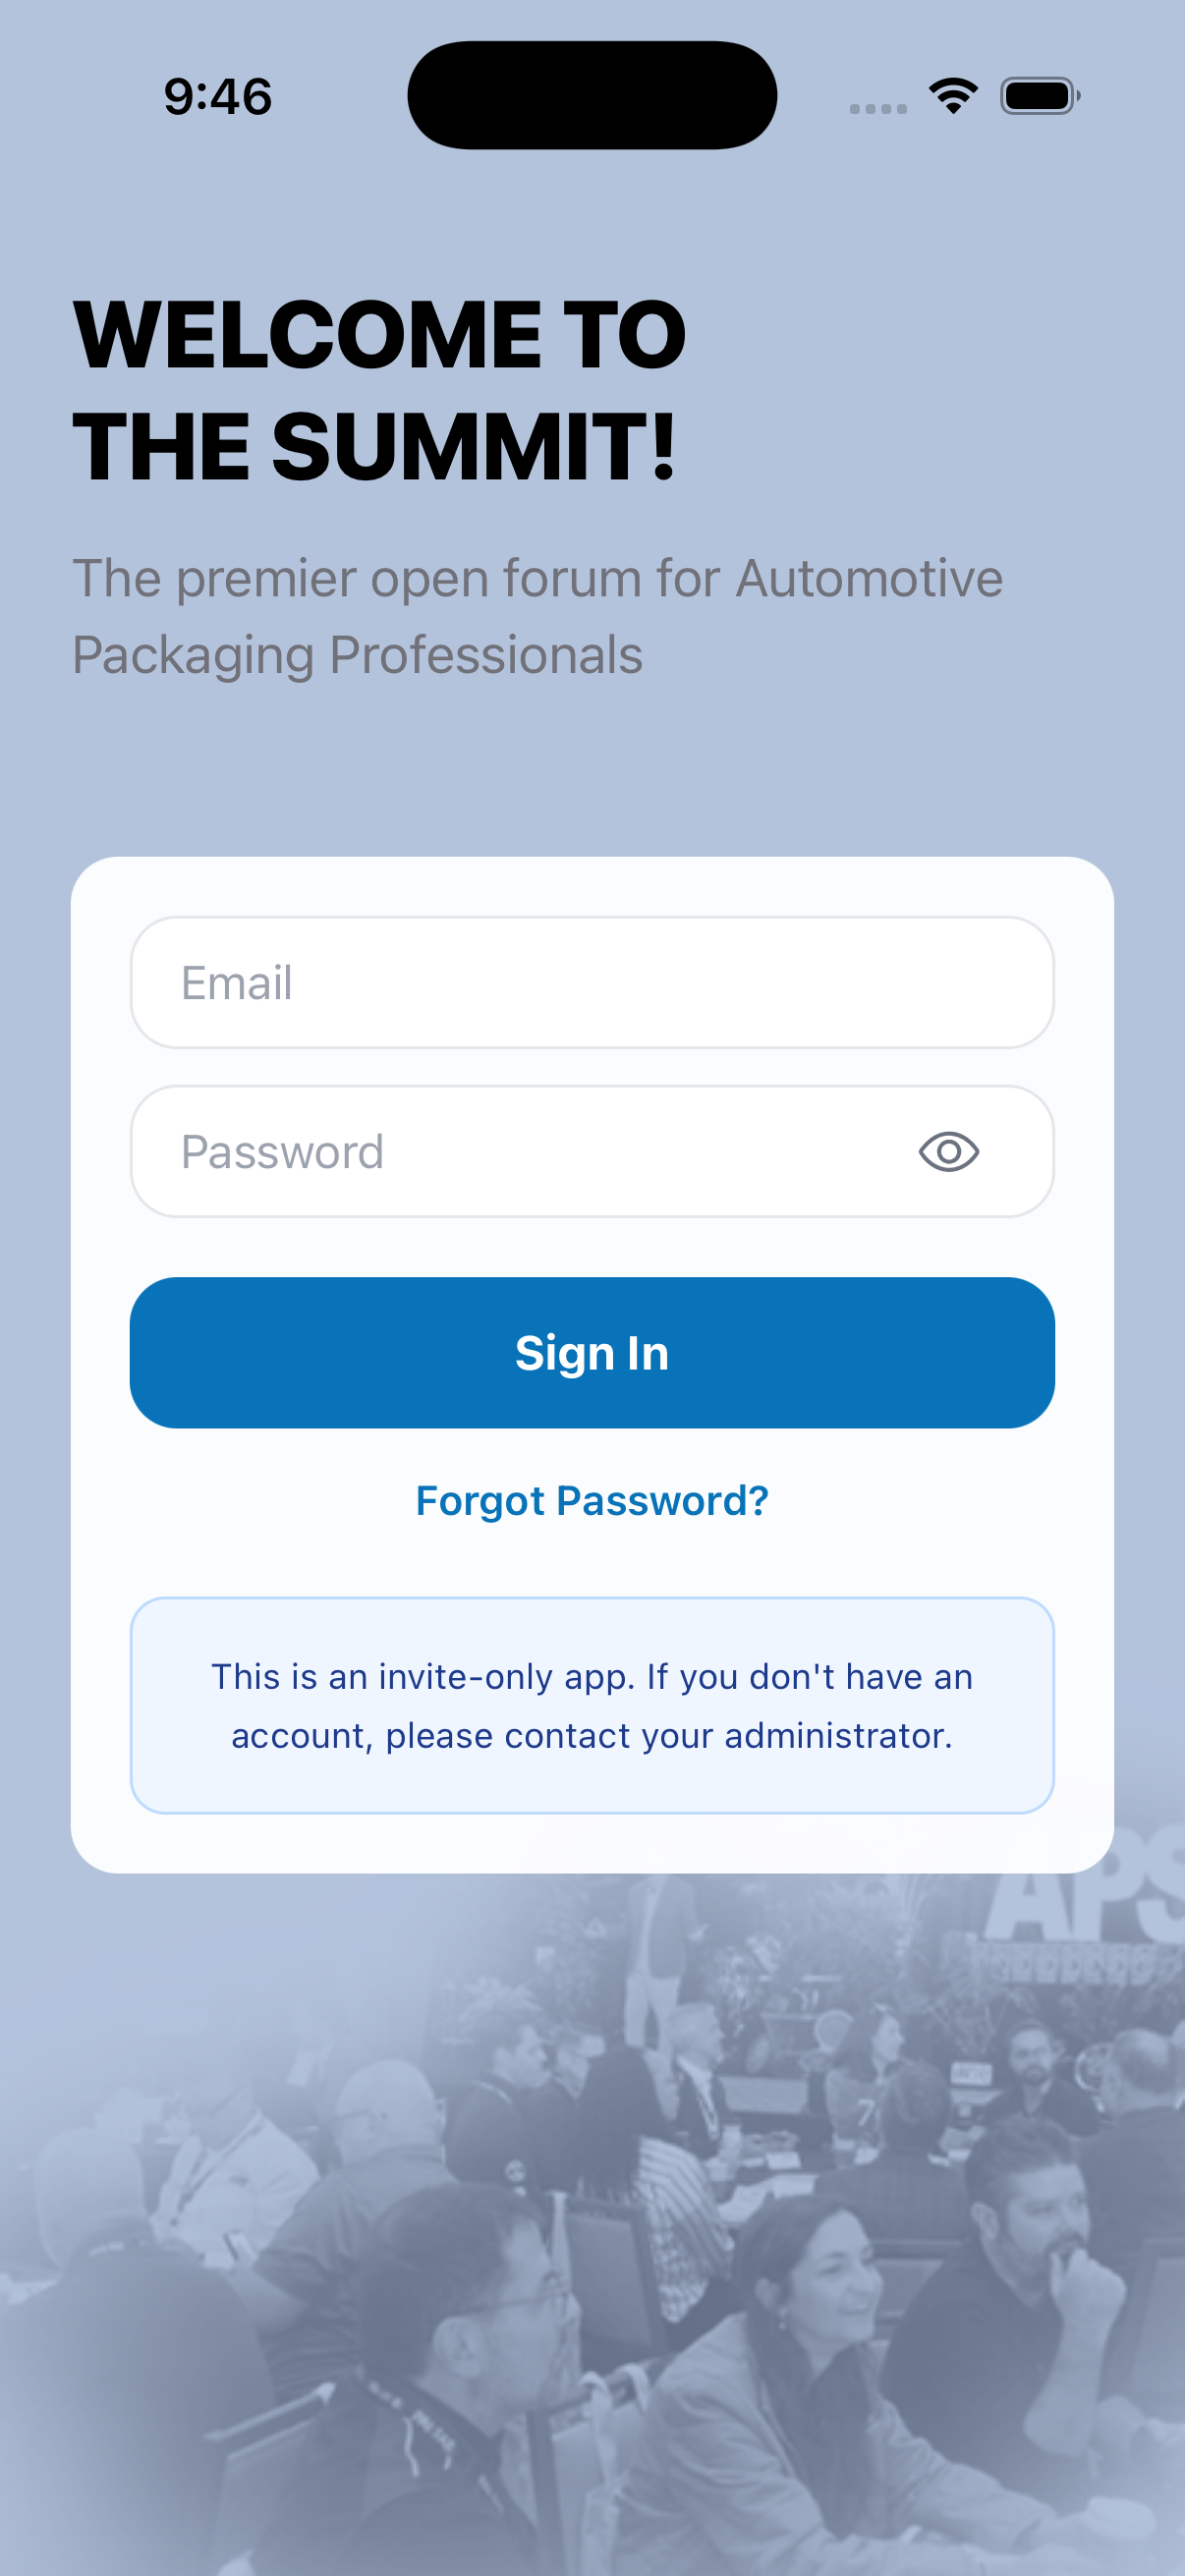
The Automotive Packaging Summit app is invite-only. There is no public sign-up — your account is created by the event organizer using your registration email. If you don’t have an account, contact your event administrator.
1.1 First-Time Sign In (Invite Only)
The first time you log in, you use the temporary password provided by the organizer. The app will then ask you to create your own password.
- Open the app. You’ll land on the Sign In screen.
- Enter your email and the temporary password you were given.
- Tap Sign In.
- When prompted, enter a new password, then confirm it.
- Tap Update Password. You’ll be taken straight into the app.
1.2 Signing In
- Enter your email and password.
- Tap the eye icon to show/hide your password if needed.
- Tap Sign In.
If your credentials are incorrect, you’ll see a message such as “Incorrect email or password.” Because the app is invite-only, an unrecognized email returns “No account found… please contact your administrator.”
1.3 Forgot / Reset Password
If you forget your password, you can reset it yourself with a verification code sent to your email.
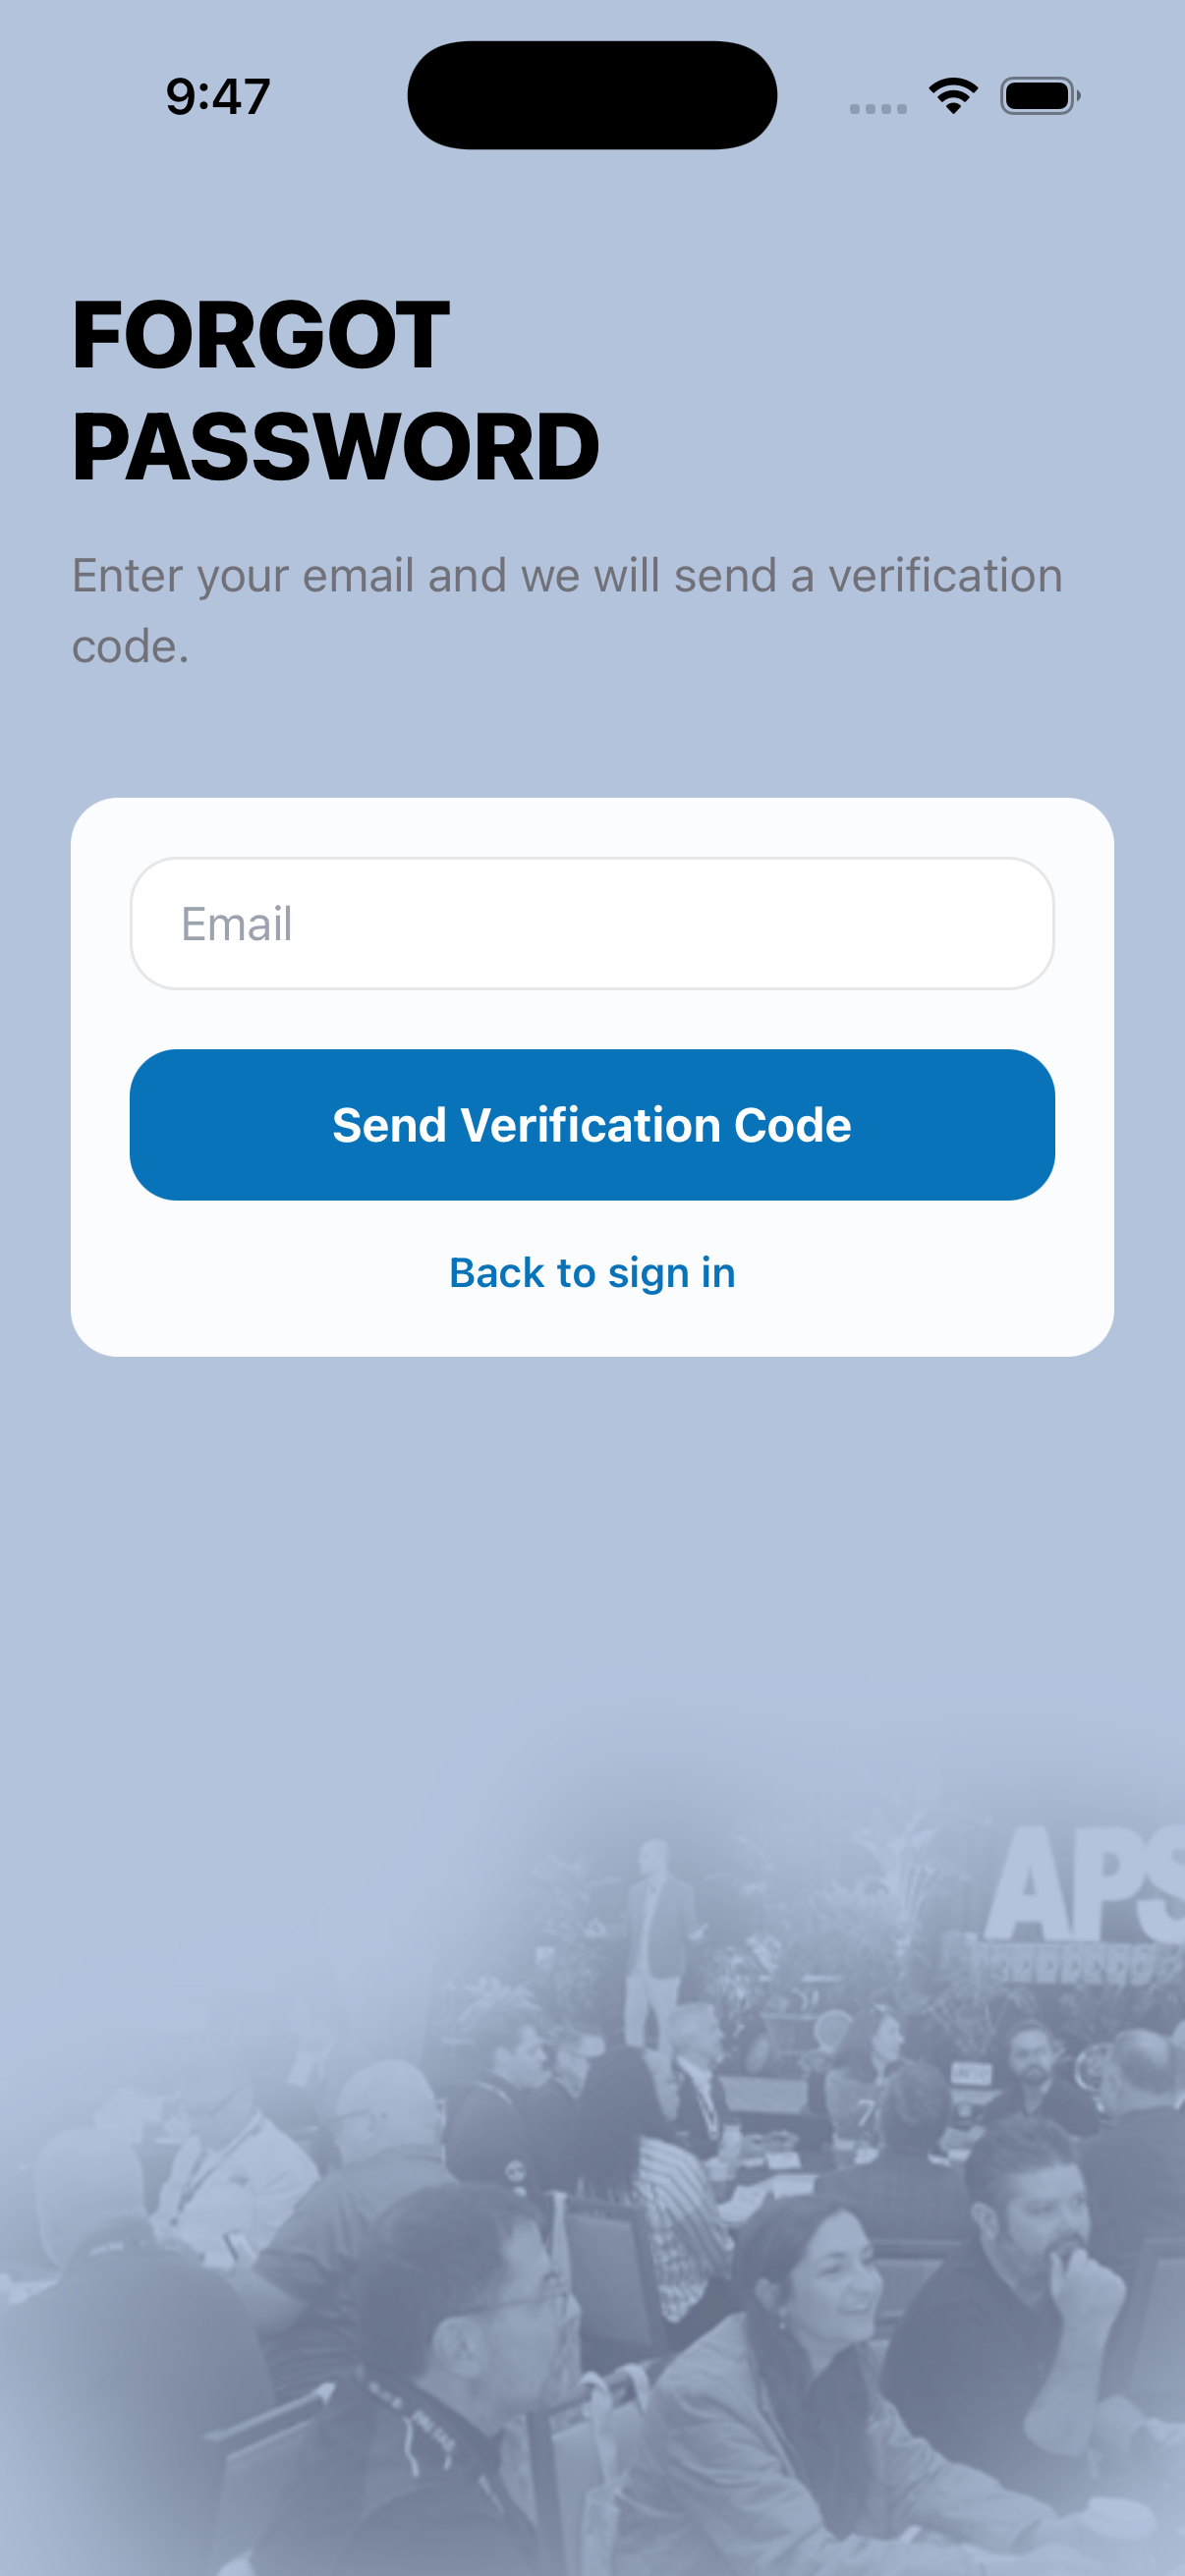
- On the Sign In screen, tap Forgot Password?
- Enter your email and tap Send Verification Code.
- Check your email for the code.
- Back in the app, enter the verification code, your new password, and confirm it.
- Tap Reset Password. You’ll be returned to Sign In to log in with your new password.
Helpful options on this screen:
- Resend code — sends a new code if the first didn’t arrive.
- Use a different email — start over with another address.
- Back to sign in — return without resetting.
1.4 Signing Out
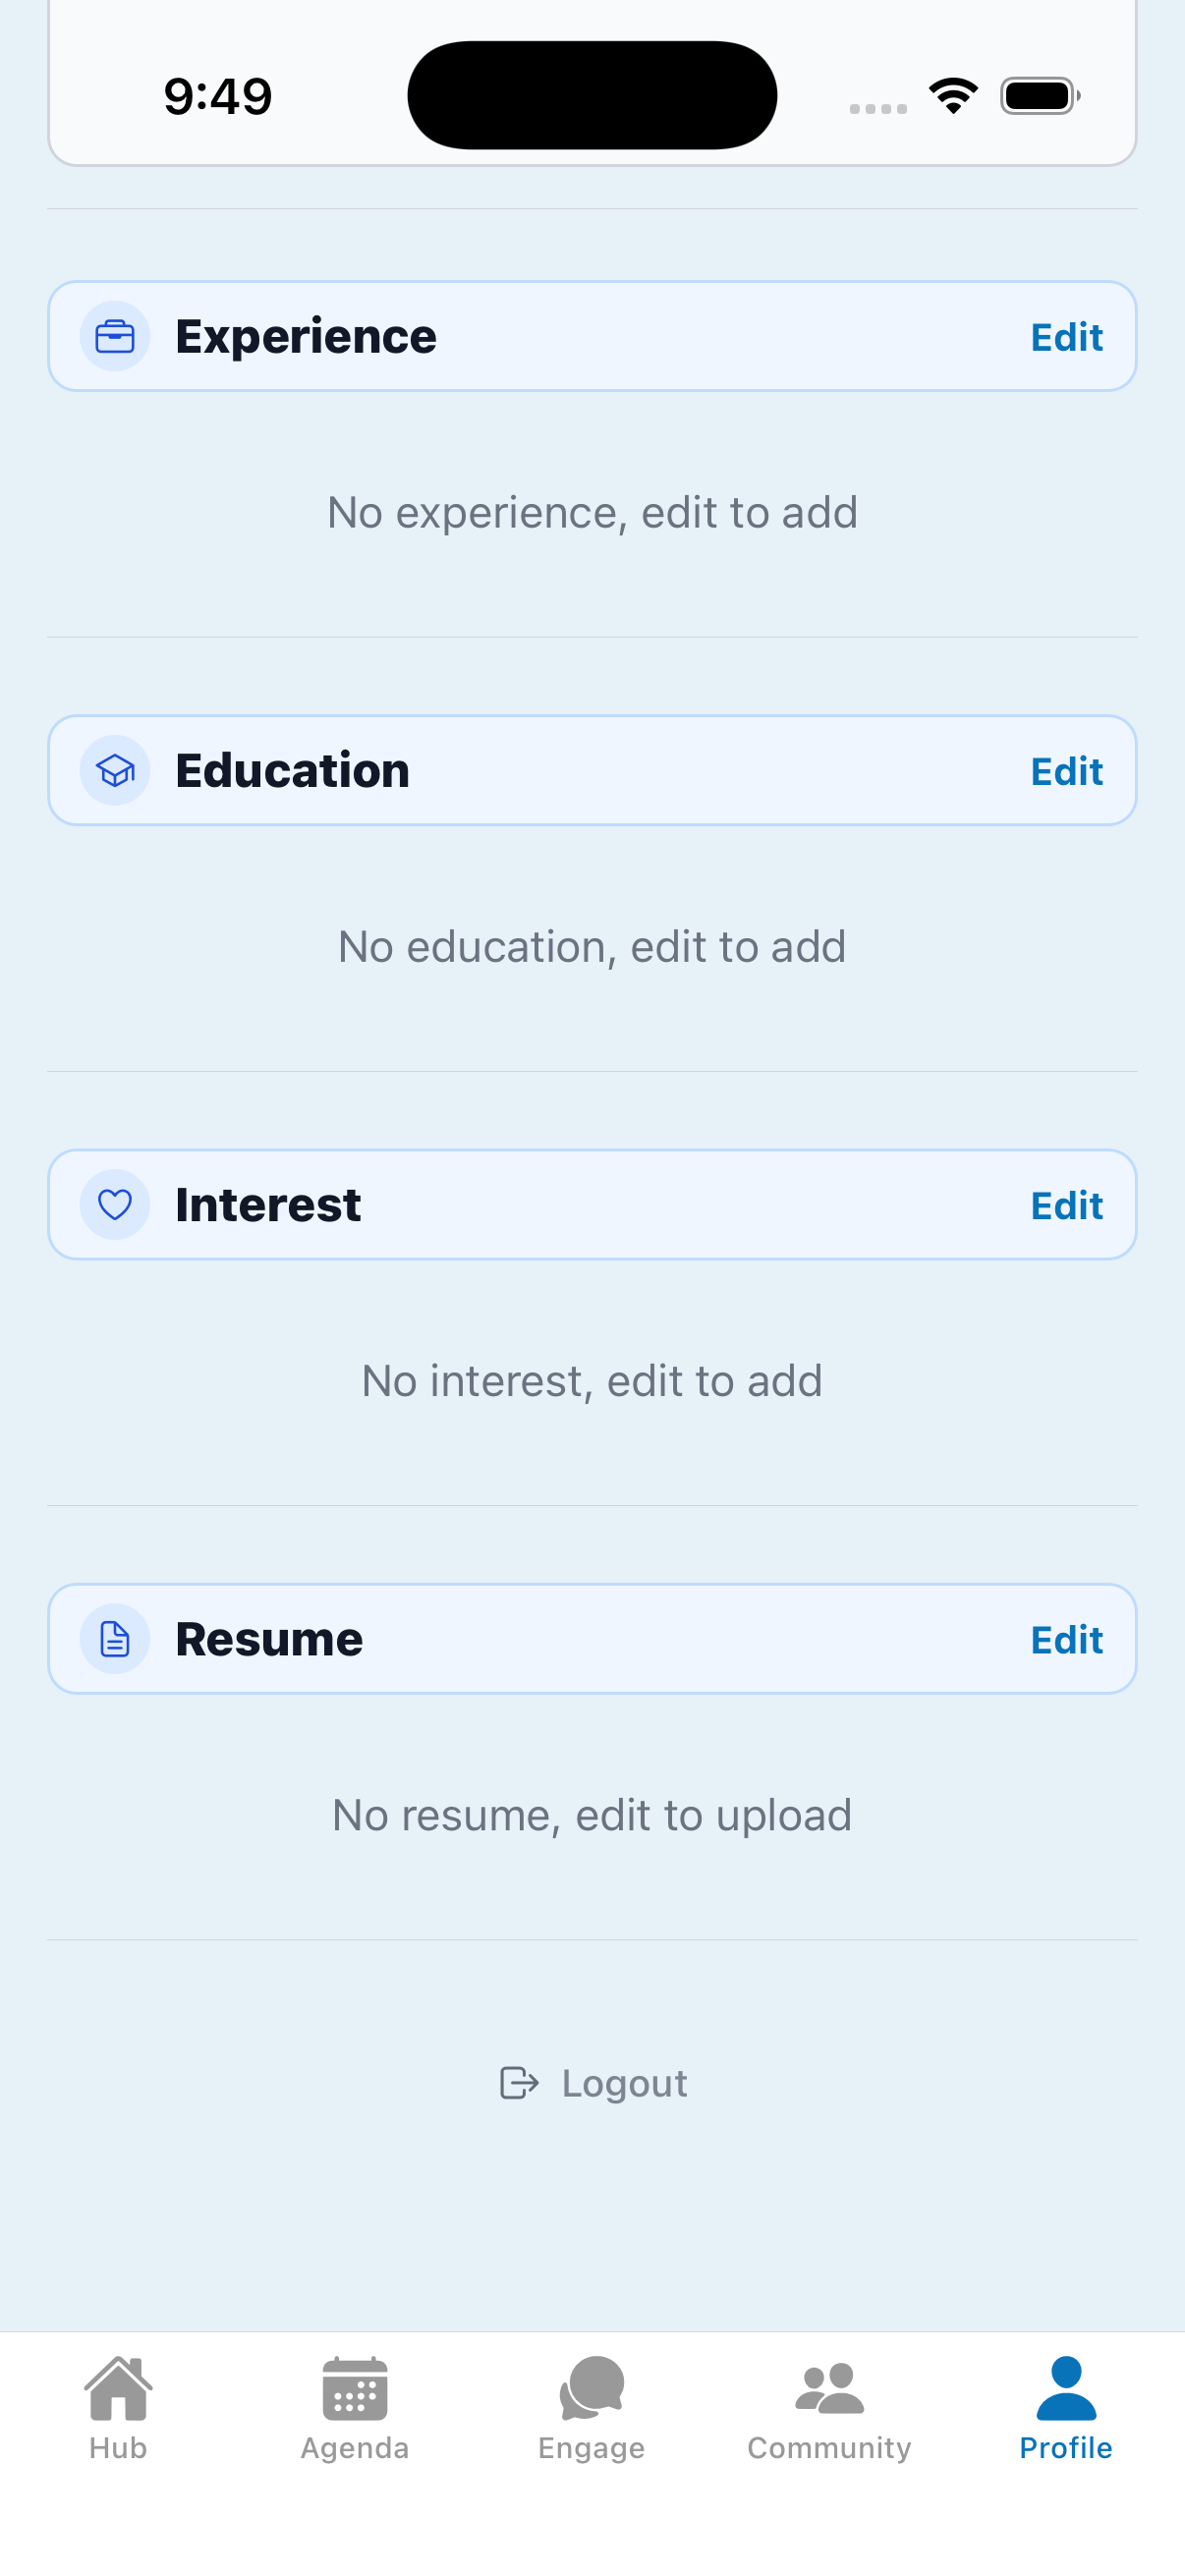
- Go to the Profile tab.
- Scroll to the bottom and tap Logout.
2. Getting Around the App
The app has five main tabs along the bottom of the screen:
| Tab | Icon | What it’s for |
|---|---|---|
| Hub | 🏠 Home | Your personalized home screen: your QR code, countdown, live sessions, quick shortcuts, and passport progress. |
| Agenda | 📅 Calendar | The full event schedule, organized by day. |
| Engage | 💬 Chat bubbles | Announcements, messages, contact requests, and directories. A red badge shows unread activity. |
| Community | 👥 People | The attendee directory — find and connect with other people. |
| Profile | 👤 Person | Your profile, QR code, contacts, notes, favorites, and settings. |
Tip: Tapping a tab you’re already on returns you to the top of that section.
3. The Hub (Home)
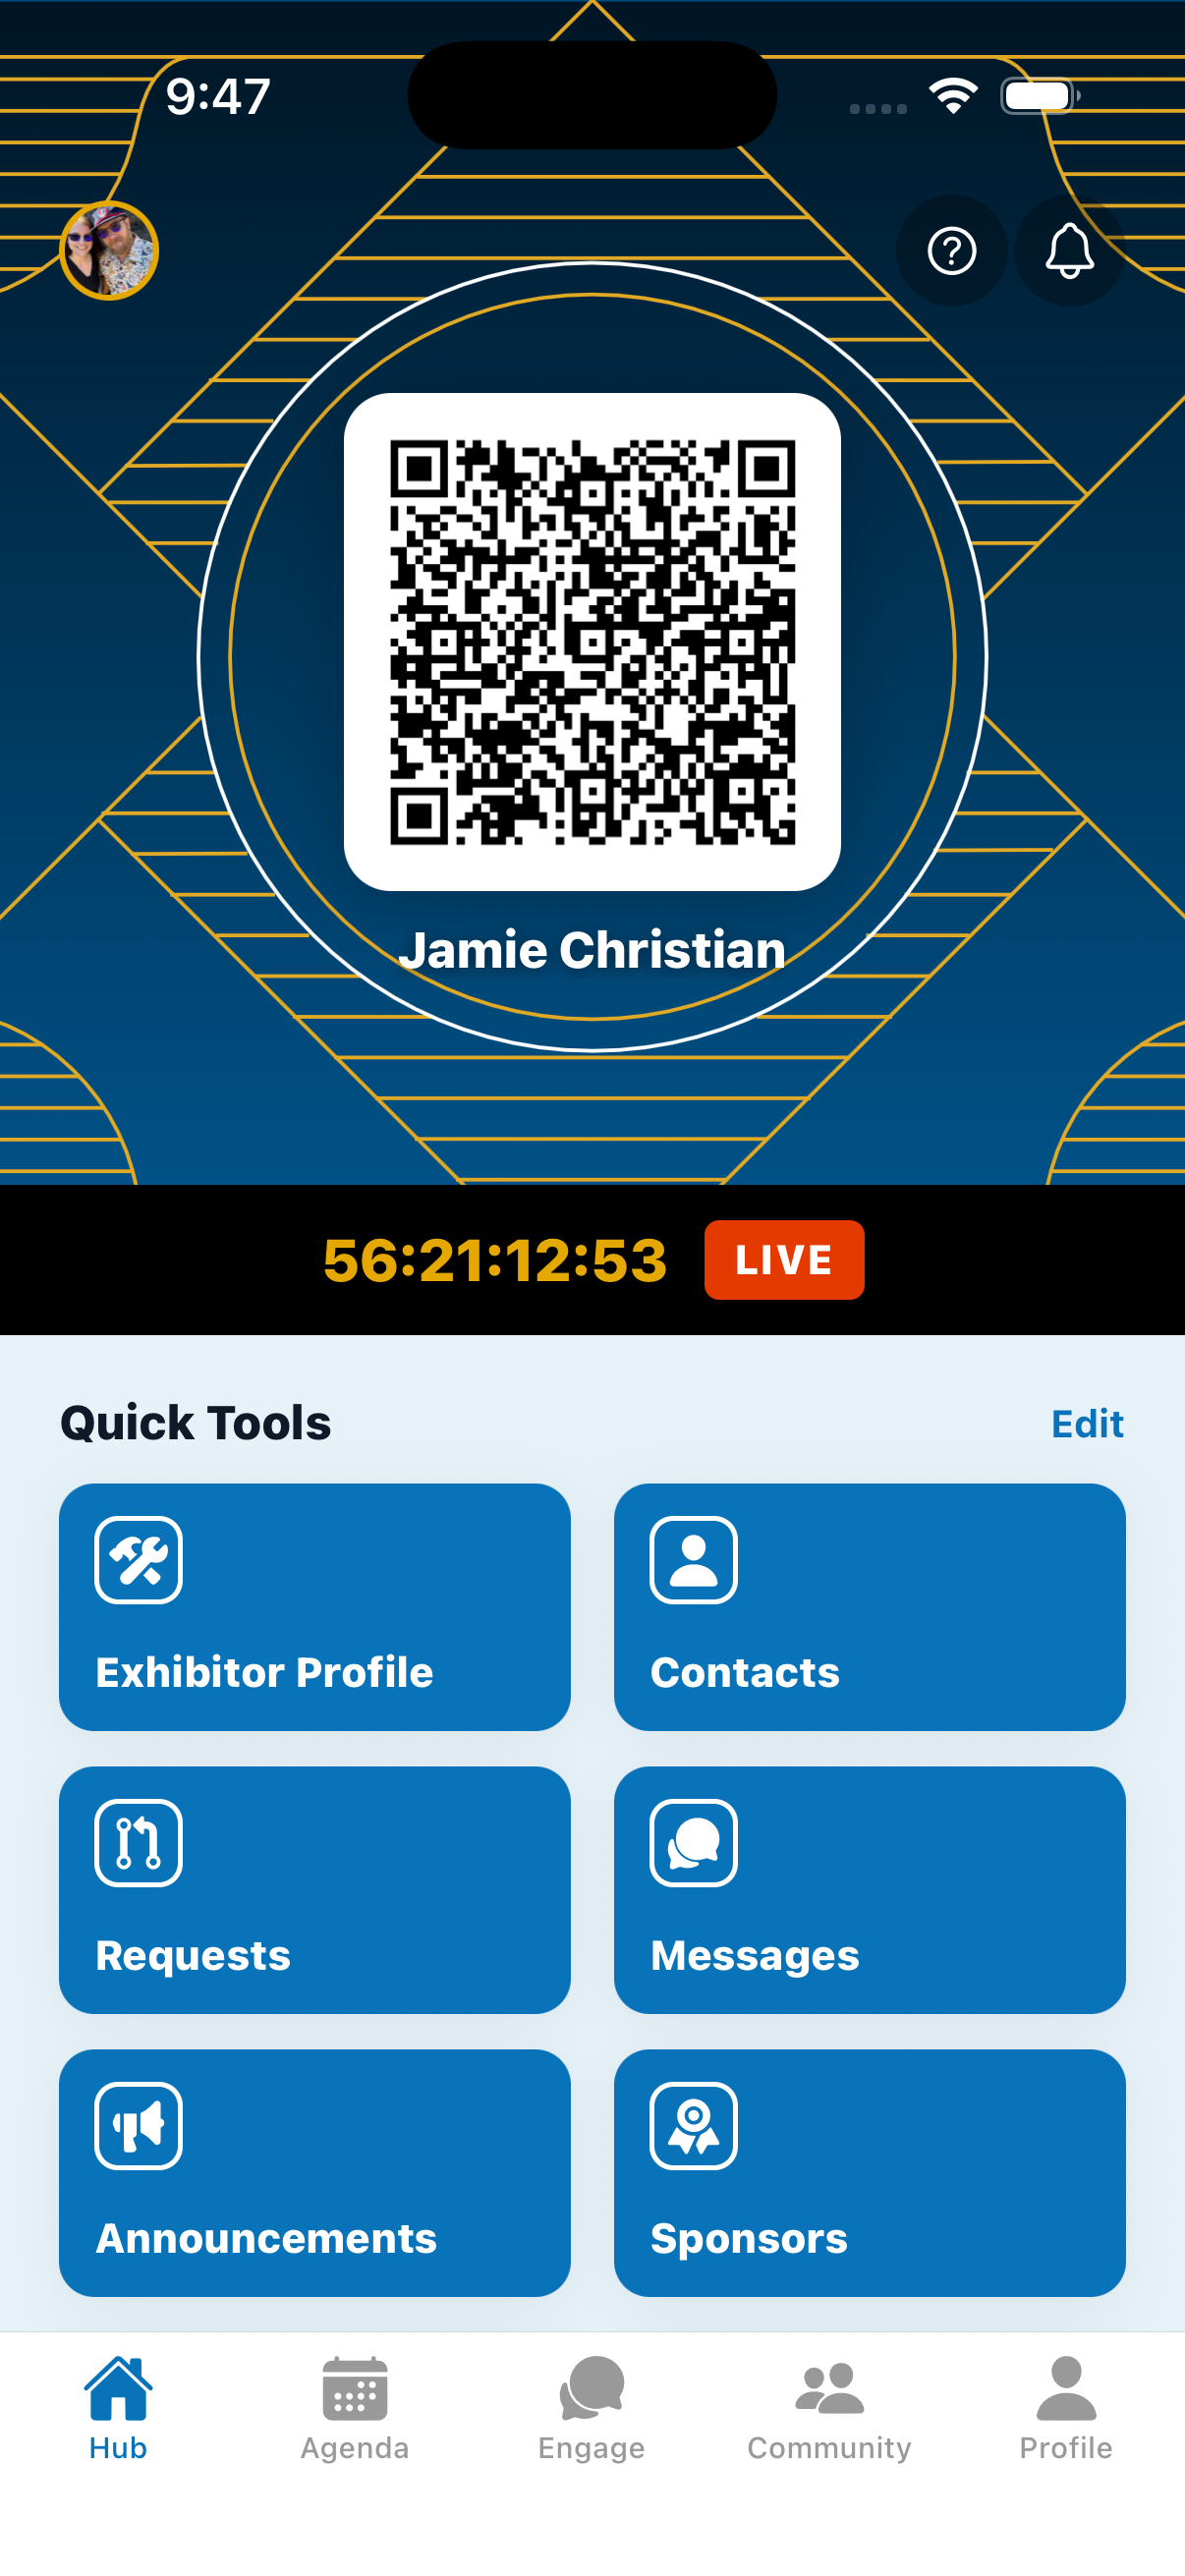
The Hub is your personalized landing screen. Your profile photo (or initials) sits in the top-left, and your name appears under your QR code so others can easily connect with you.
3.1 Your QR Code (Always on the Hub)
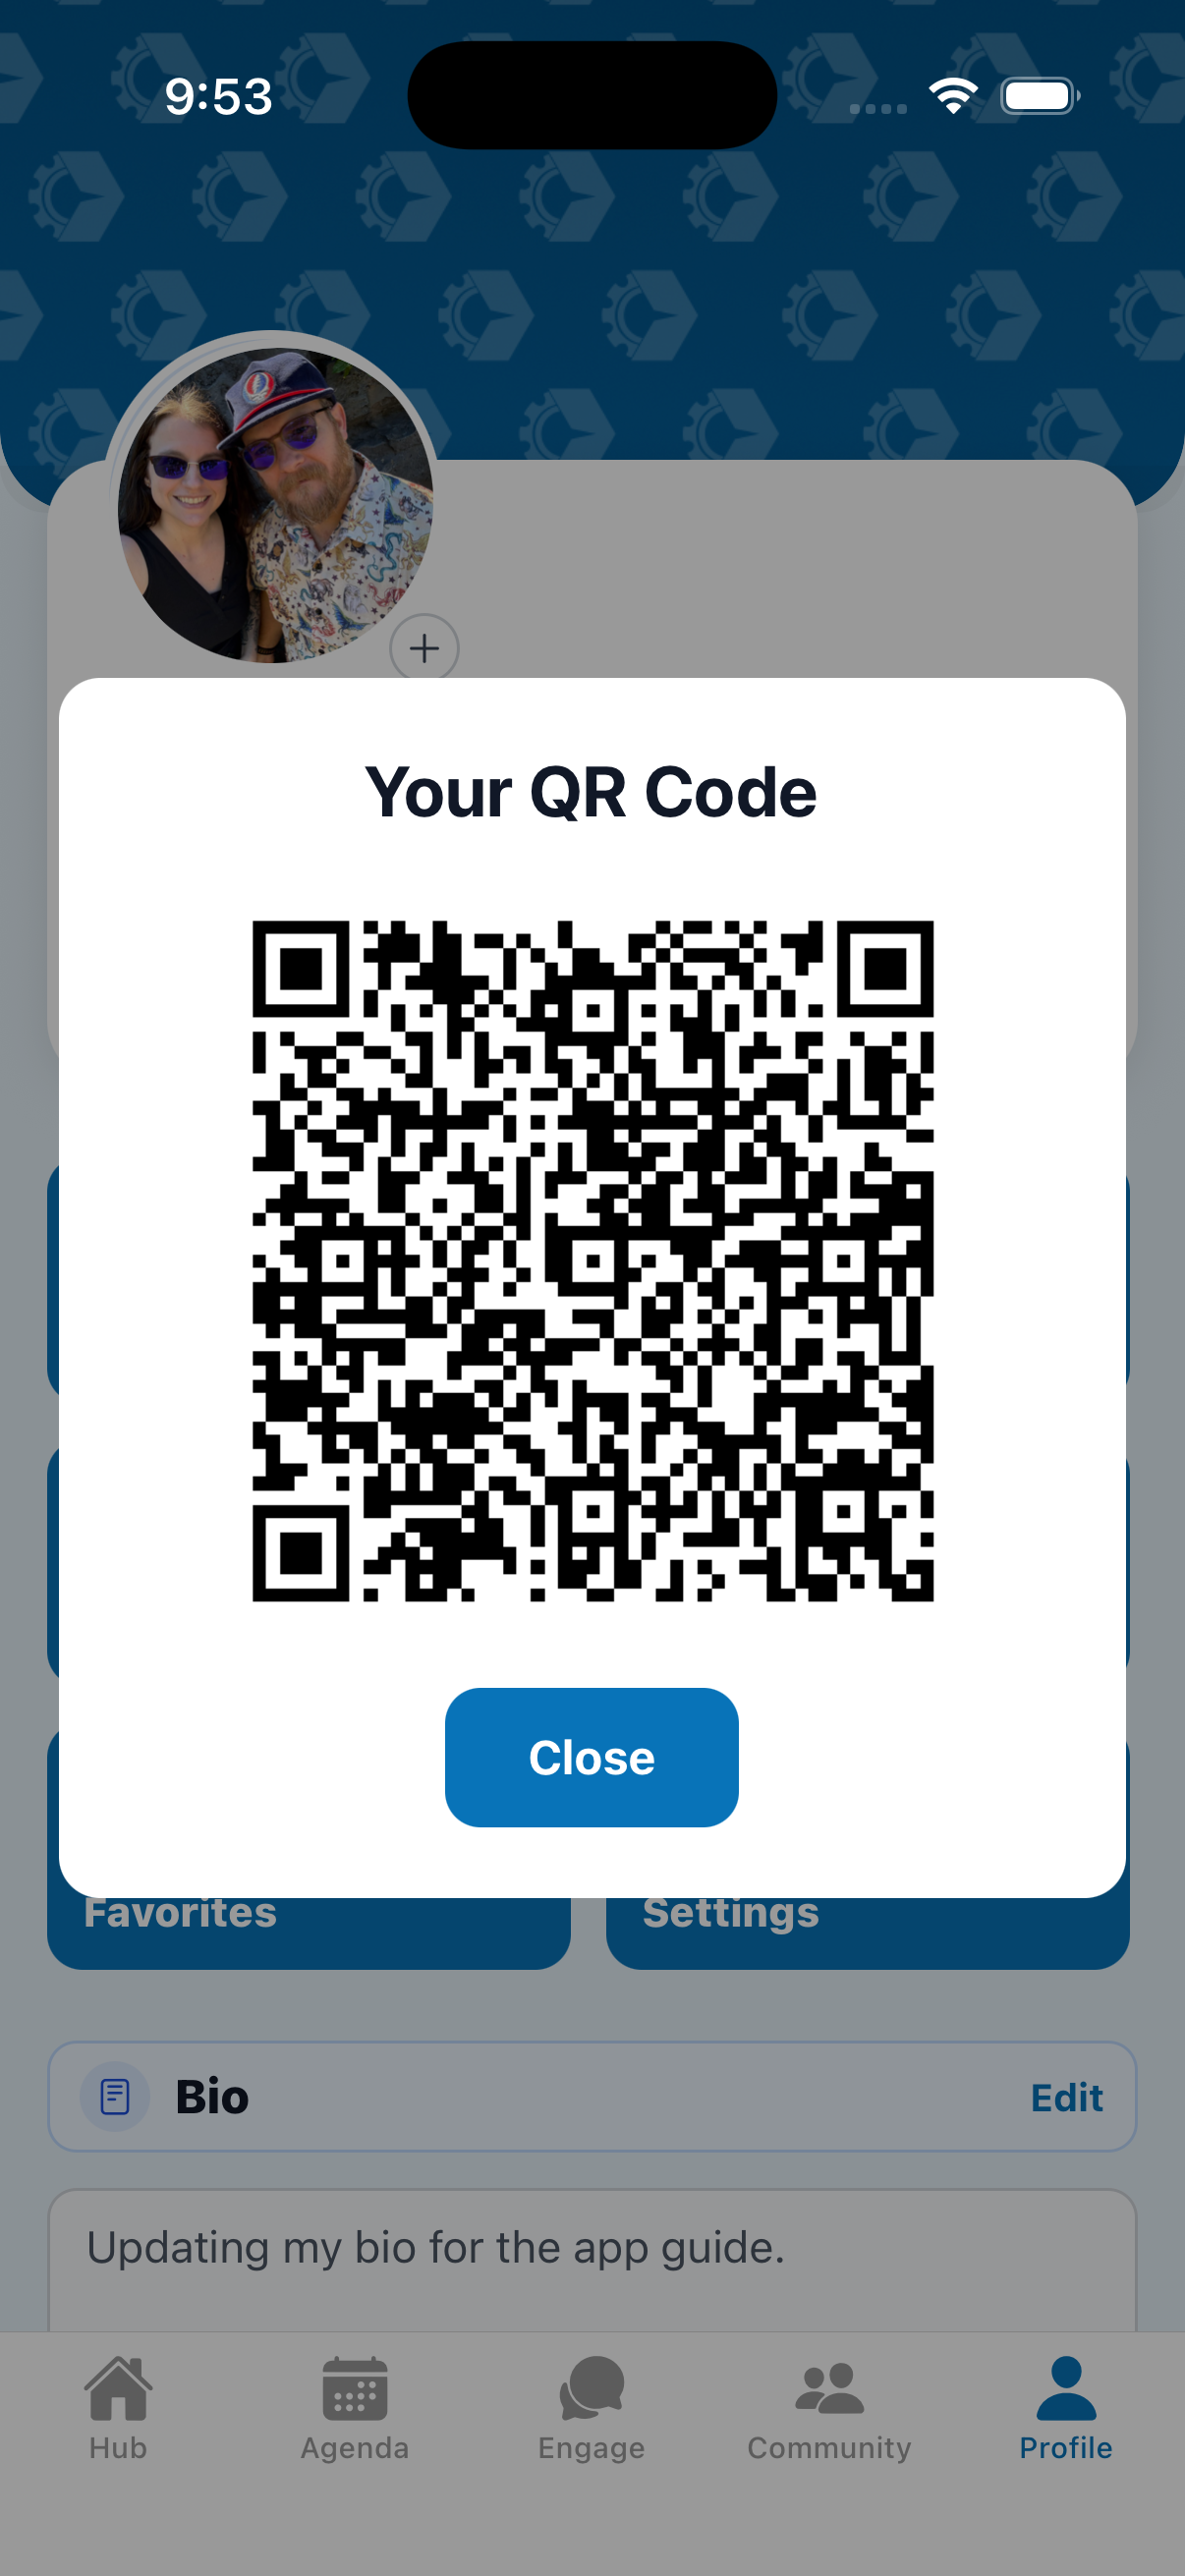
Your personal QR code is a staple at the top of the Hub — always visible so you can share your info and connect with others in person without digging through menus.
- Have someone open Scan Contact (or their camera scanner) and point it at your Hub QR code.
- Your profile opens on their device so they can send a contact request.
- Your name appears directly under the QR code so people know whose code they’re scanning.
Tip: Flip to the Hub anytime you want to share your info — your QR code is right there at the top.
3.2 Countdown & Live Sessions
- A countdown timer ticks down to the event in Greenville (Sept 30 – Oct 2, 2026).
- When sessions are happening, a LIVE badge appears next to the timer; otherwise you’ll see “Coming Up” with the next session.
- Tap a session card to open its details. If a session is live and has a stream, a View Presentation button appears.
3.3 Quick Tools (Customize Your Shortcuts)
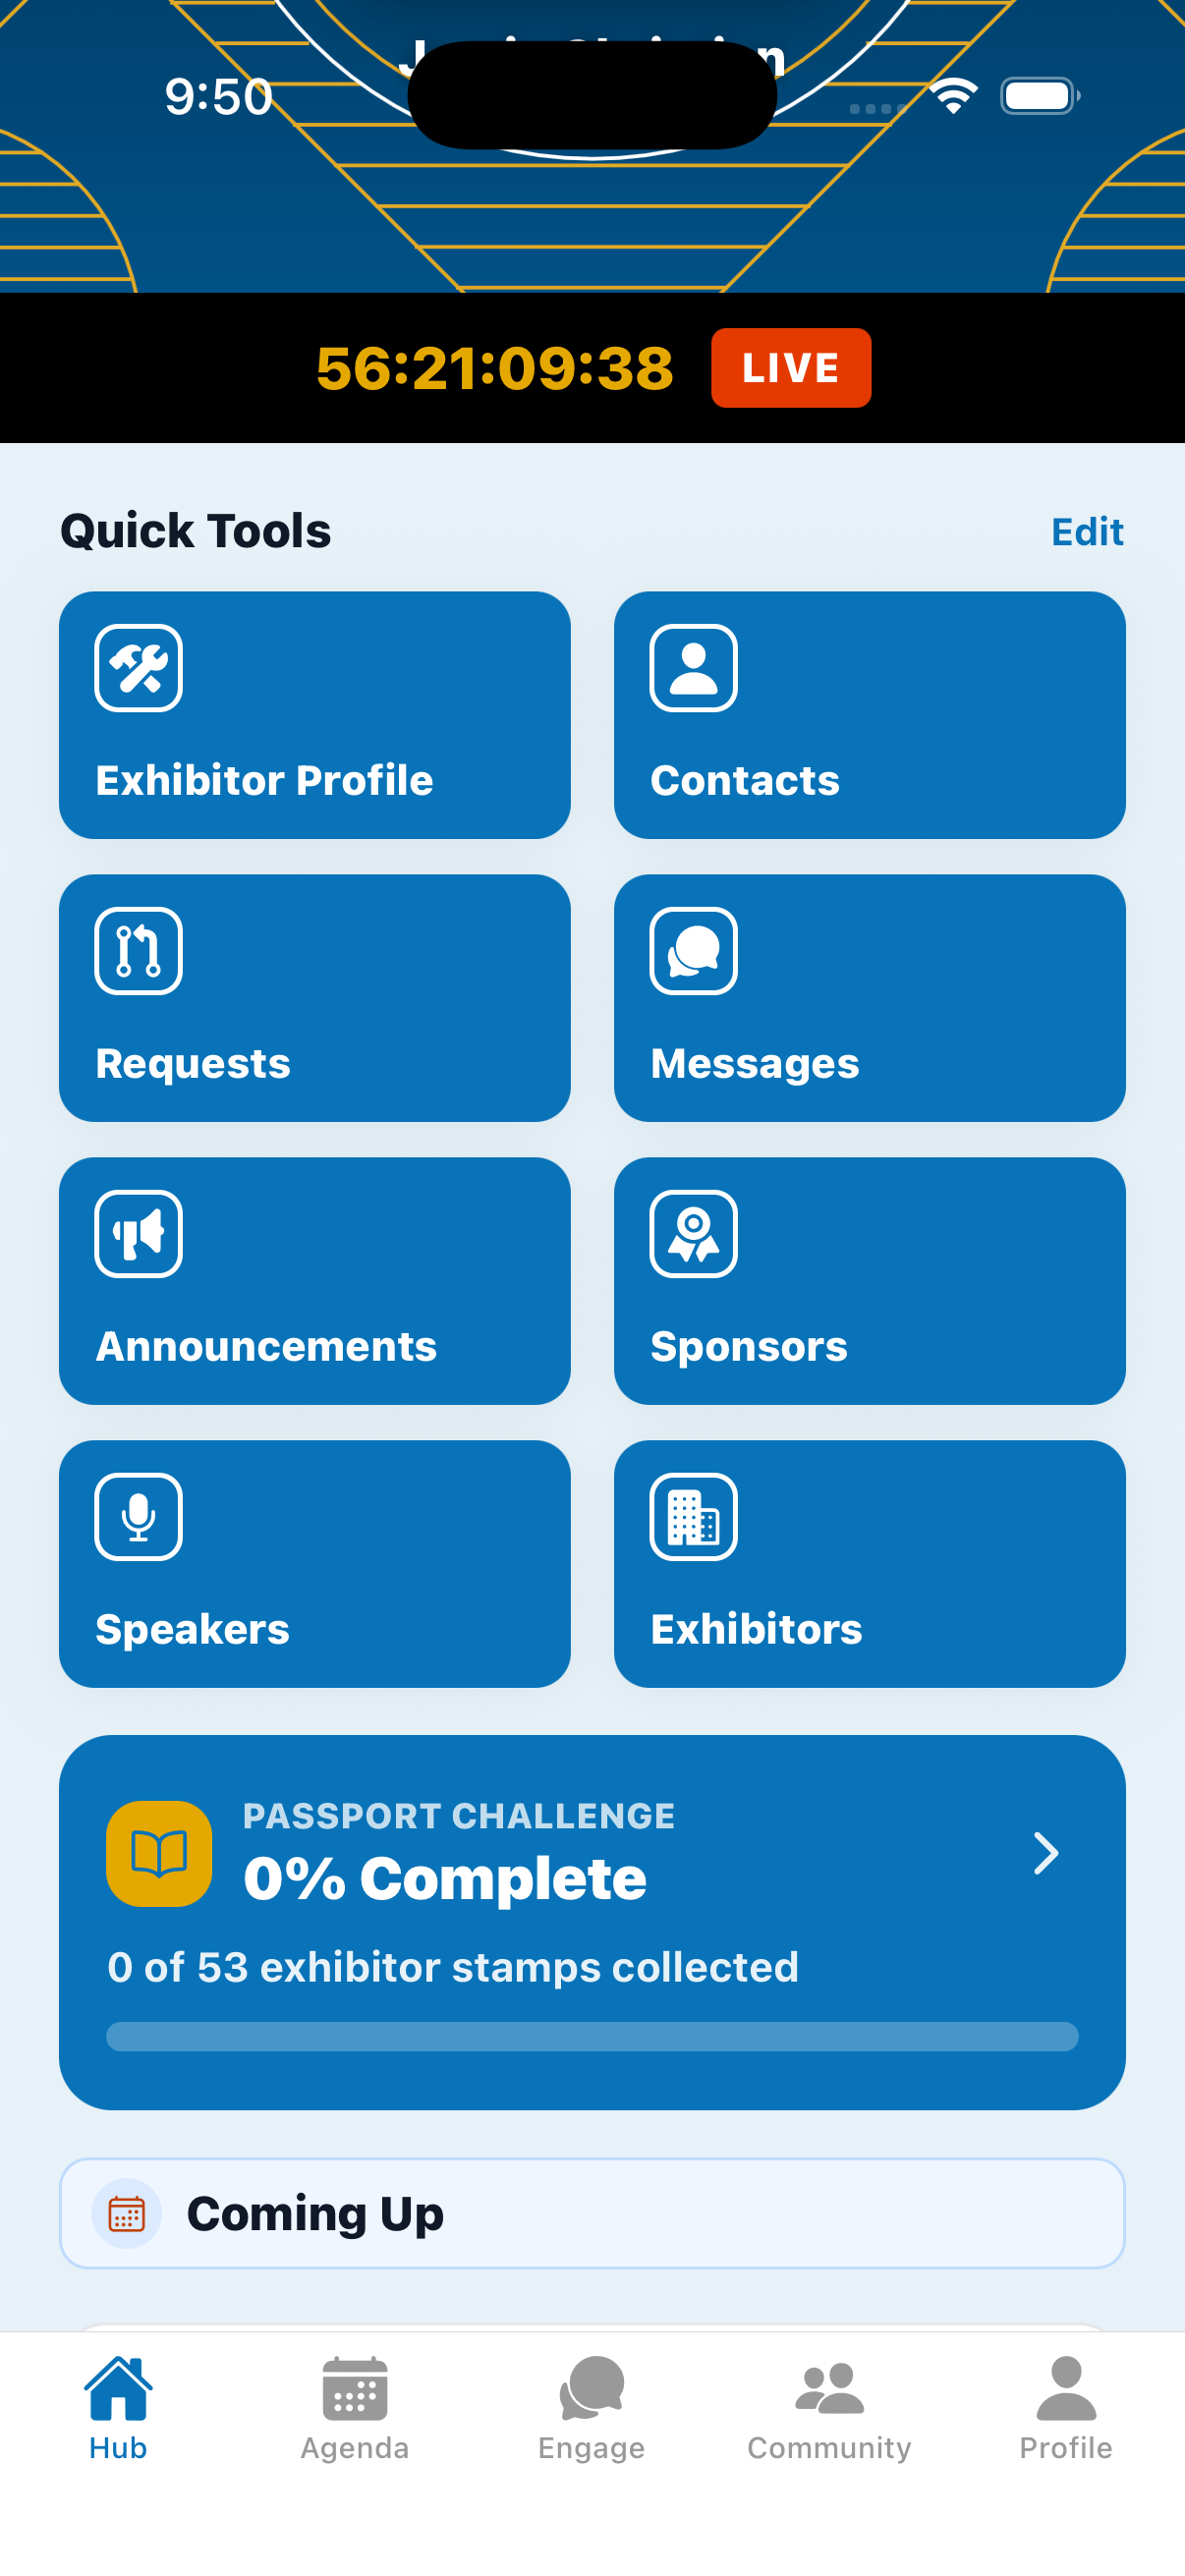
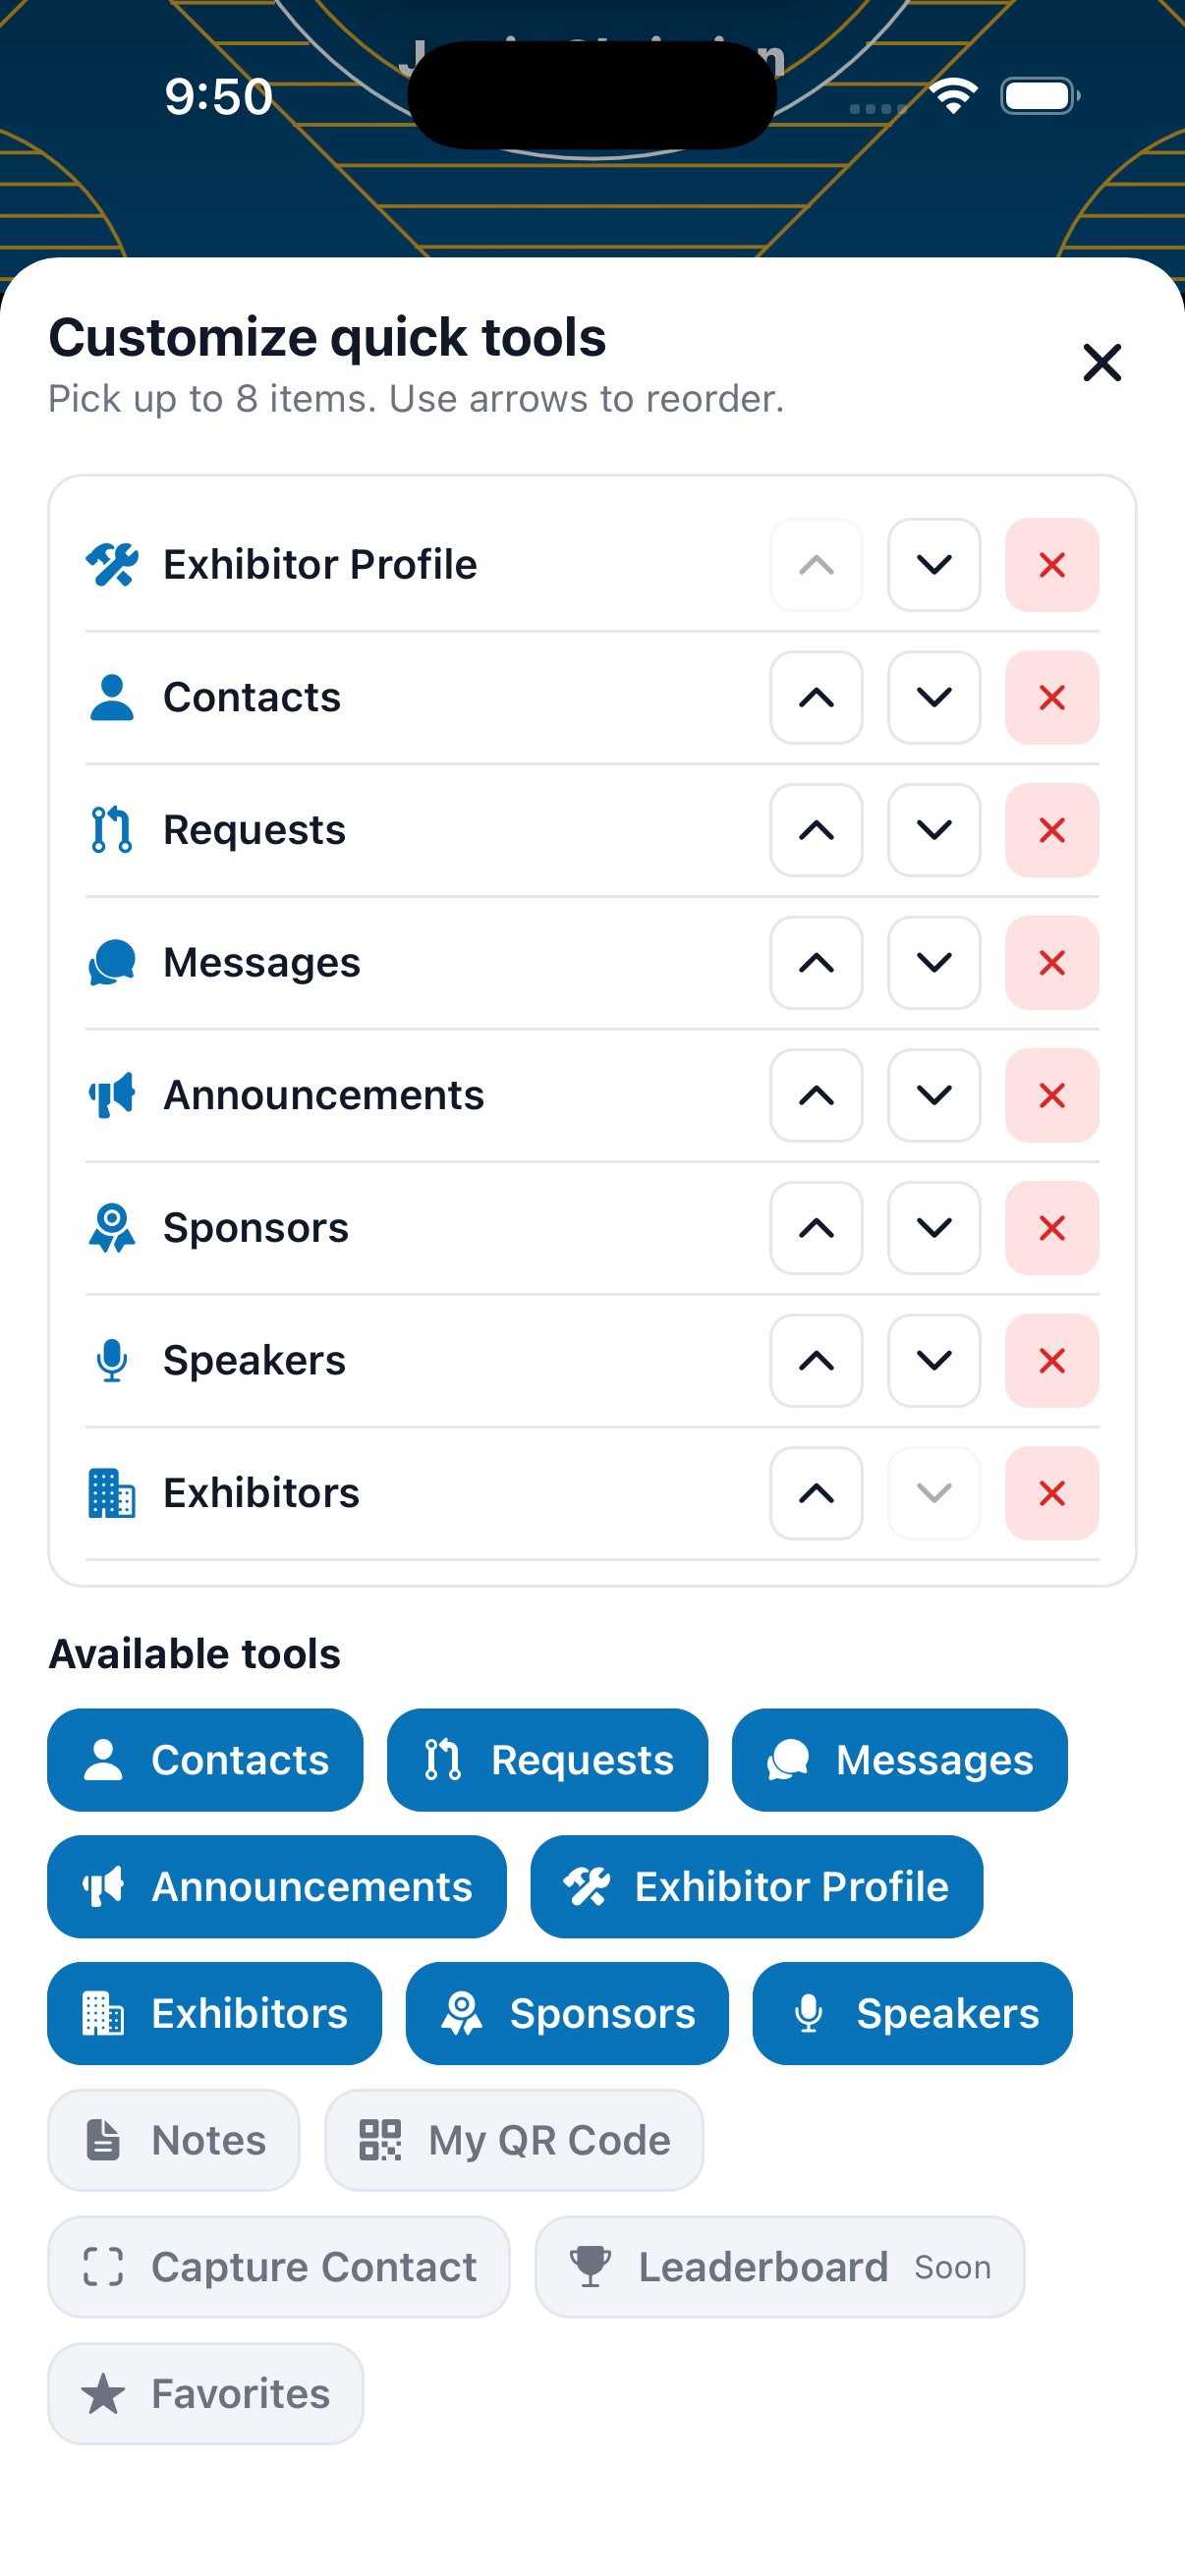
The Quick Tools grid gives one-tap access to your most-used features. You can pin up to 8 and arrange them in any order.
- In the Quick Tools section, tap Edit.
- Add or remove tools by tapping them in the Available tools list.
- Use the up/down arrows to reorder your pinned tools.
- Tap Reset to return to the default set.
- Close the panel — your choices save automatically.
Available shortcuts include: Contacts, Notes, Requests, Messages, Announcements, Favorites, Exhibitors, Sponsors, Speakers, and (for booth staff) Exhibitor Profile and Capture Contact.
3.4 Passport Challenge Card
A blue Passport Challenge card shows your completion percentage and how many exhibitor stamps you’ve collected. Tap it to open the full Passport.
3.5 Help, Feedback & Notifications
The top-right of the Hub has two icons you’ll use often:
- Help (?) — opens a menu with two options:
- App Guide — opens this how-to page with instructions for every attendee feature.
- Feedback — send comments, bug reports, or ideas straight to the organizers from inside the app.
- Bell — open your Notifications. A red badge shows how many items are unread.
Sending Feedback
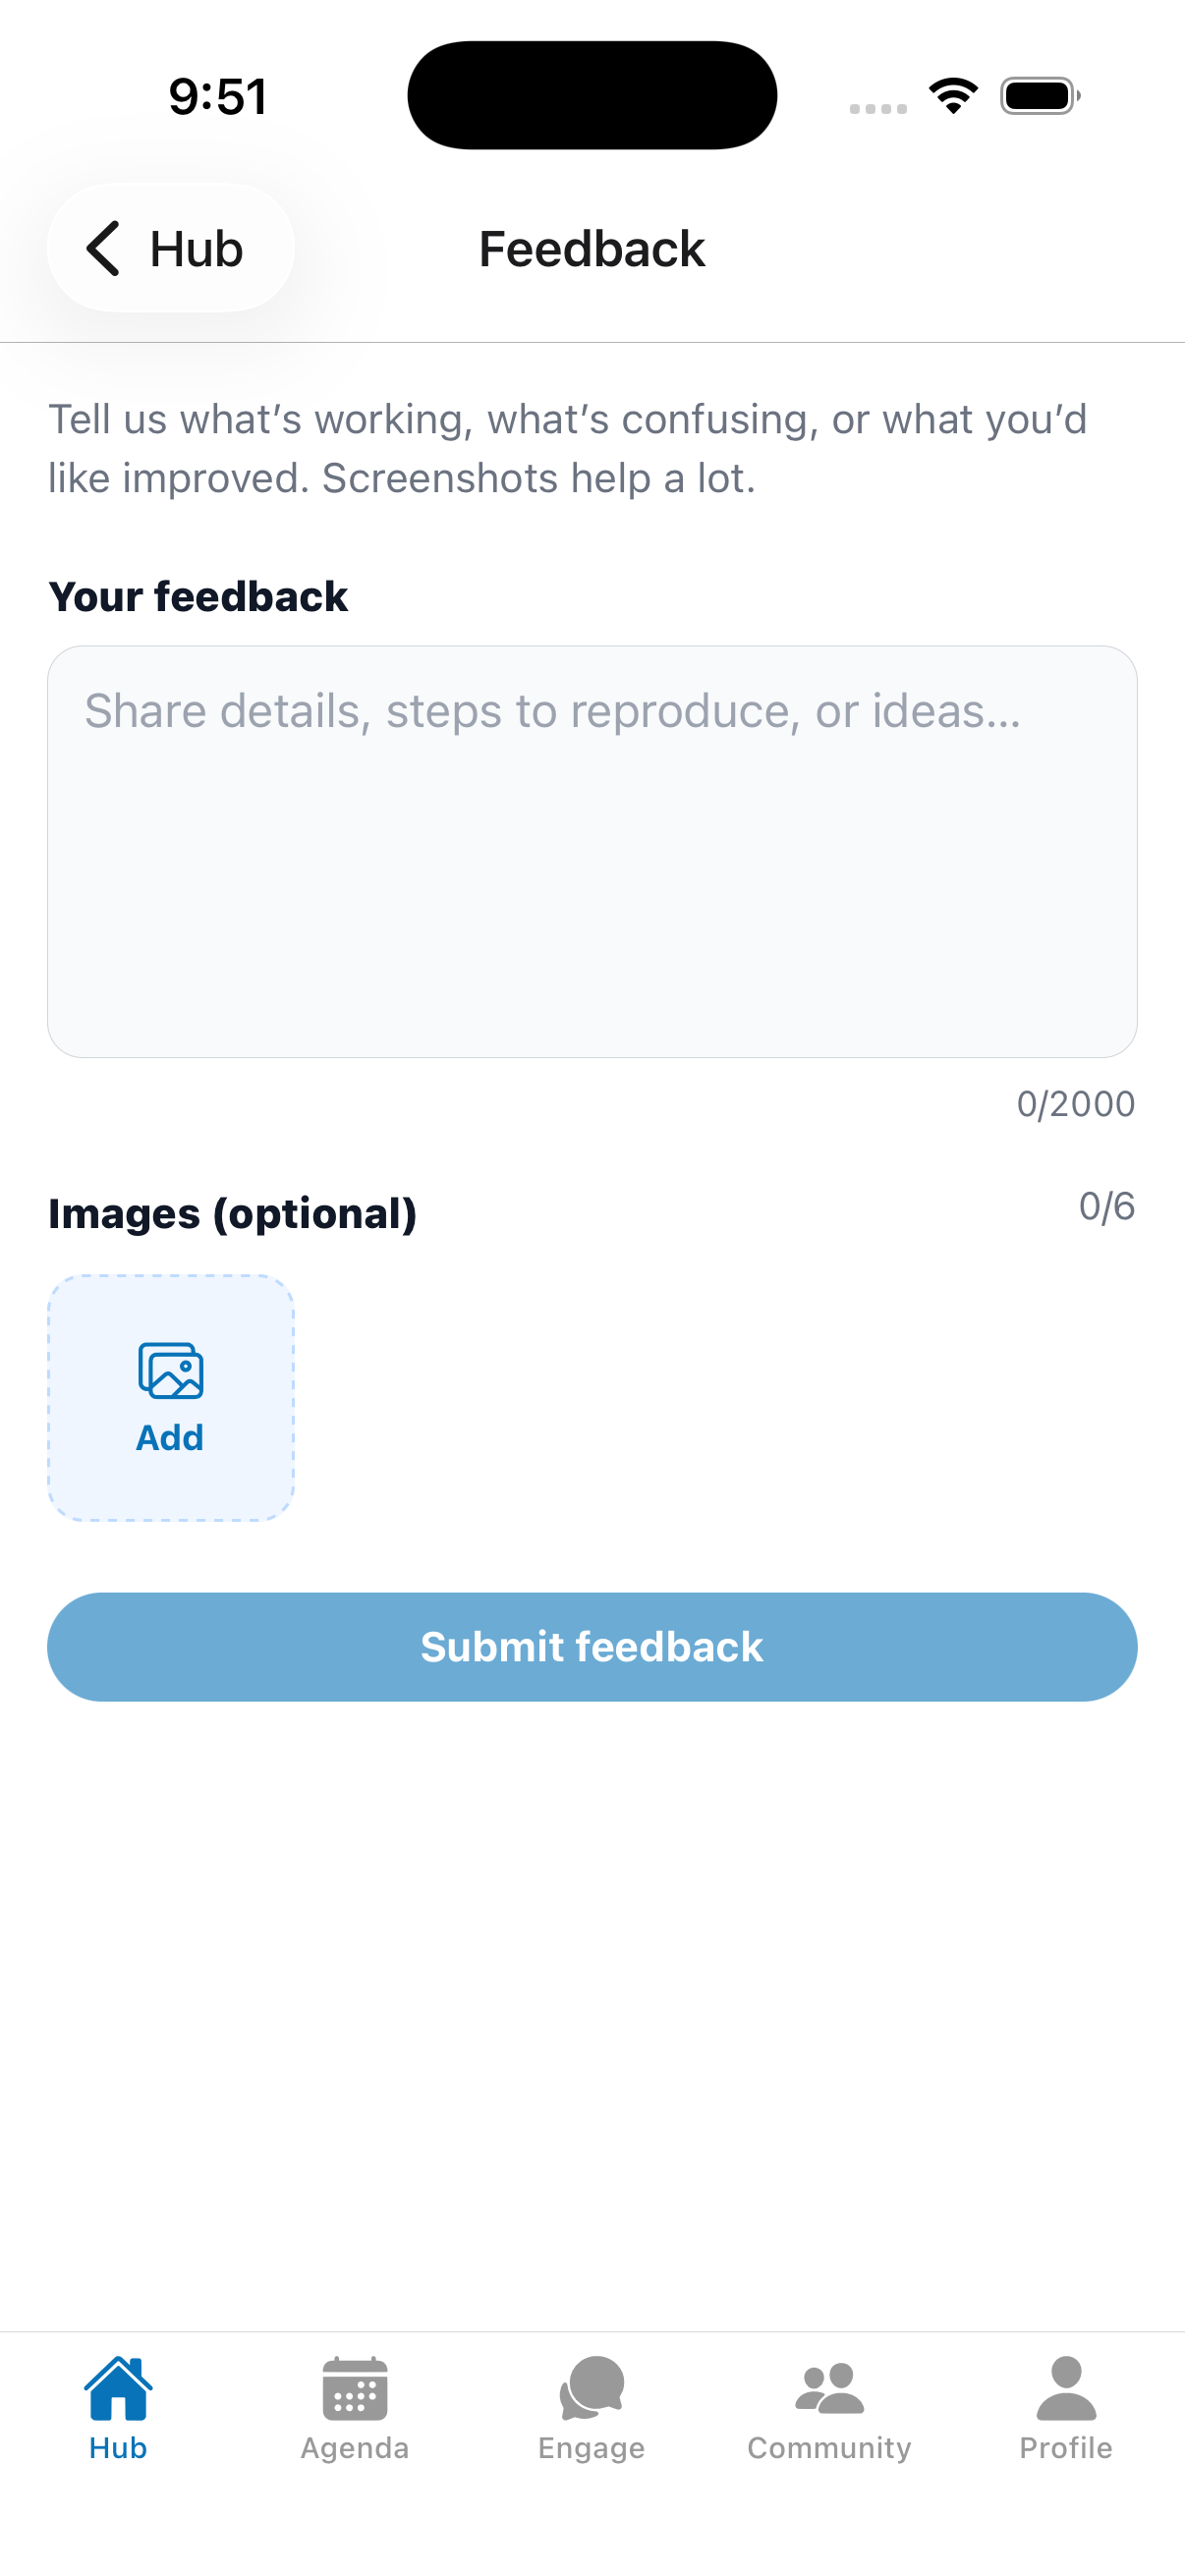
From the Help menu, tap Feedback to open the feedback form.
- Type your message in Your feedback (up to 2,000 characters) — what’s working, what’s confusing, or what you’d like improved.
- Optionally attach up to 6 images (screenshots help a lot) via the Add button.
- Tap Submit feedback.
4. Your Profile
4.1 Viewing Your Profile
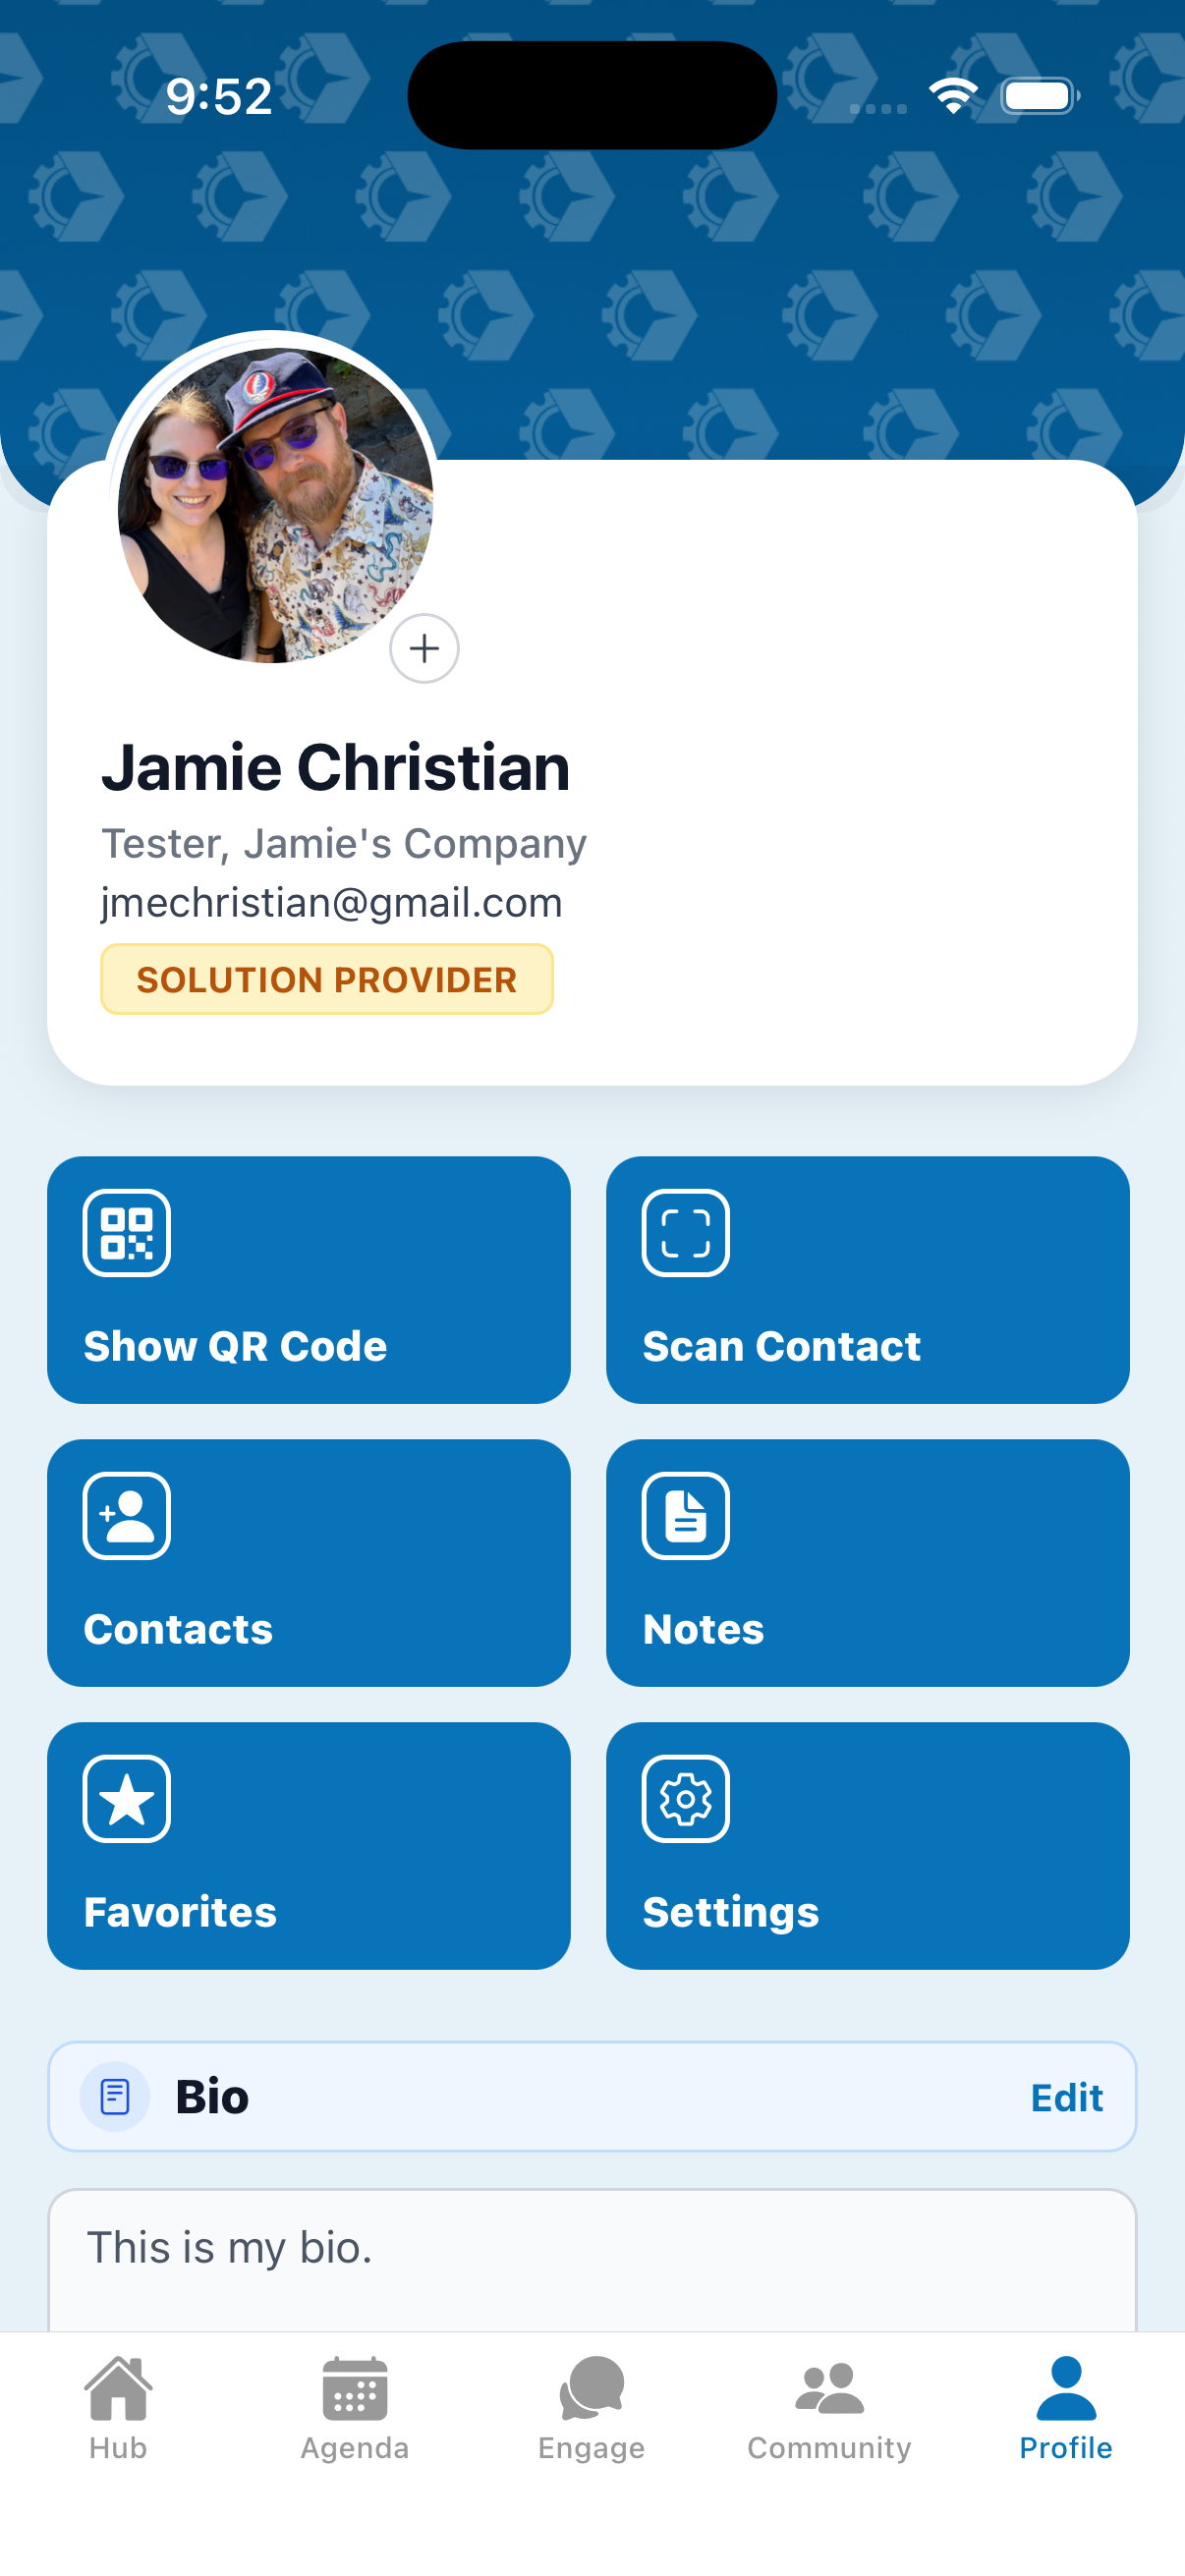
Open the Profile tab to see your photo, name, title, company, email, and attendee type, followed by your Bio, Experience, Education, Interests, and Resume.
The profile screen also has quick action tiles: Show QR Code, Scan Contact, Contacts, Notes, Favorites, and Settings.
4.2 Editing Your Profile
You can update your details directly on the Profile screen and in the Edit view.
Profile photo
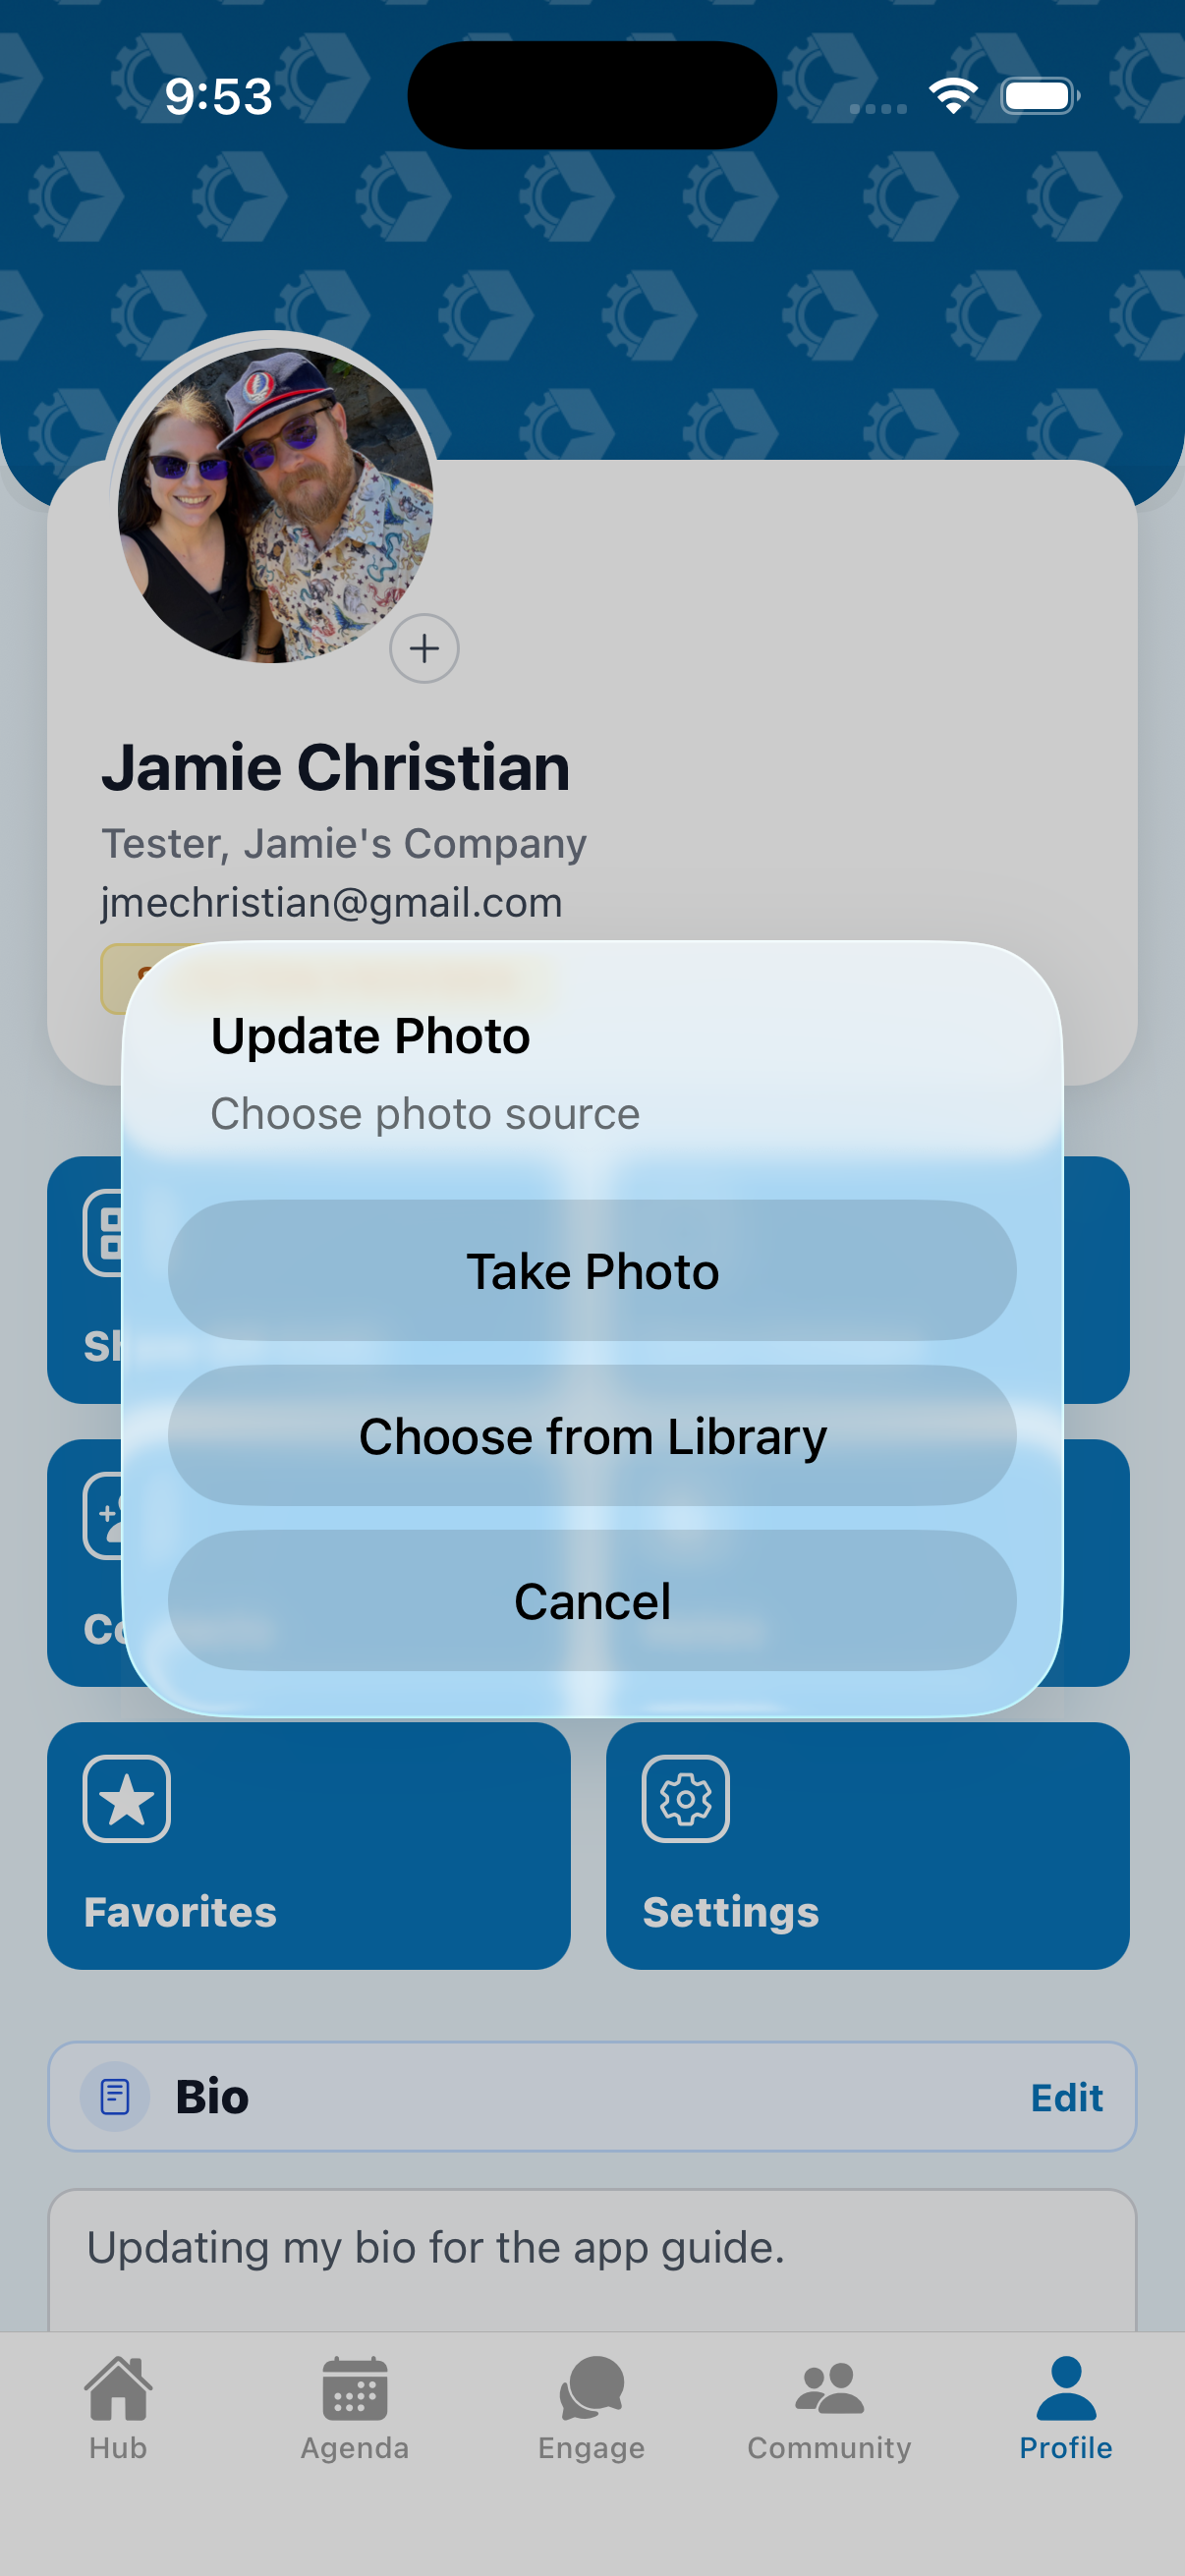
- Tap the + badge on your photo.
- Choose Take Photo or Choose from Library.
- The photo uploads and saves automatically.
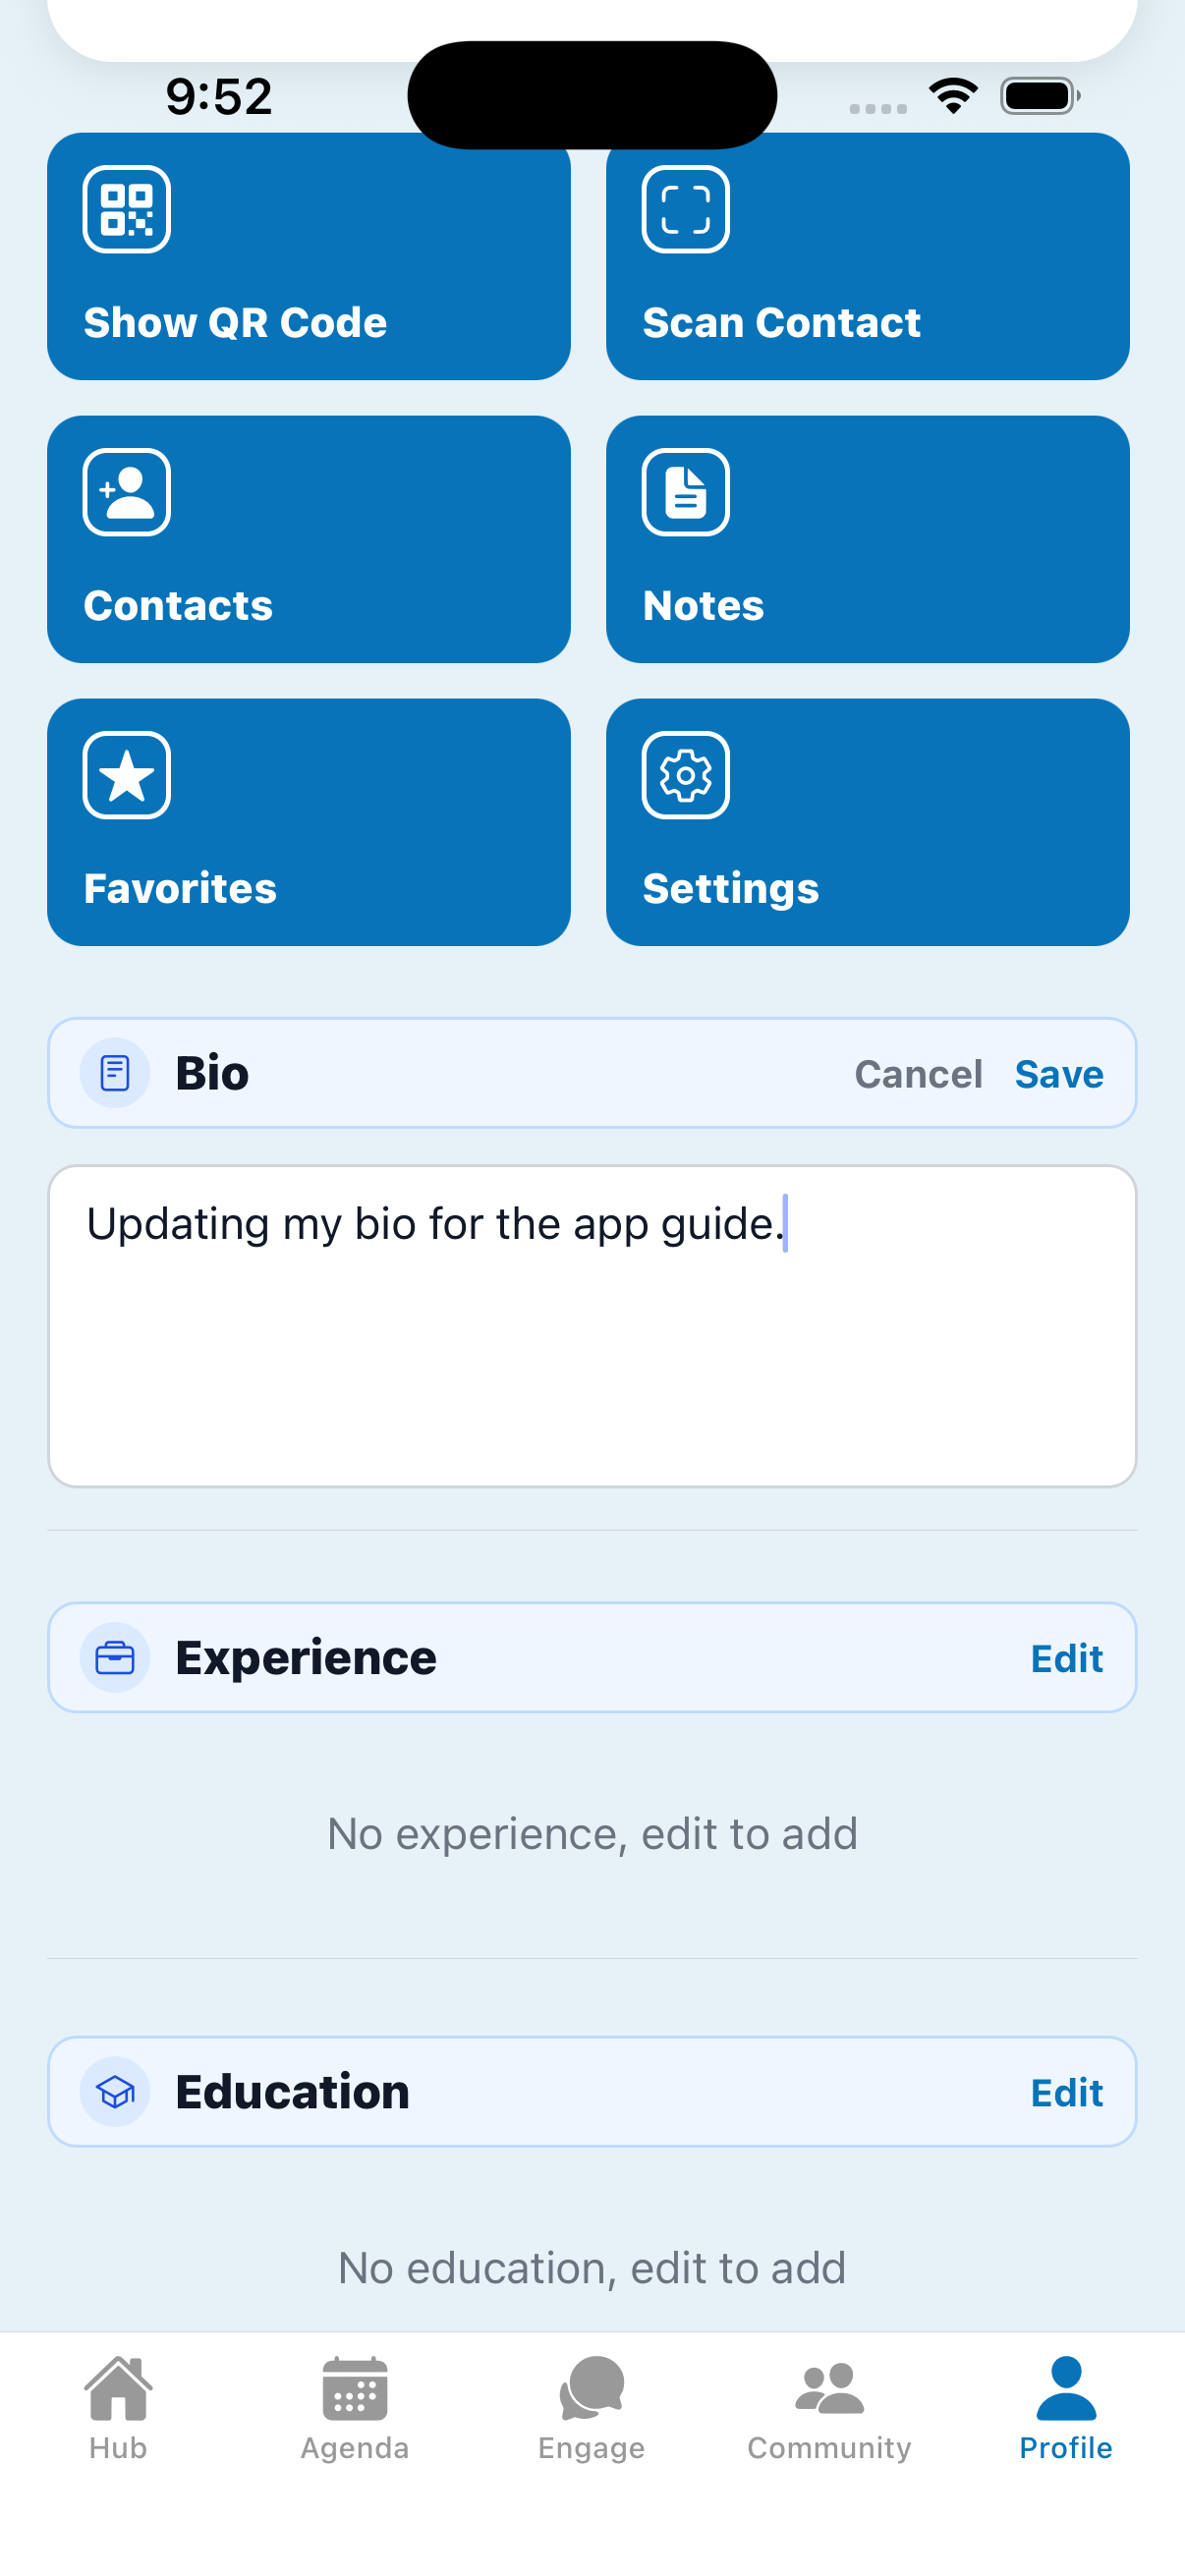
Bio — Tap Edit next to Bio, type your bio, then tap Save.
Experience, Education, and Interests — Each section has its own add/edit controls to build out your background.
Resume — Tap Edit in the Resume section and choose a PDF (max 10MB). Once uploaded, tap View uploaded resume to open it.
4.3 Your QR Code
Your personal QR code lets other attendees scan you to open your profile and connect. The easiest place to find it is right at the top of the Hub, where it’s always on display with your name underneath.
- Open the Hub tab — your QR code is the staple at the top, or
- From Profile, tap Show QR Code.
Have others point their camera at it (via Scan Contact) to view your profile.
4.4 Settings: Notifications
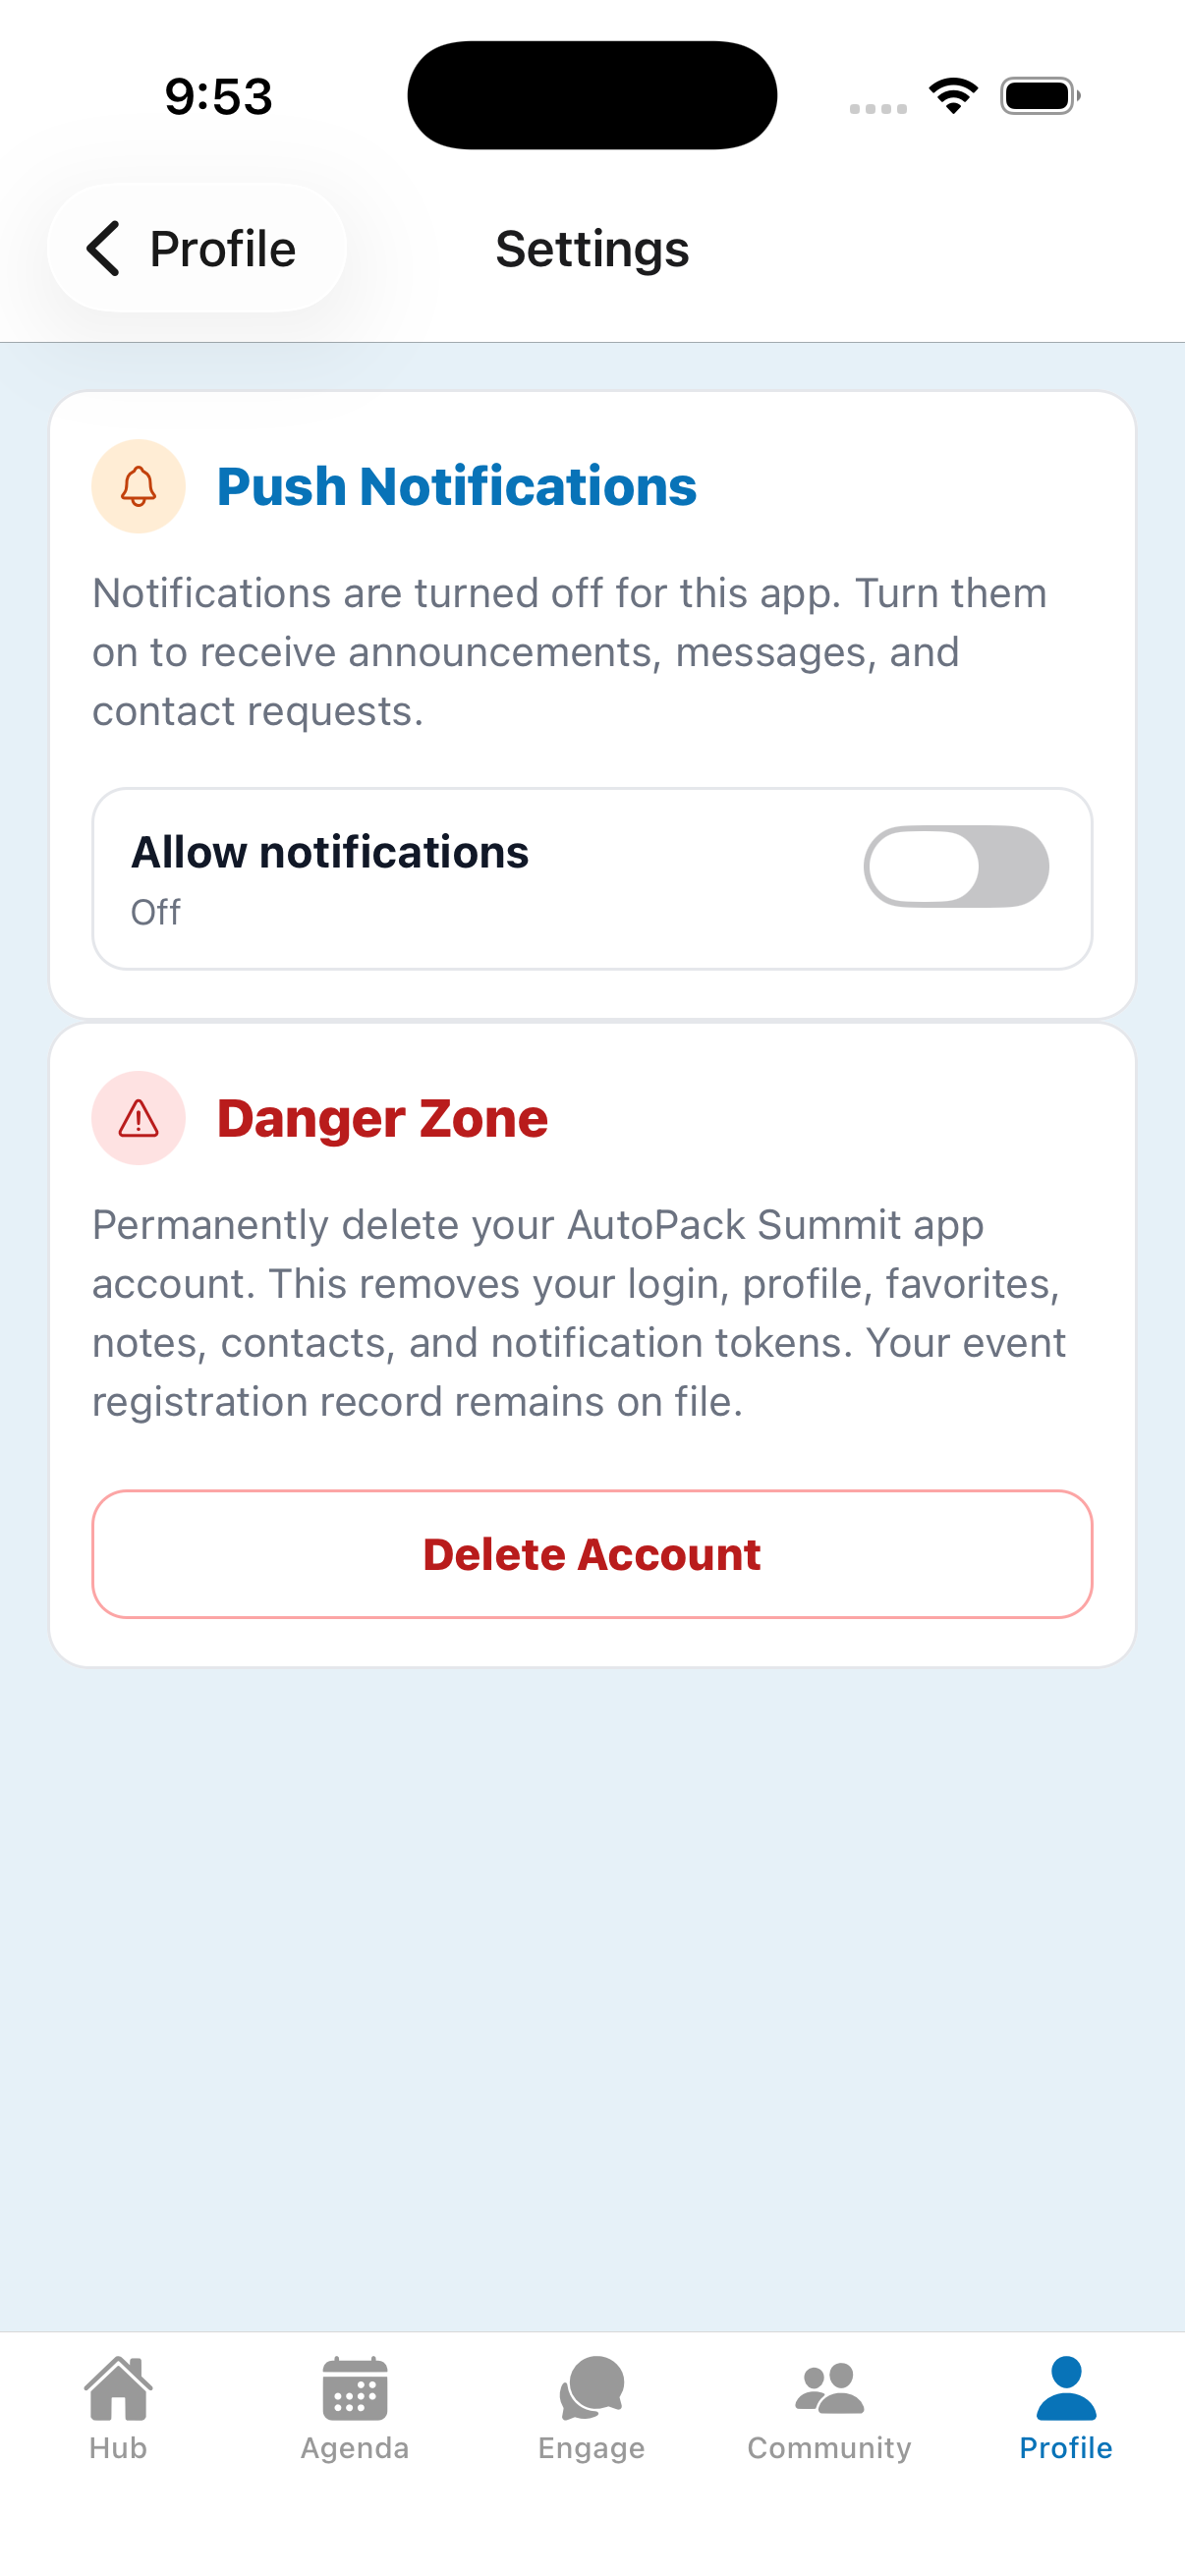
From Profile → Settings, control push notifications.
- Toggle Allow notifications on or off.
- Notifications include announcements, messages, and contact requests.
- If notifications were previously denied, the app shows an Open Settings button that takes you to your device settings to re-enable them.
4.5 Settings: Delete Account
At the bottom of Settings is a Danger Zone.
- Tapping Delete Account permanently removes your login, app profile, favorites, notes, contacts, and notification tokens. (Your event registration record is kept on file.)
- You’ll be asked to confirm twice because this cannot be undone.
5. Agenda & Sessions
5.1 Browsing the Agenda
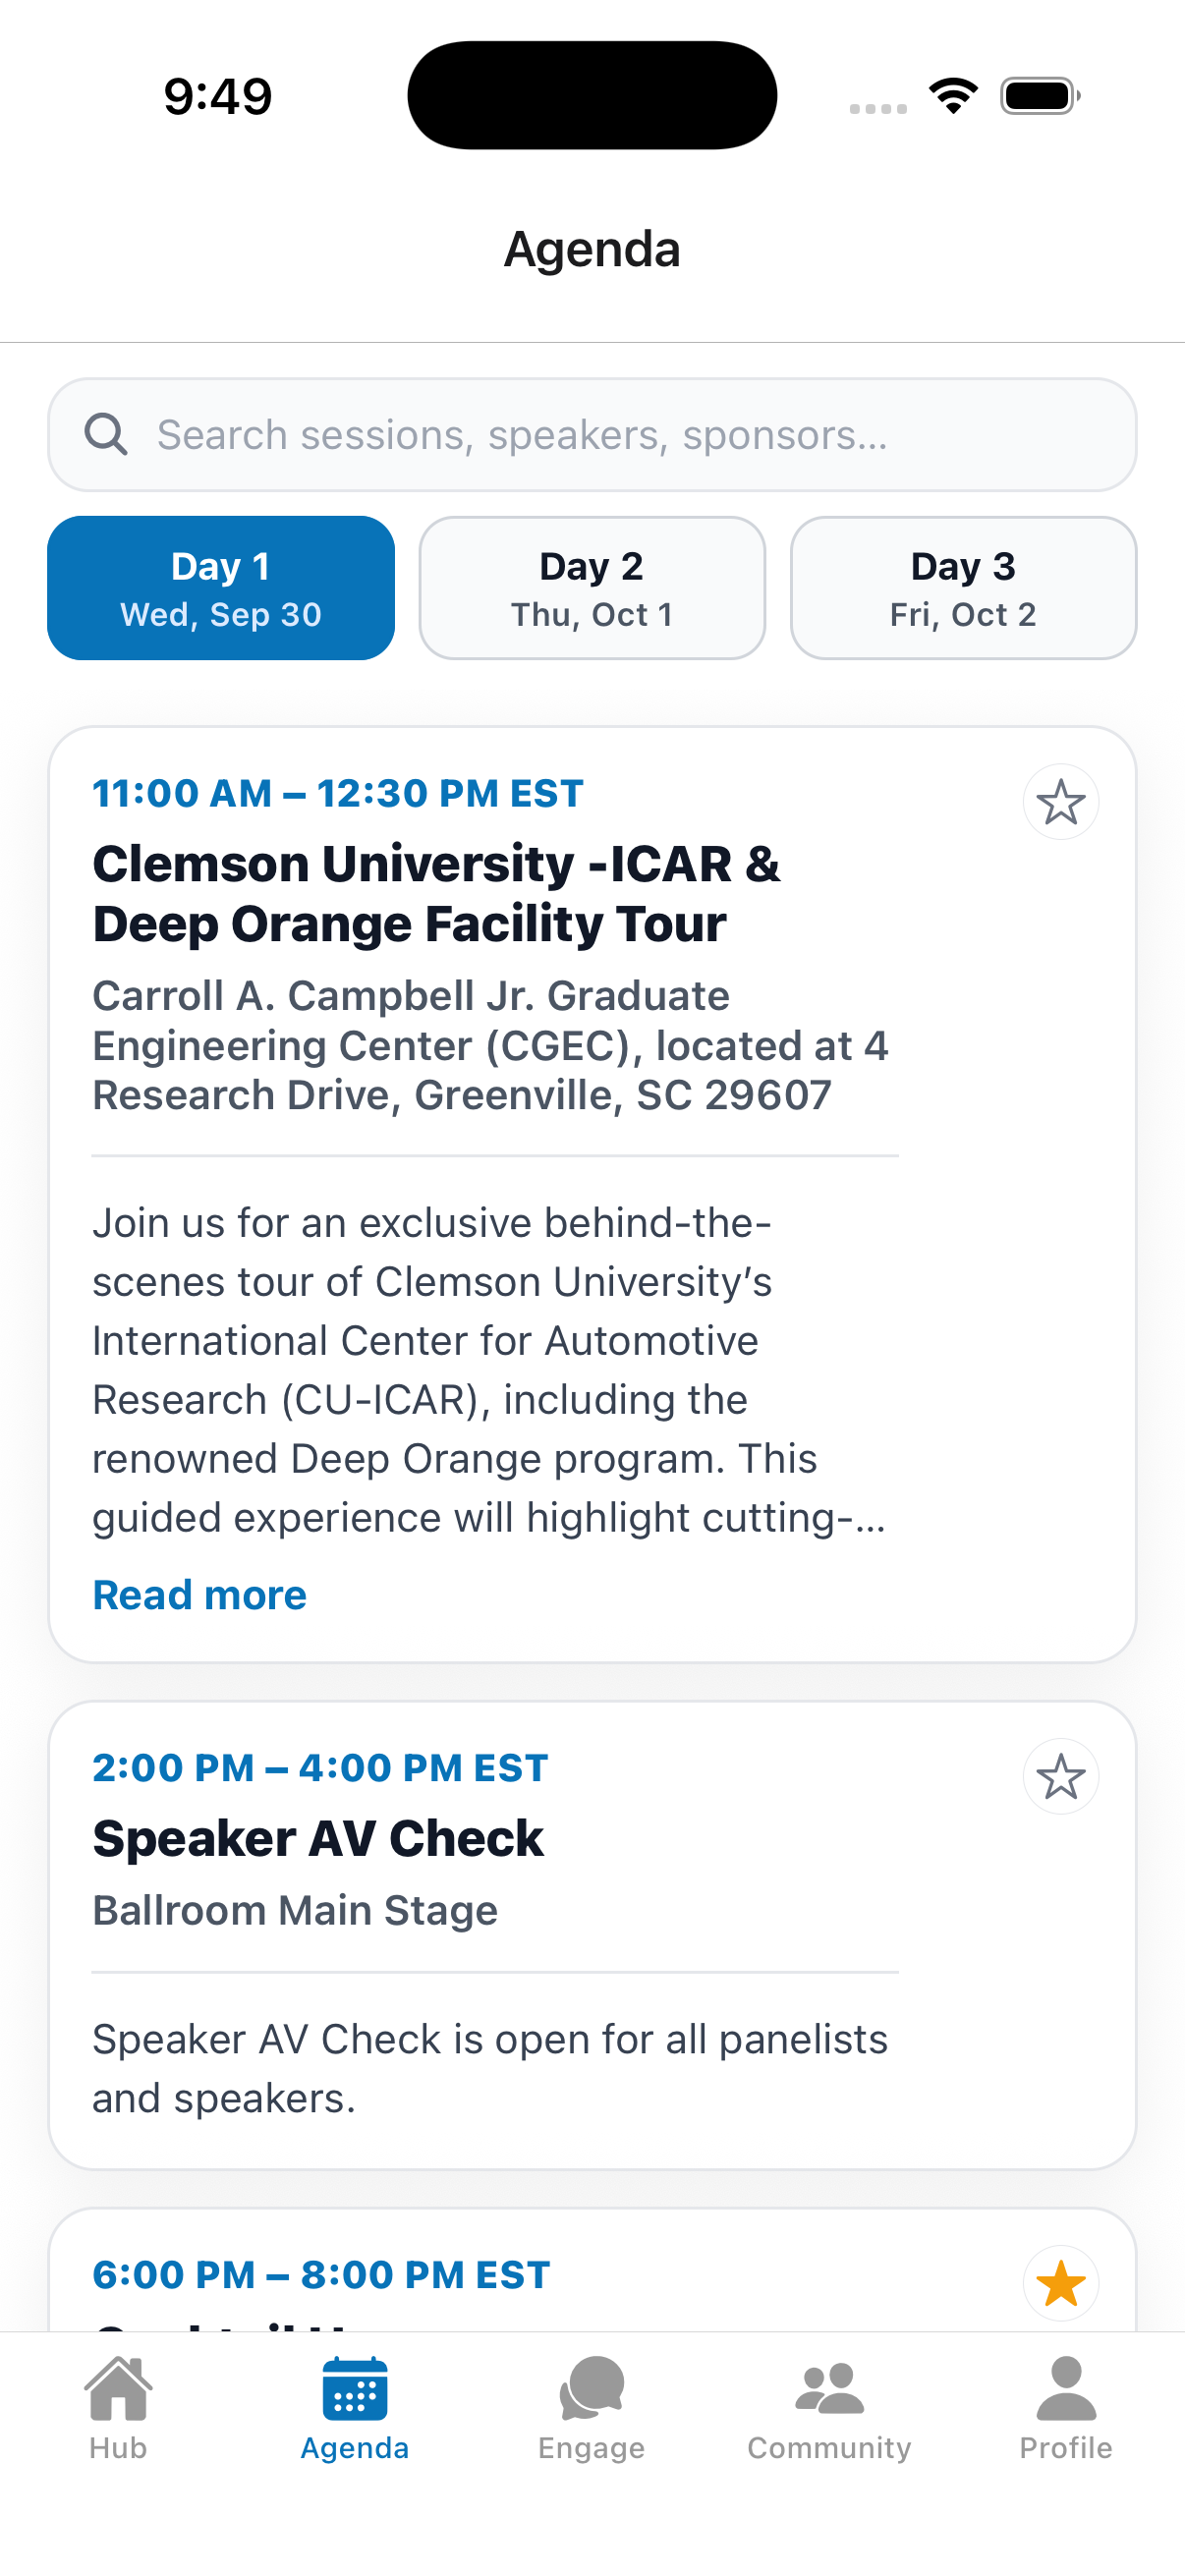
Open the Agenda tab to see the schedule.
- Use the Day chips at the top to switch between event days.
- Use the search bar to filter by session title, speaker, sponsor, or location.
- Each card shows the time, title, location, description, and speakers/sponsors. A LIVE badge appears on sessions happening now.
- Pull down to refresh.
5.2 Session Details
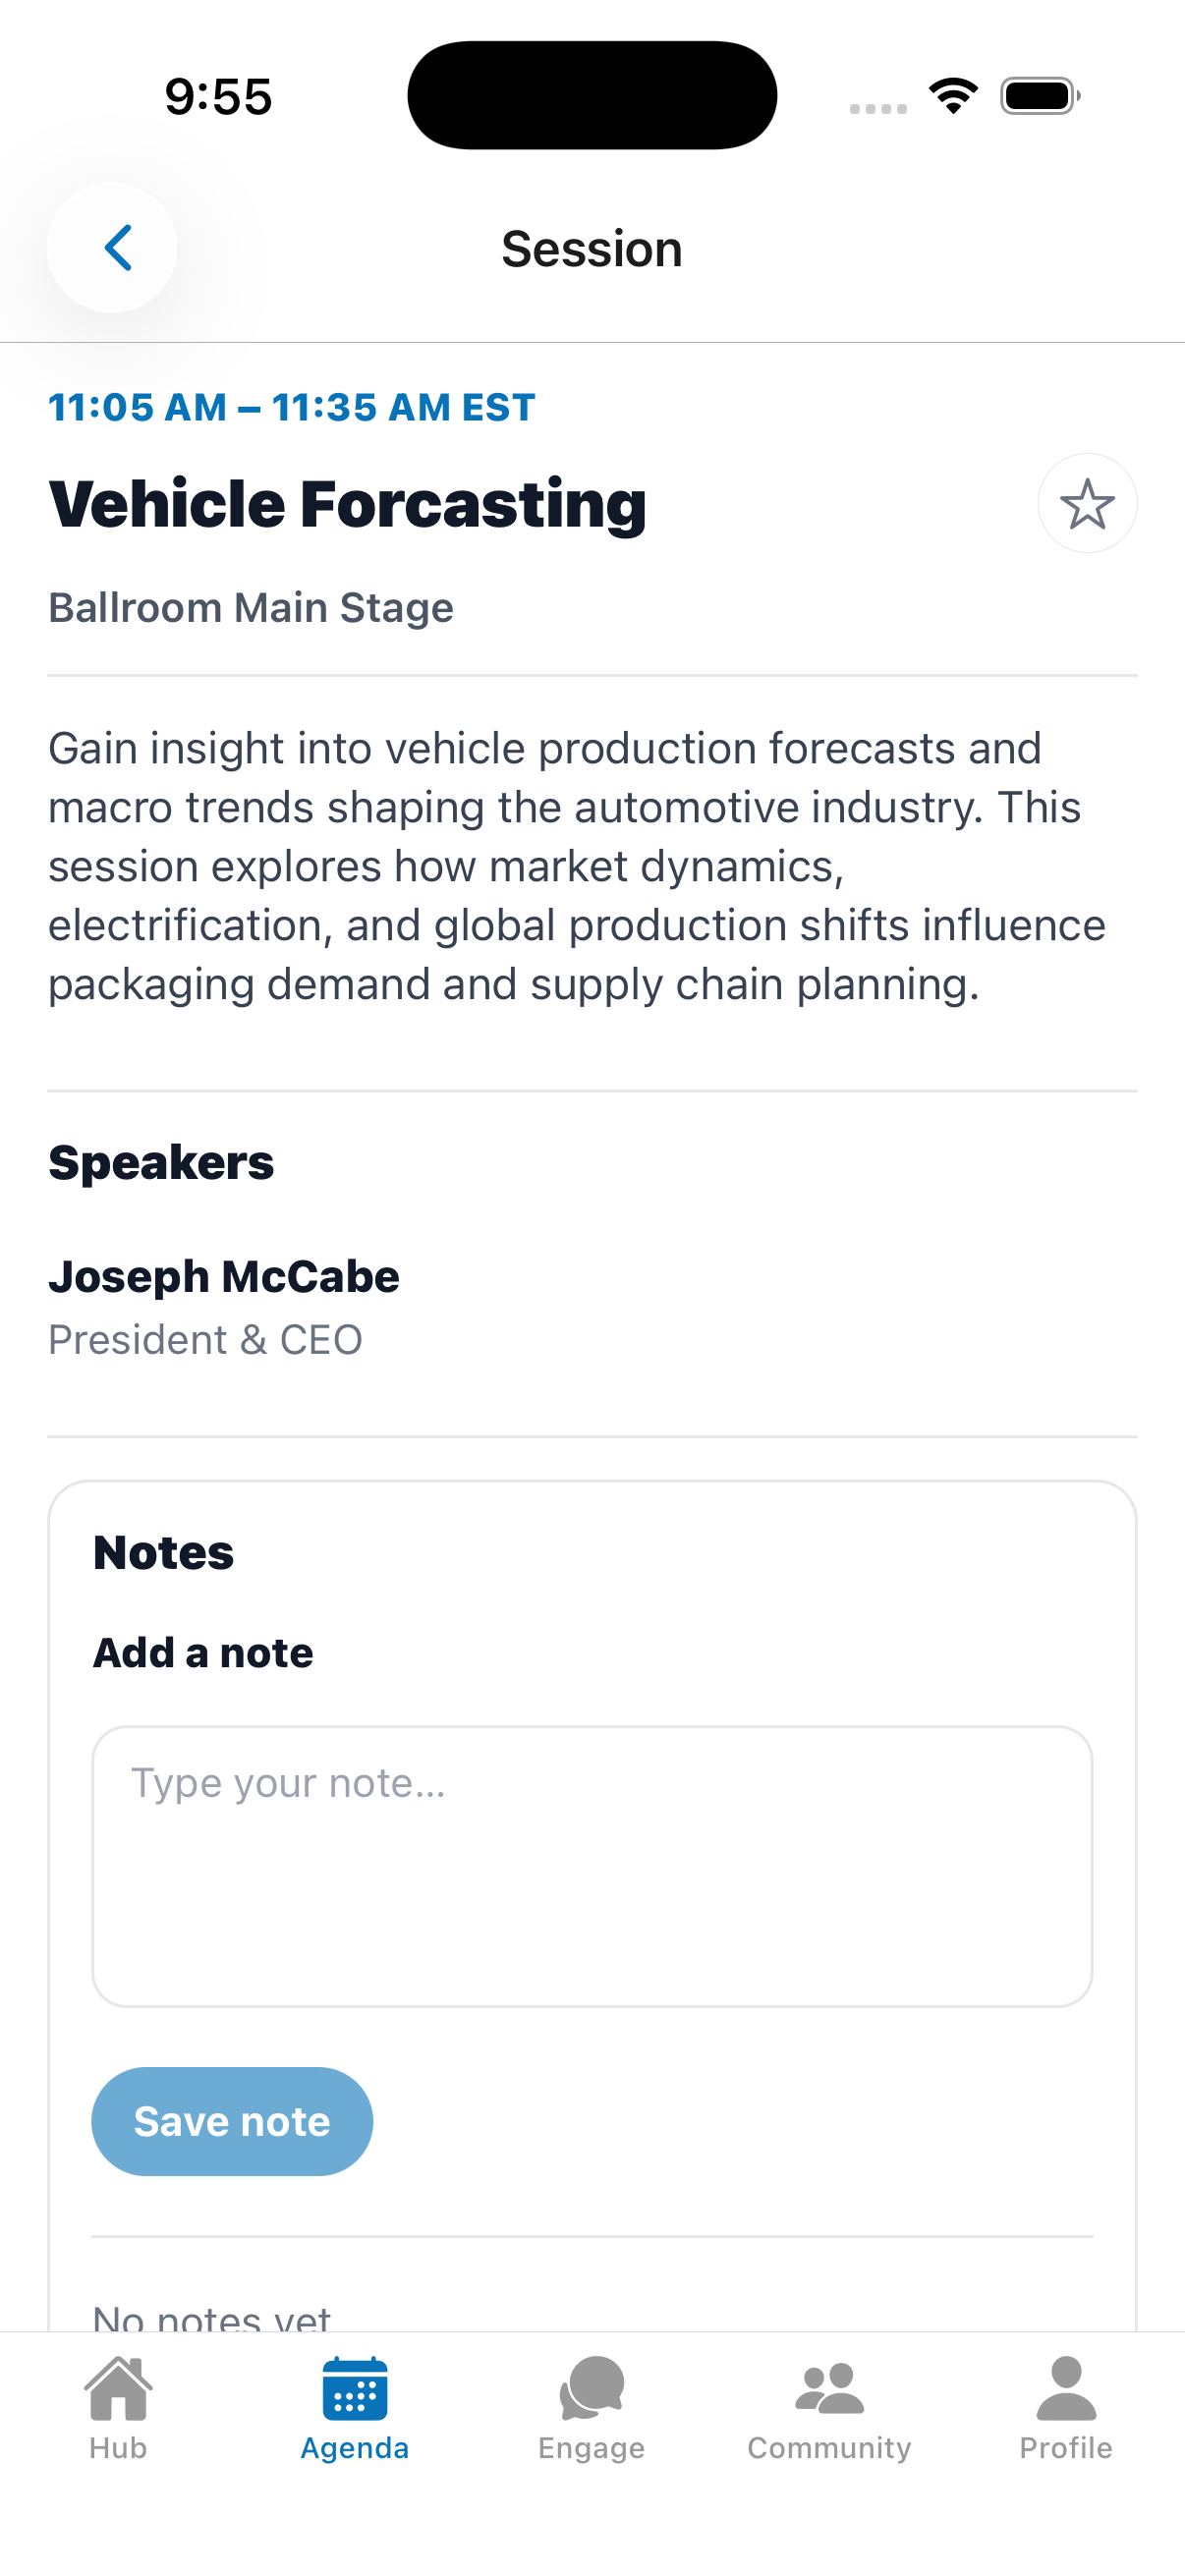
Tap any session to open its full details: time, title, location, full description, speakers, and sponsors.
5.3 Favoriting a Session
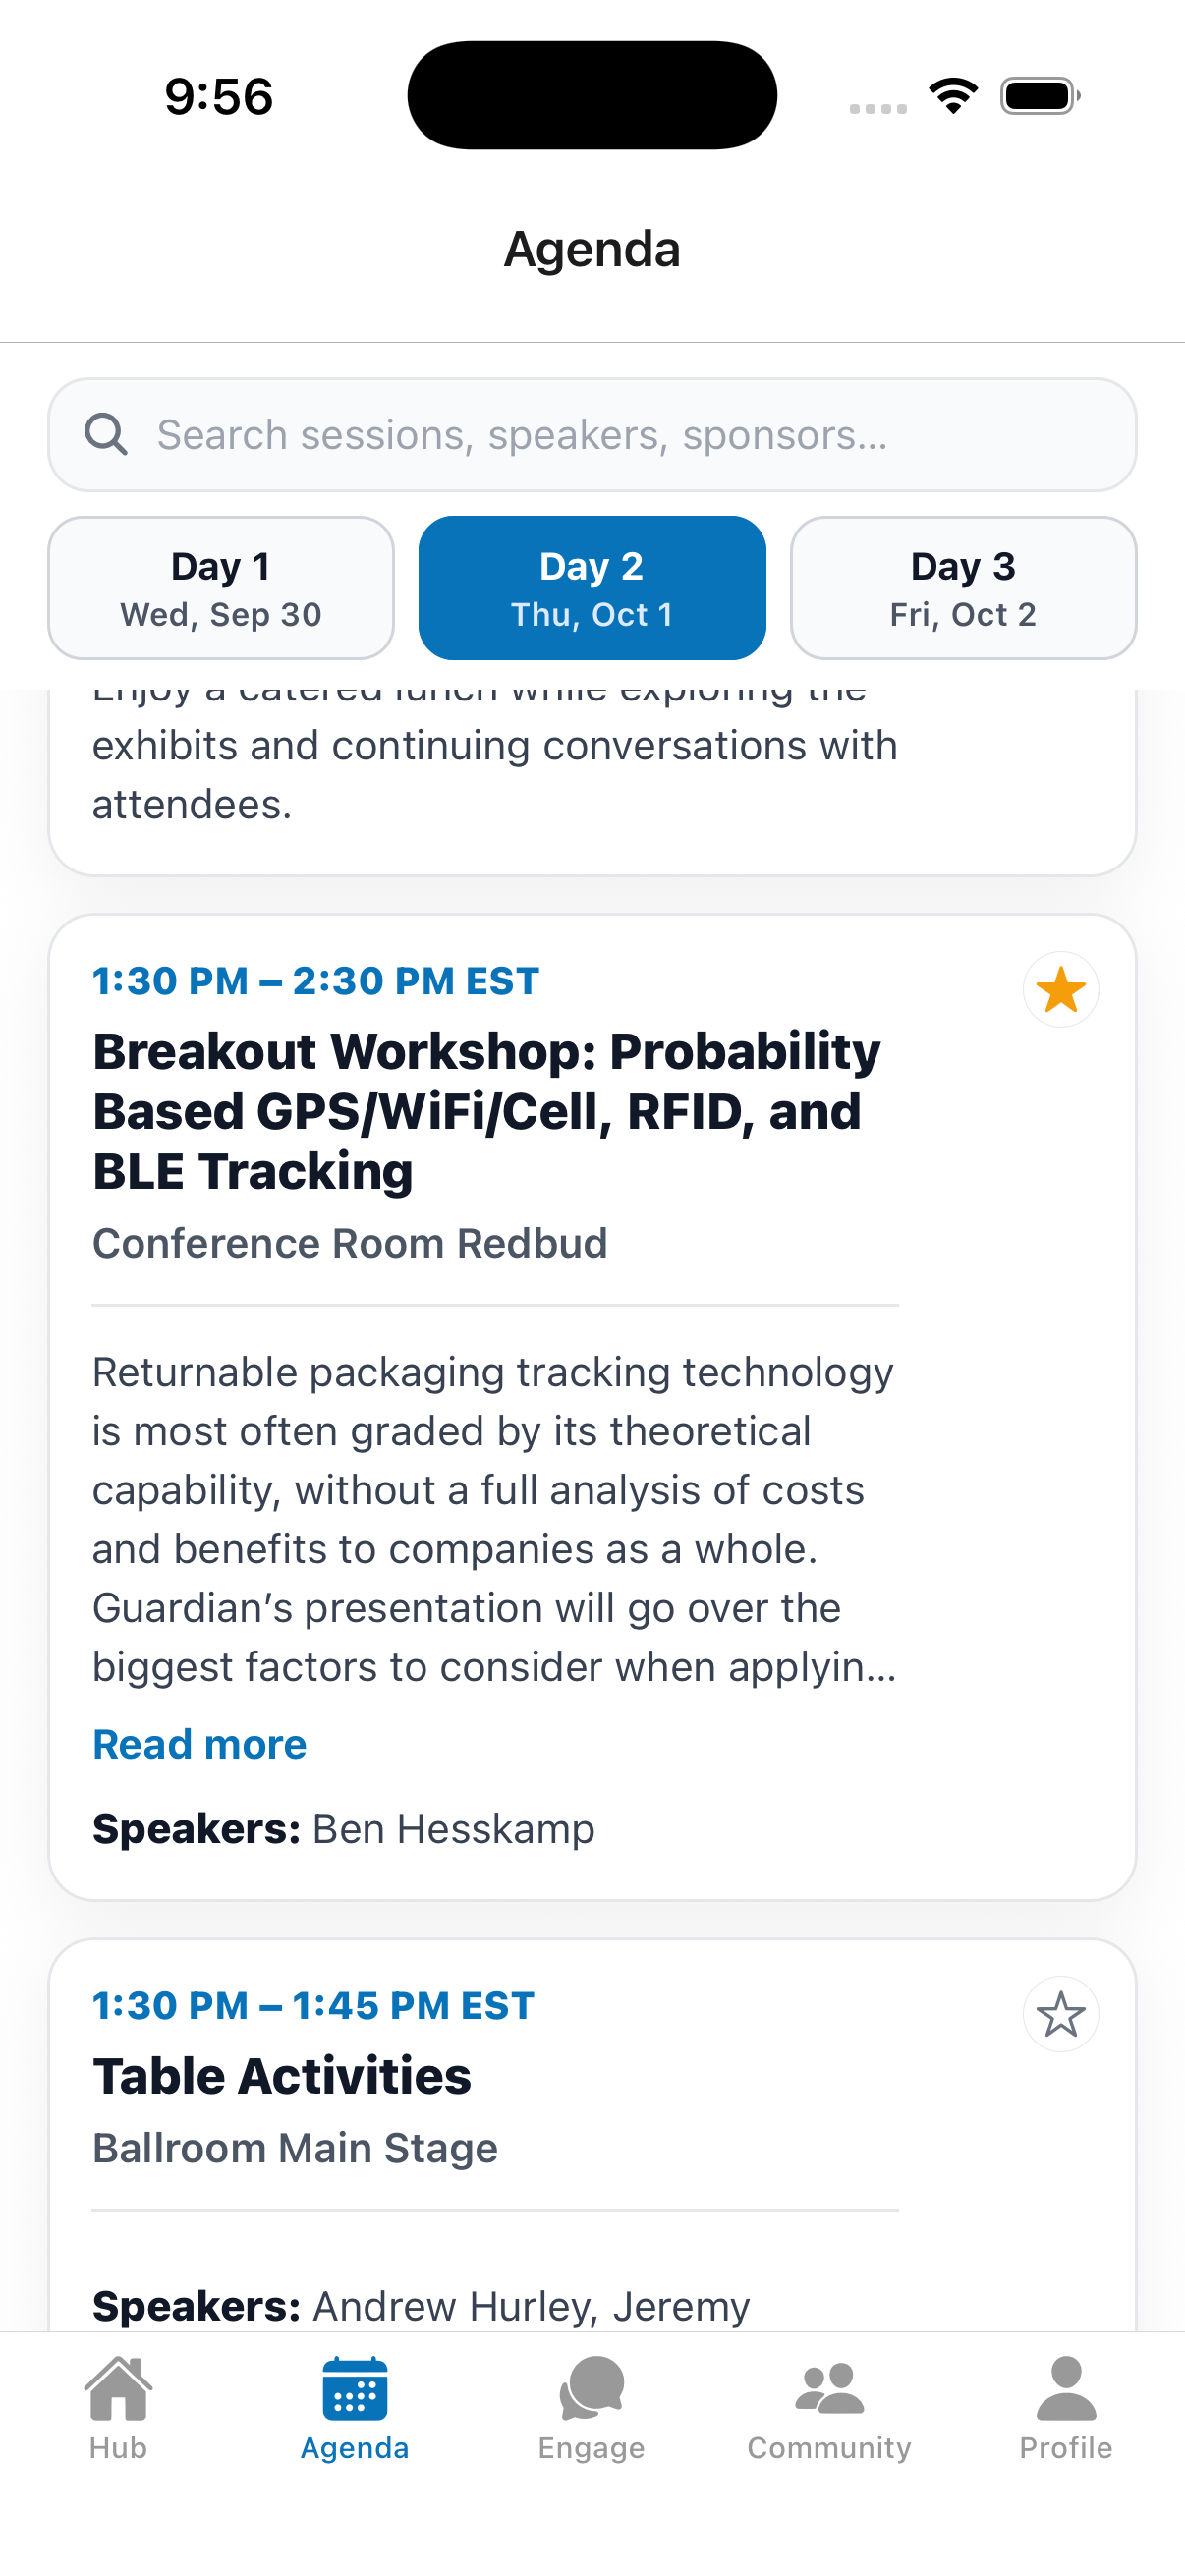
Tap the star icon on a session card or on the session detail screen to add it to your Favorites. Tap again to remove it.
5.4 Session Notes
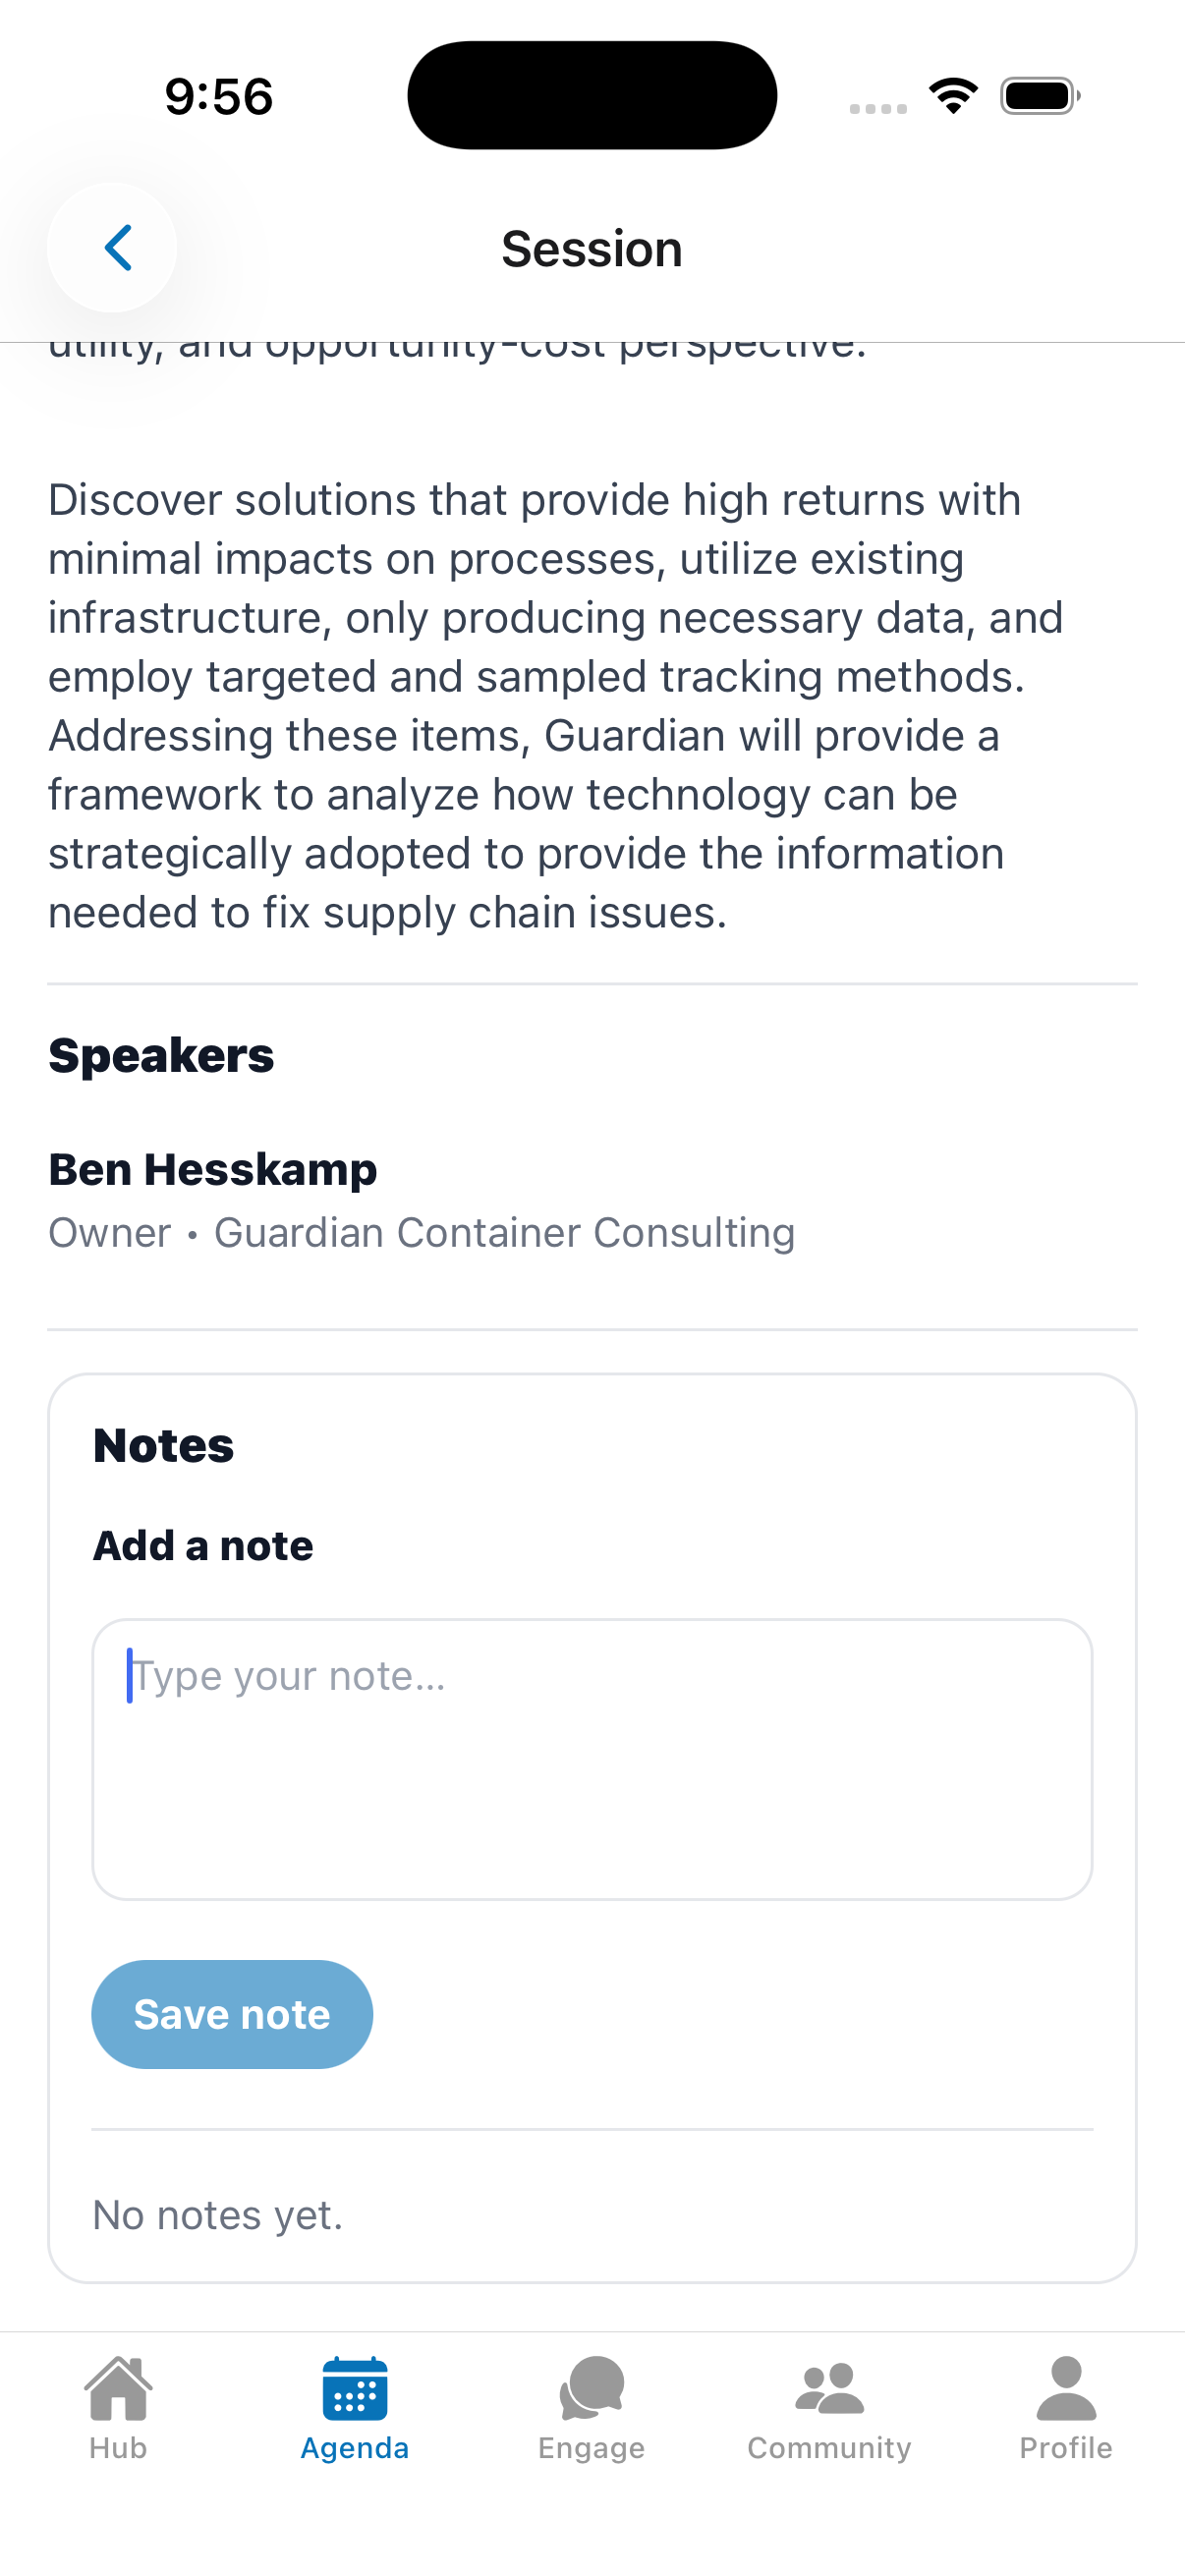
On the session detail screen, scroll to Notes to jot down private notes for that session.
- Type a note and tap Save note.
- Edit or Delete existing notes anytime.
- Your notes are private to you. (See all notes in one place under Notes.)
5.5 Watching a Live Presentation
When a session is live and has a stream attached, a View Presentation button appears on the Hub card and the session detail screen. Tap it to watch the presentation inside the app.
6. Community & Networking
This is the heart of networking in the app. The connection flow is approval-based: you send a request, and the other person must accept before you can chat, see their email, or save them to your phone.
6.1 Browsing the Community Directory
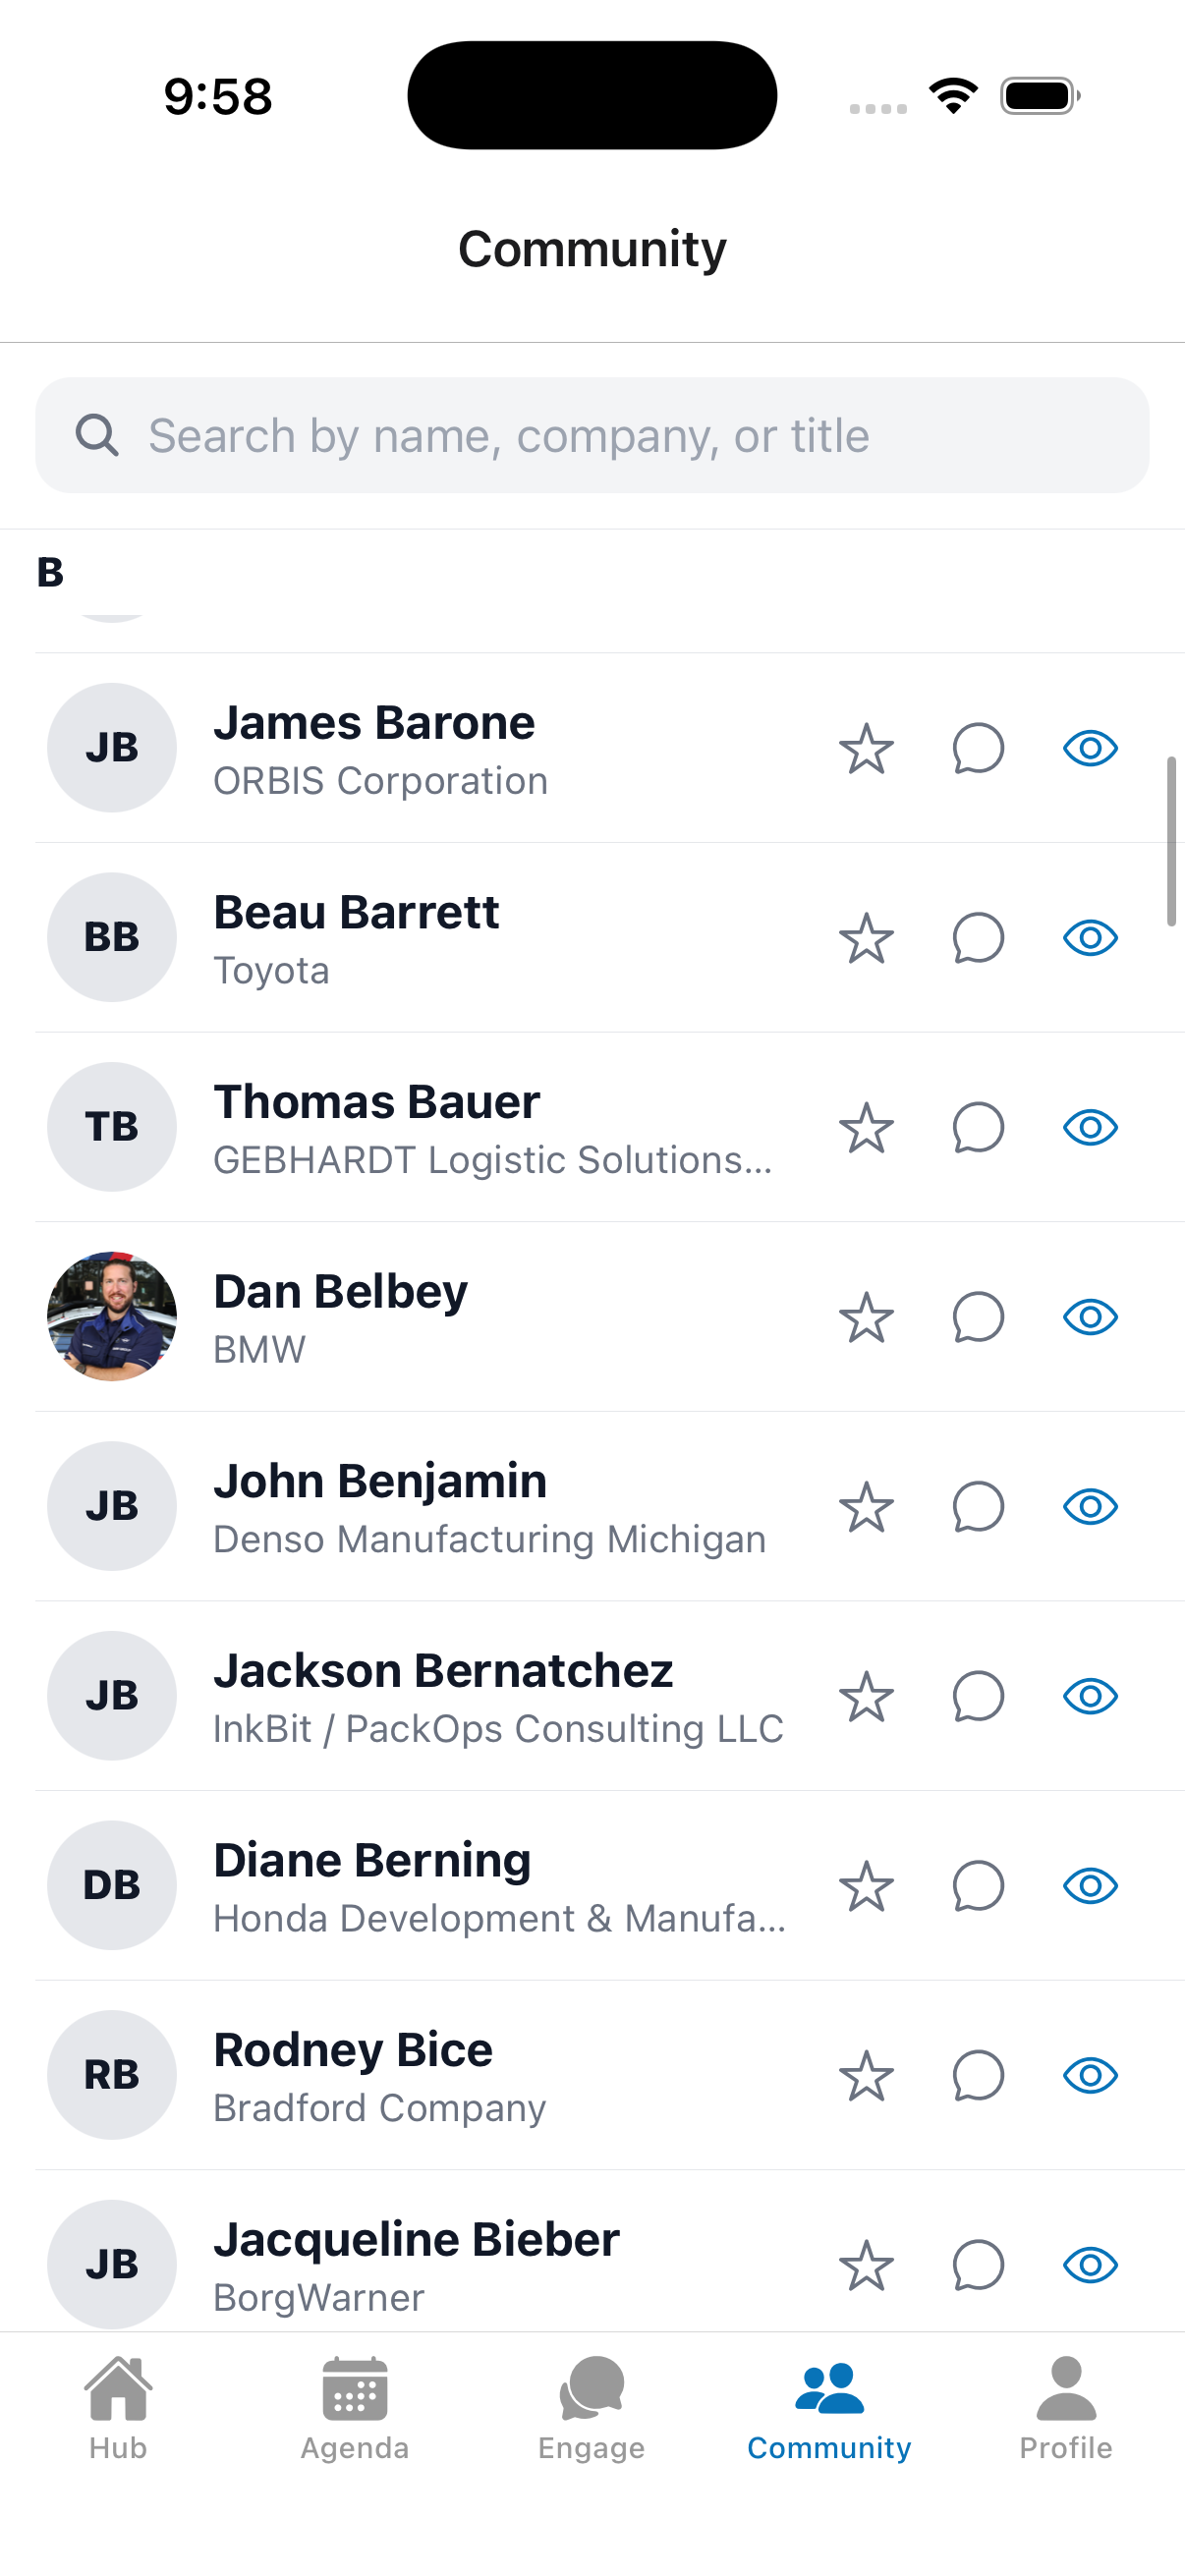
Open the Community tab to browse all attendees, grouped alphabetically by last name.
- Use the search bar to find someone by name, company, or title.
- Pull down to refresh.
- Each row shows an icon indicating favorite status and whether a request is pending.
6.2 Viewing Someone’s Profile
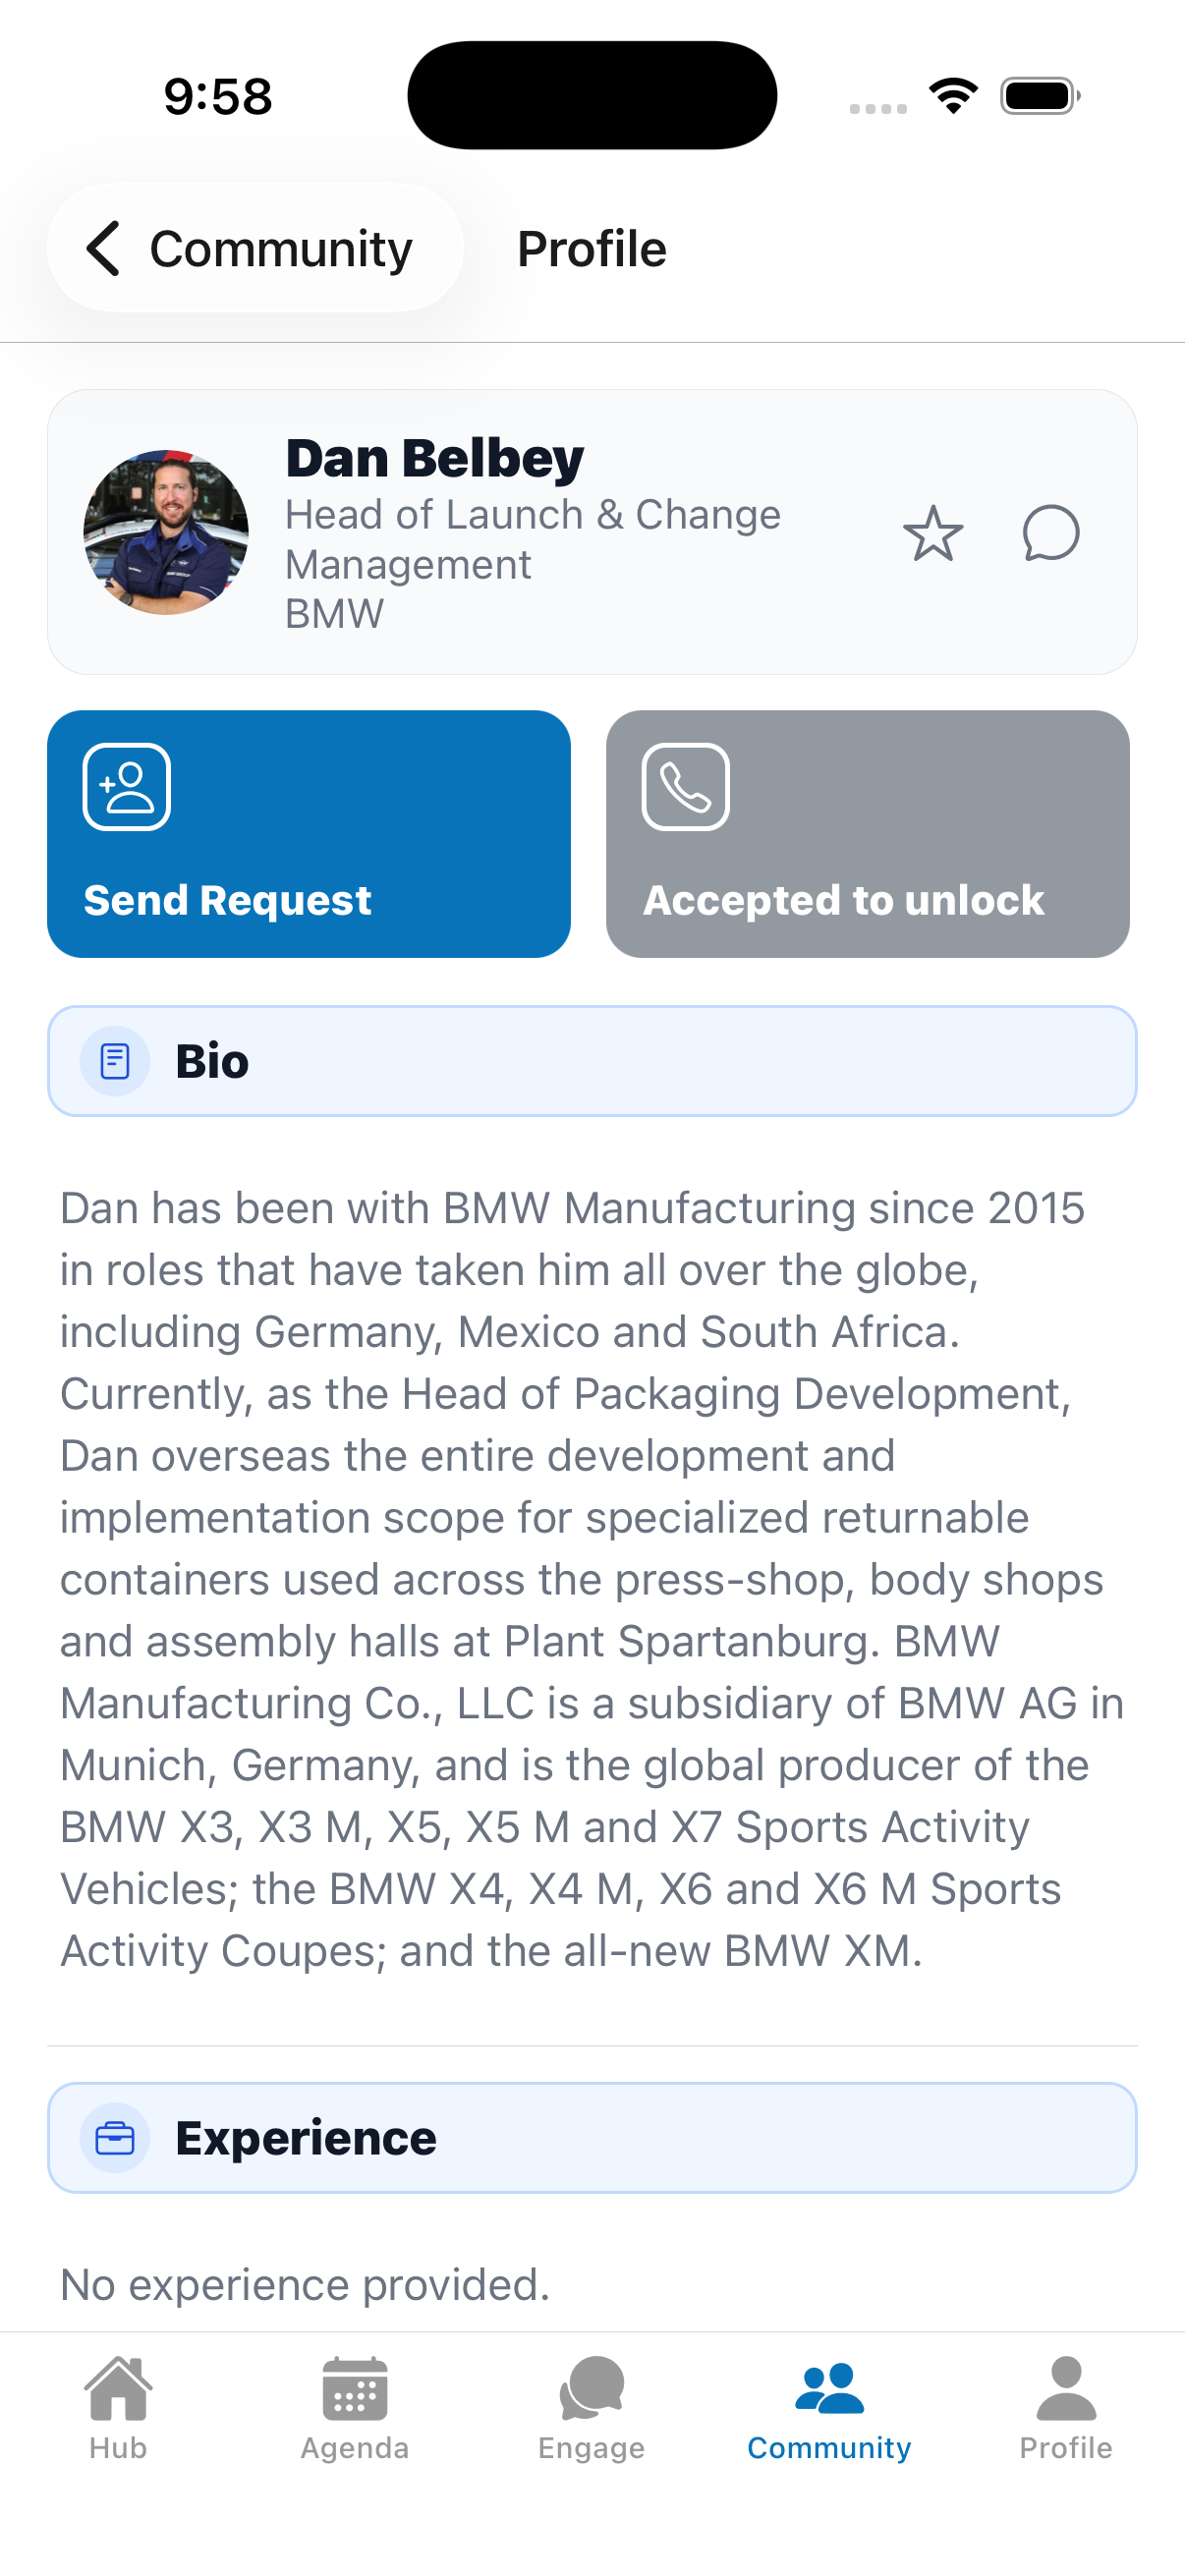
Tap any person to open their profile — bio, experience, education, and interests. Their email is hidden until you’re connected (your request is accepted).
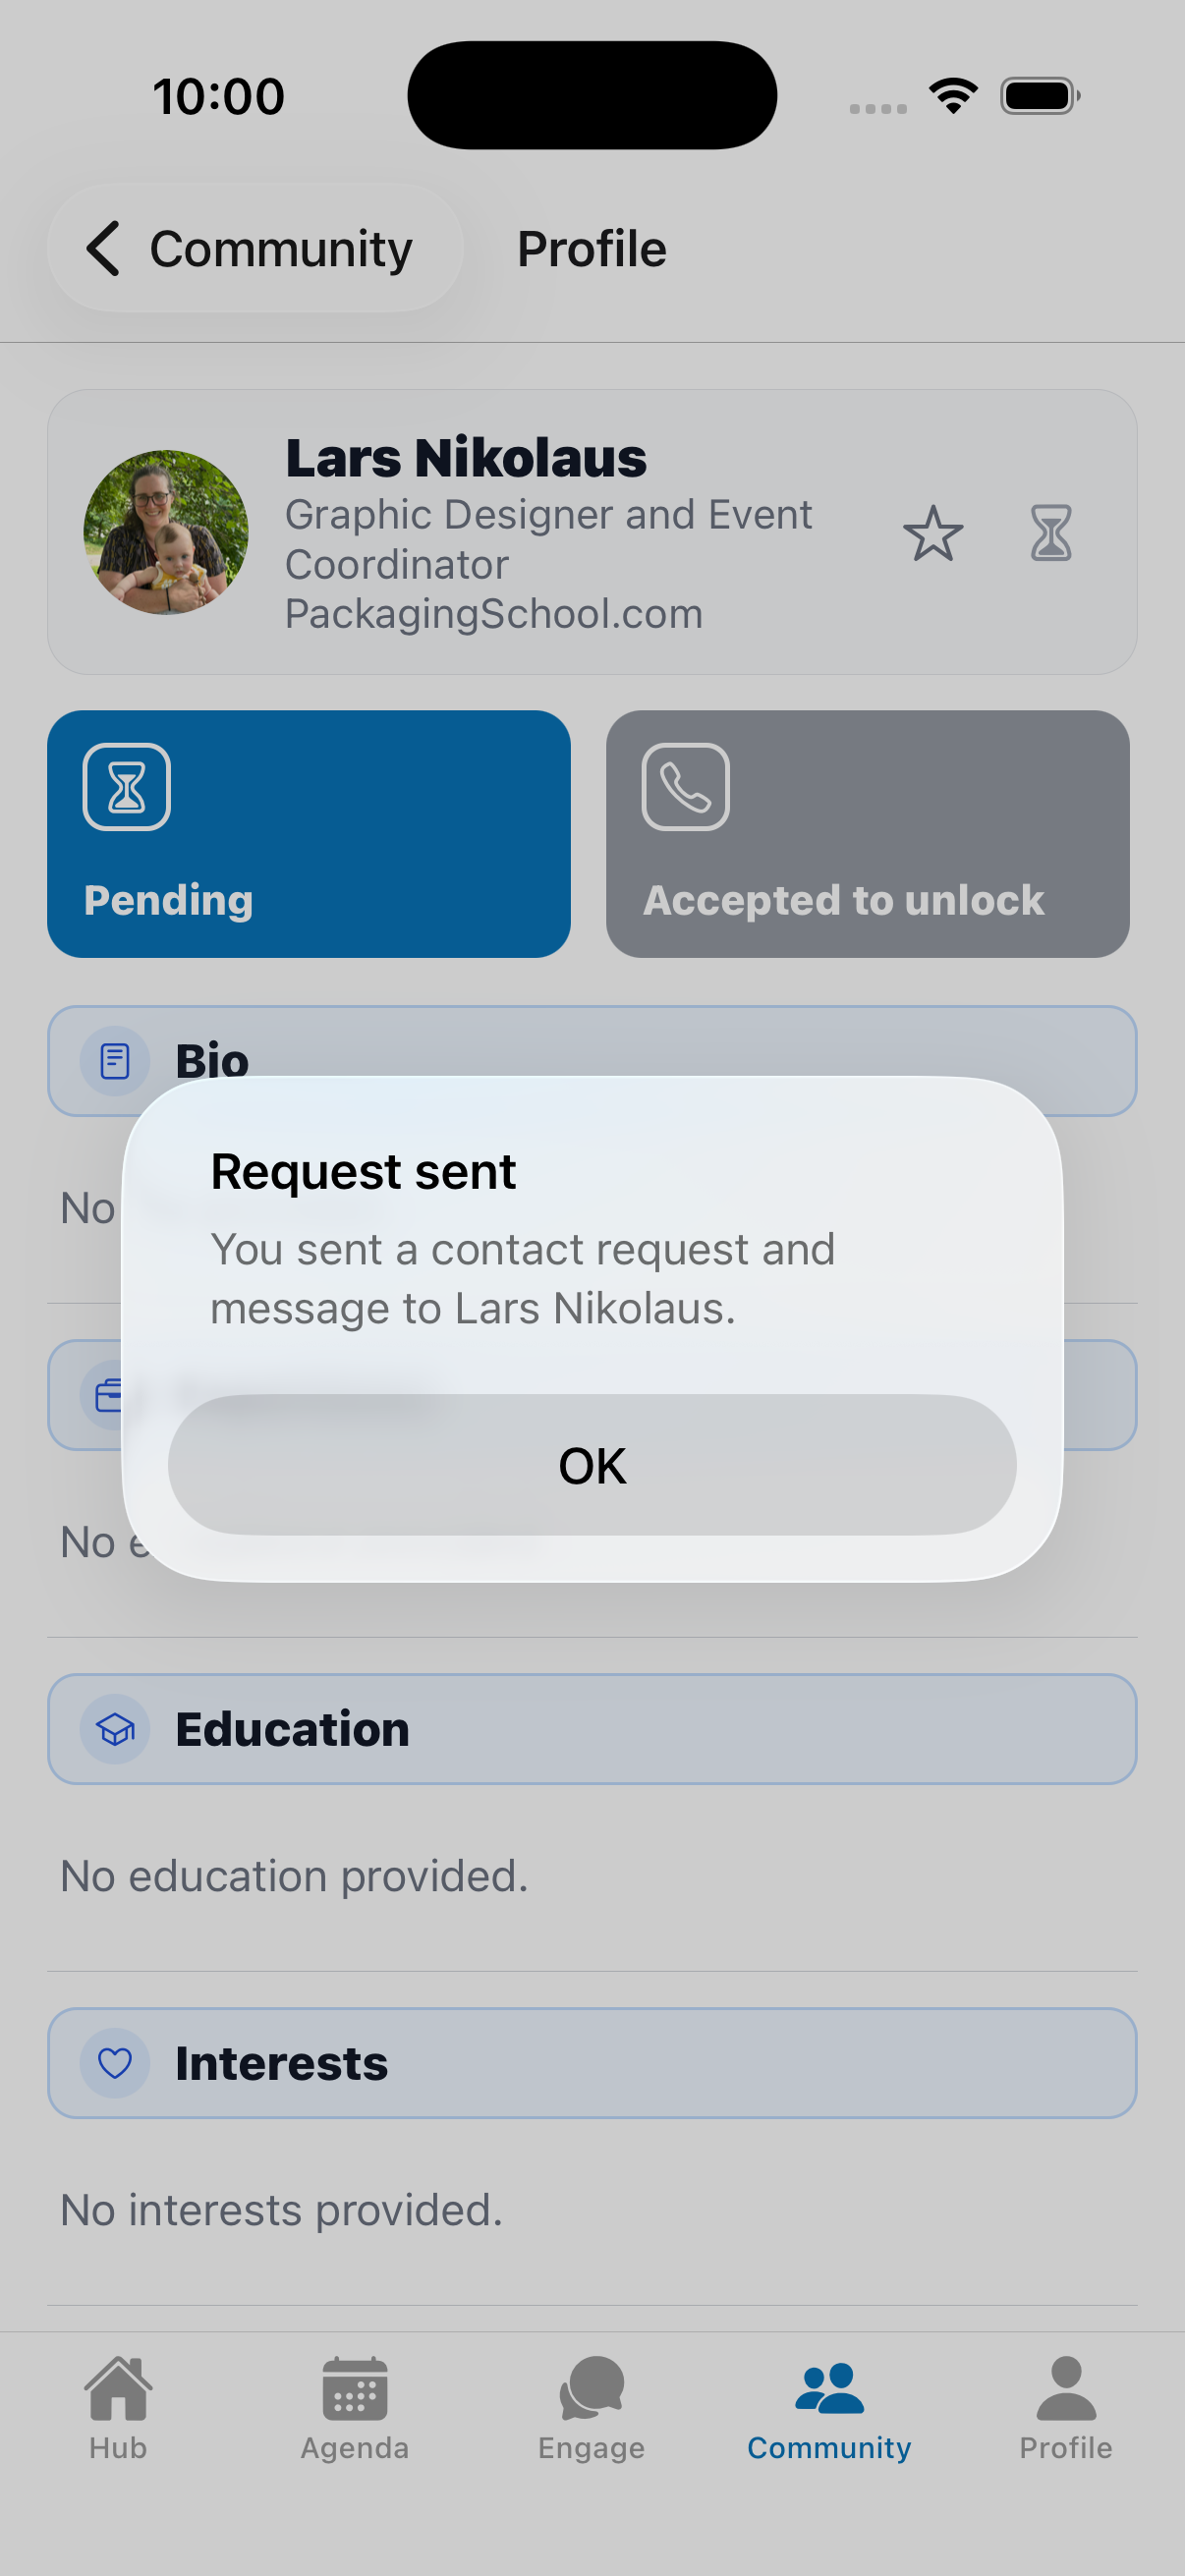
6.3 Sending a Contact Request
To connect with someone:
- Open their profile.
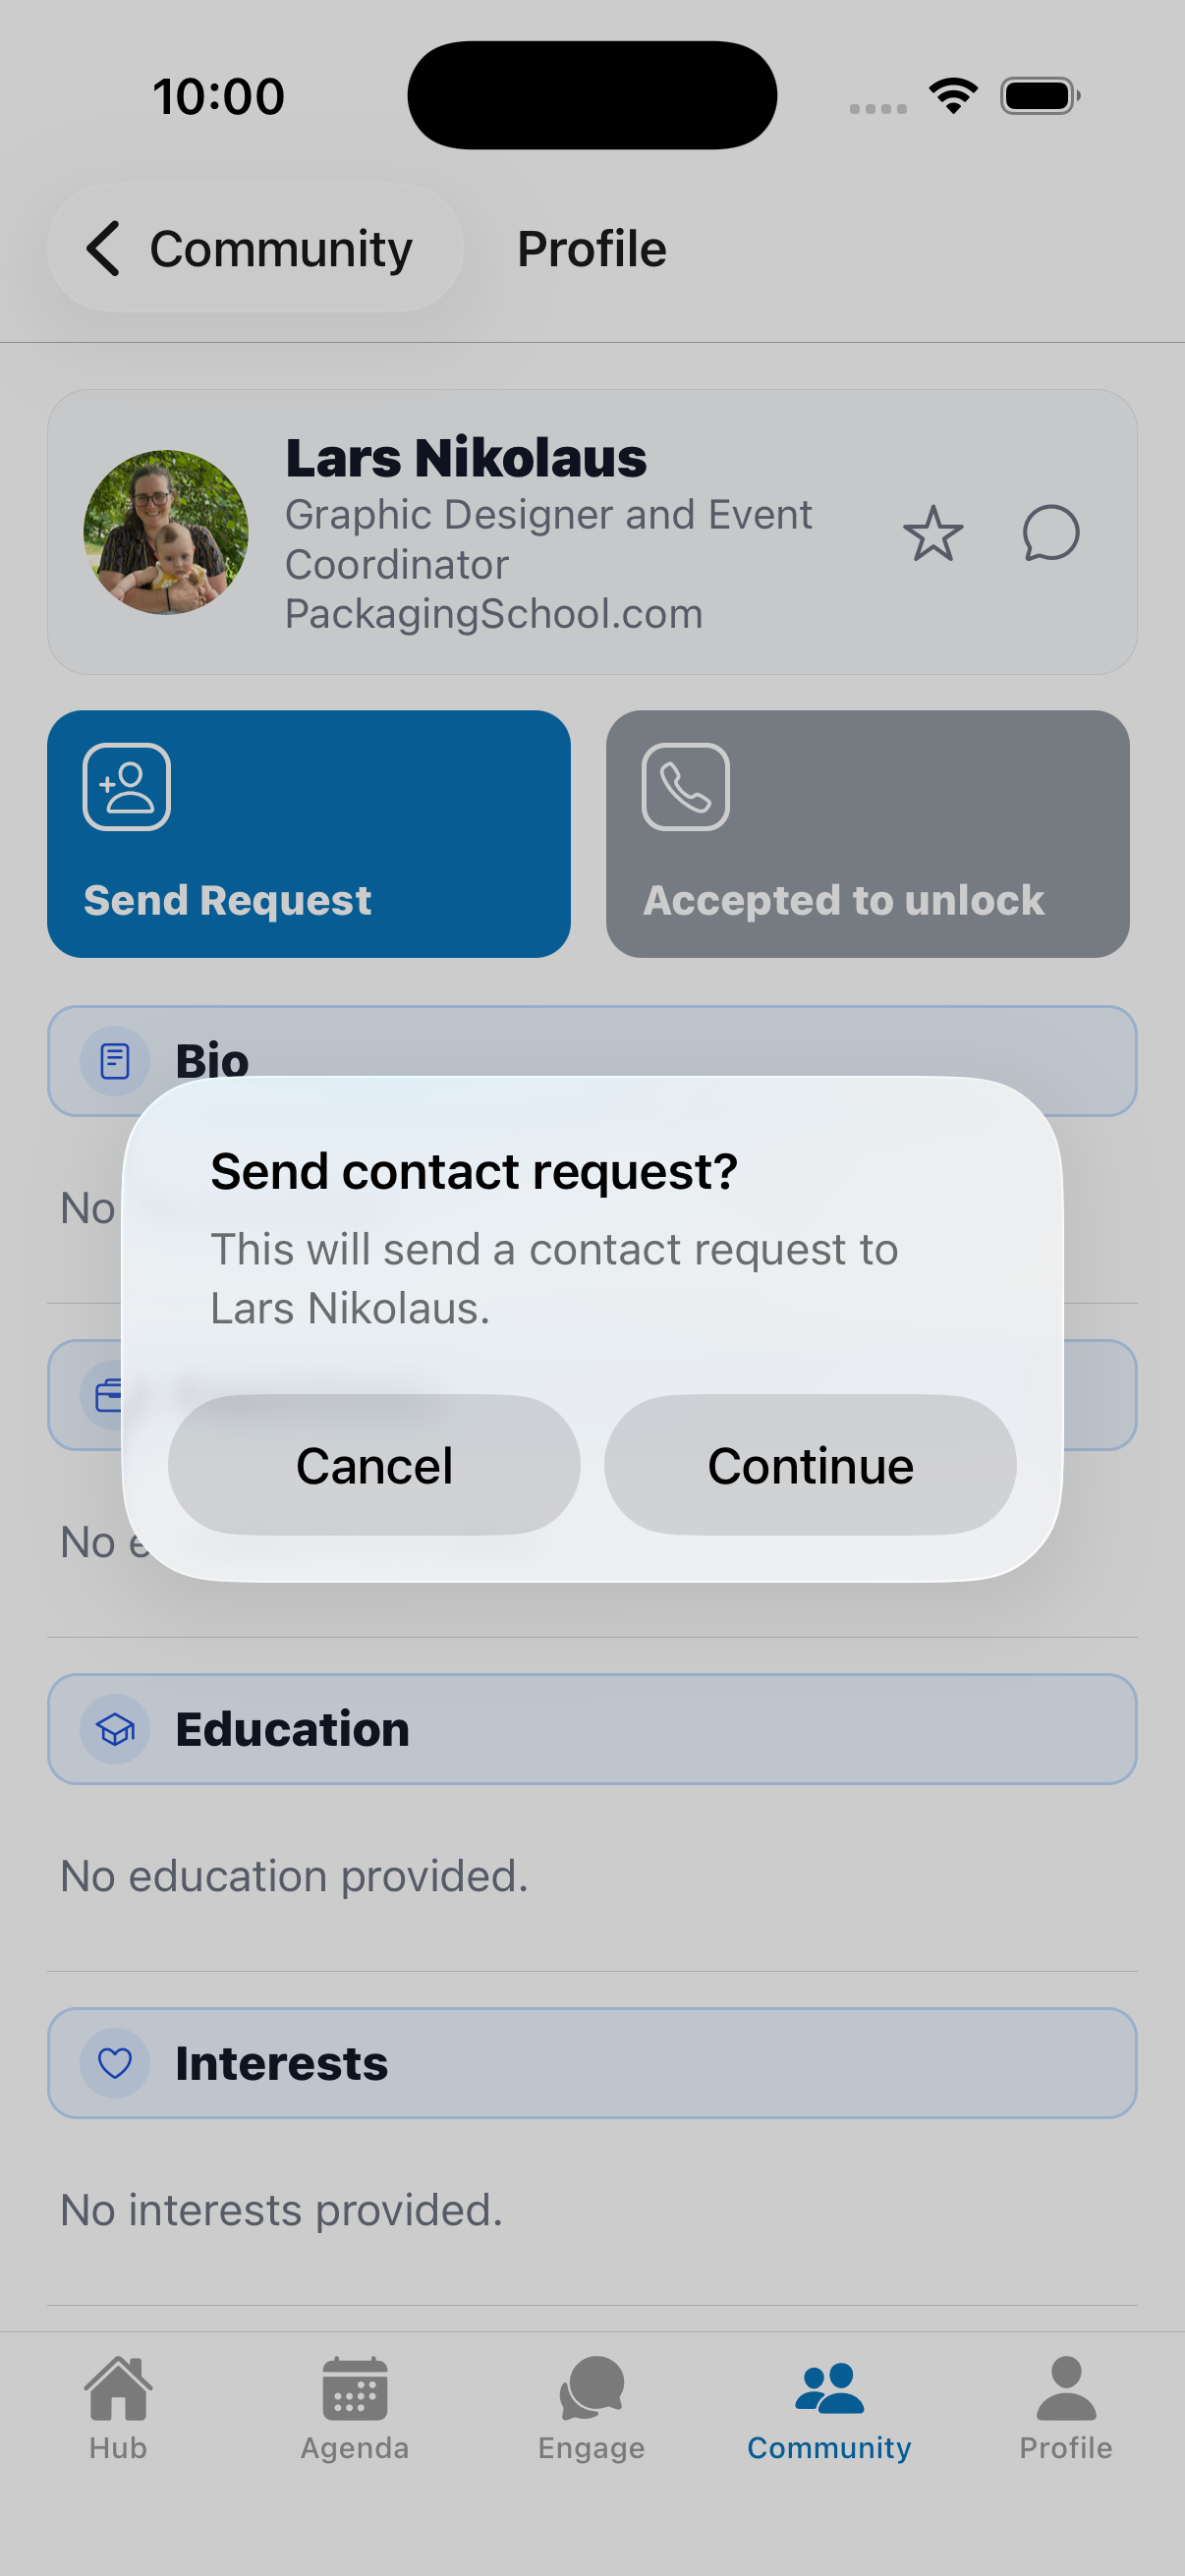
- Tap the Send Request tile (or the chat bubble icon).
- Confirm you want to send the request.
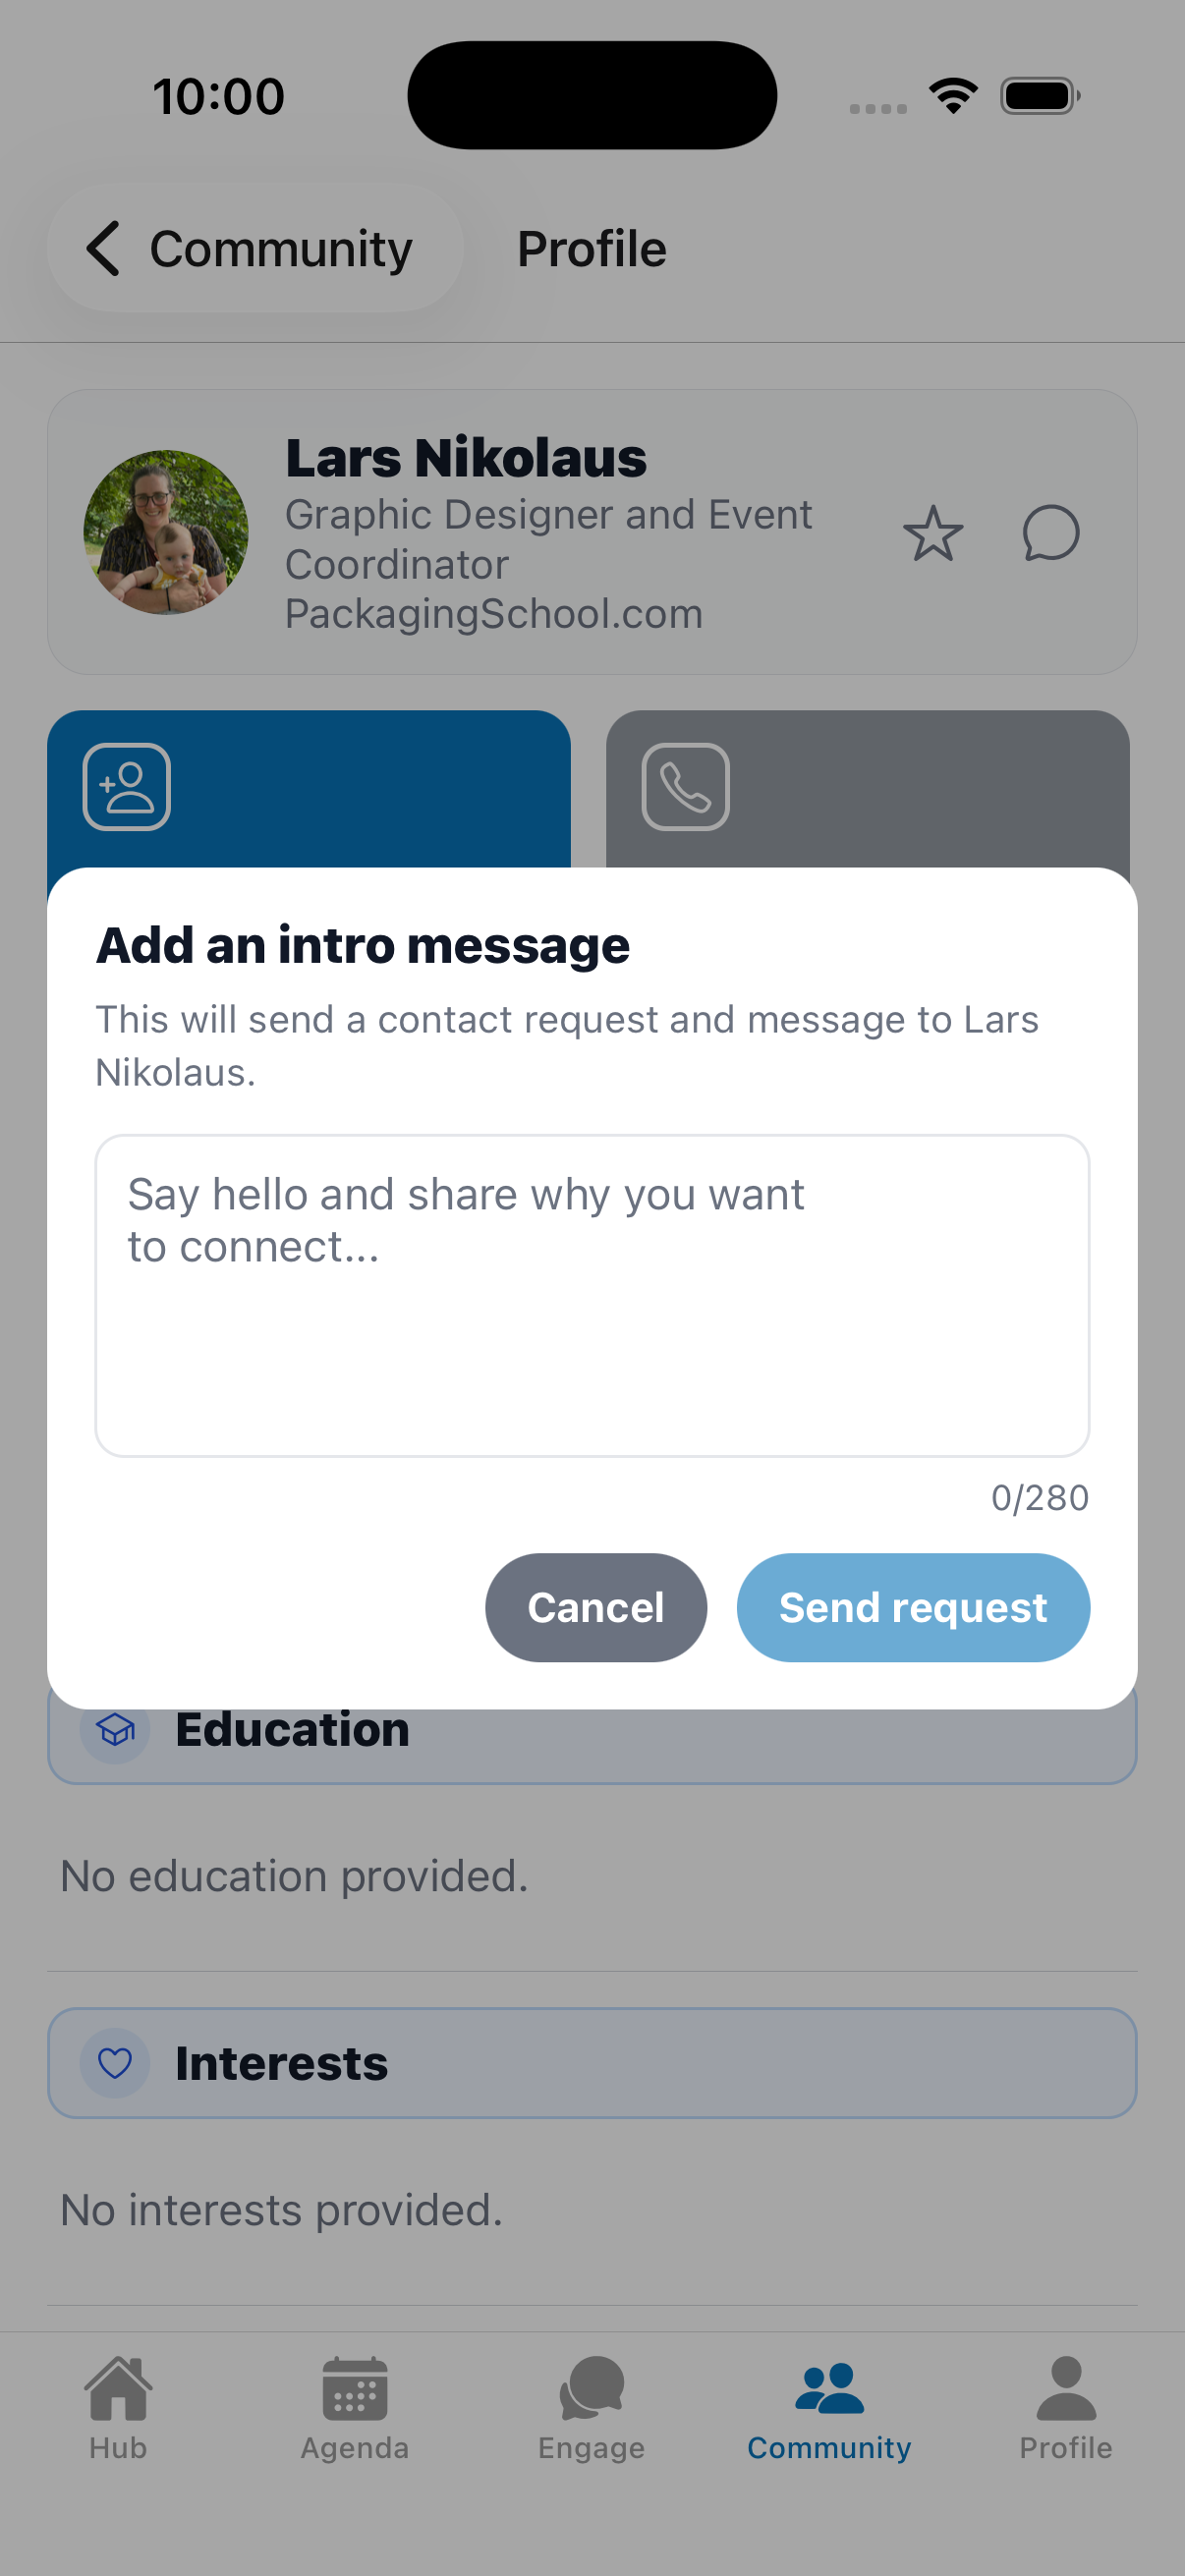
- Add a short intro message so they know who you are, then submit.
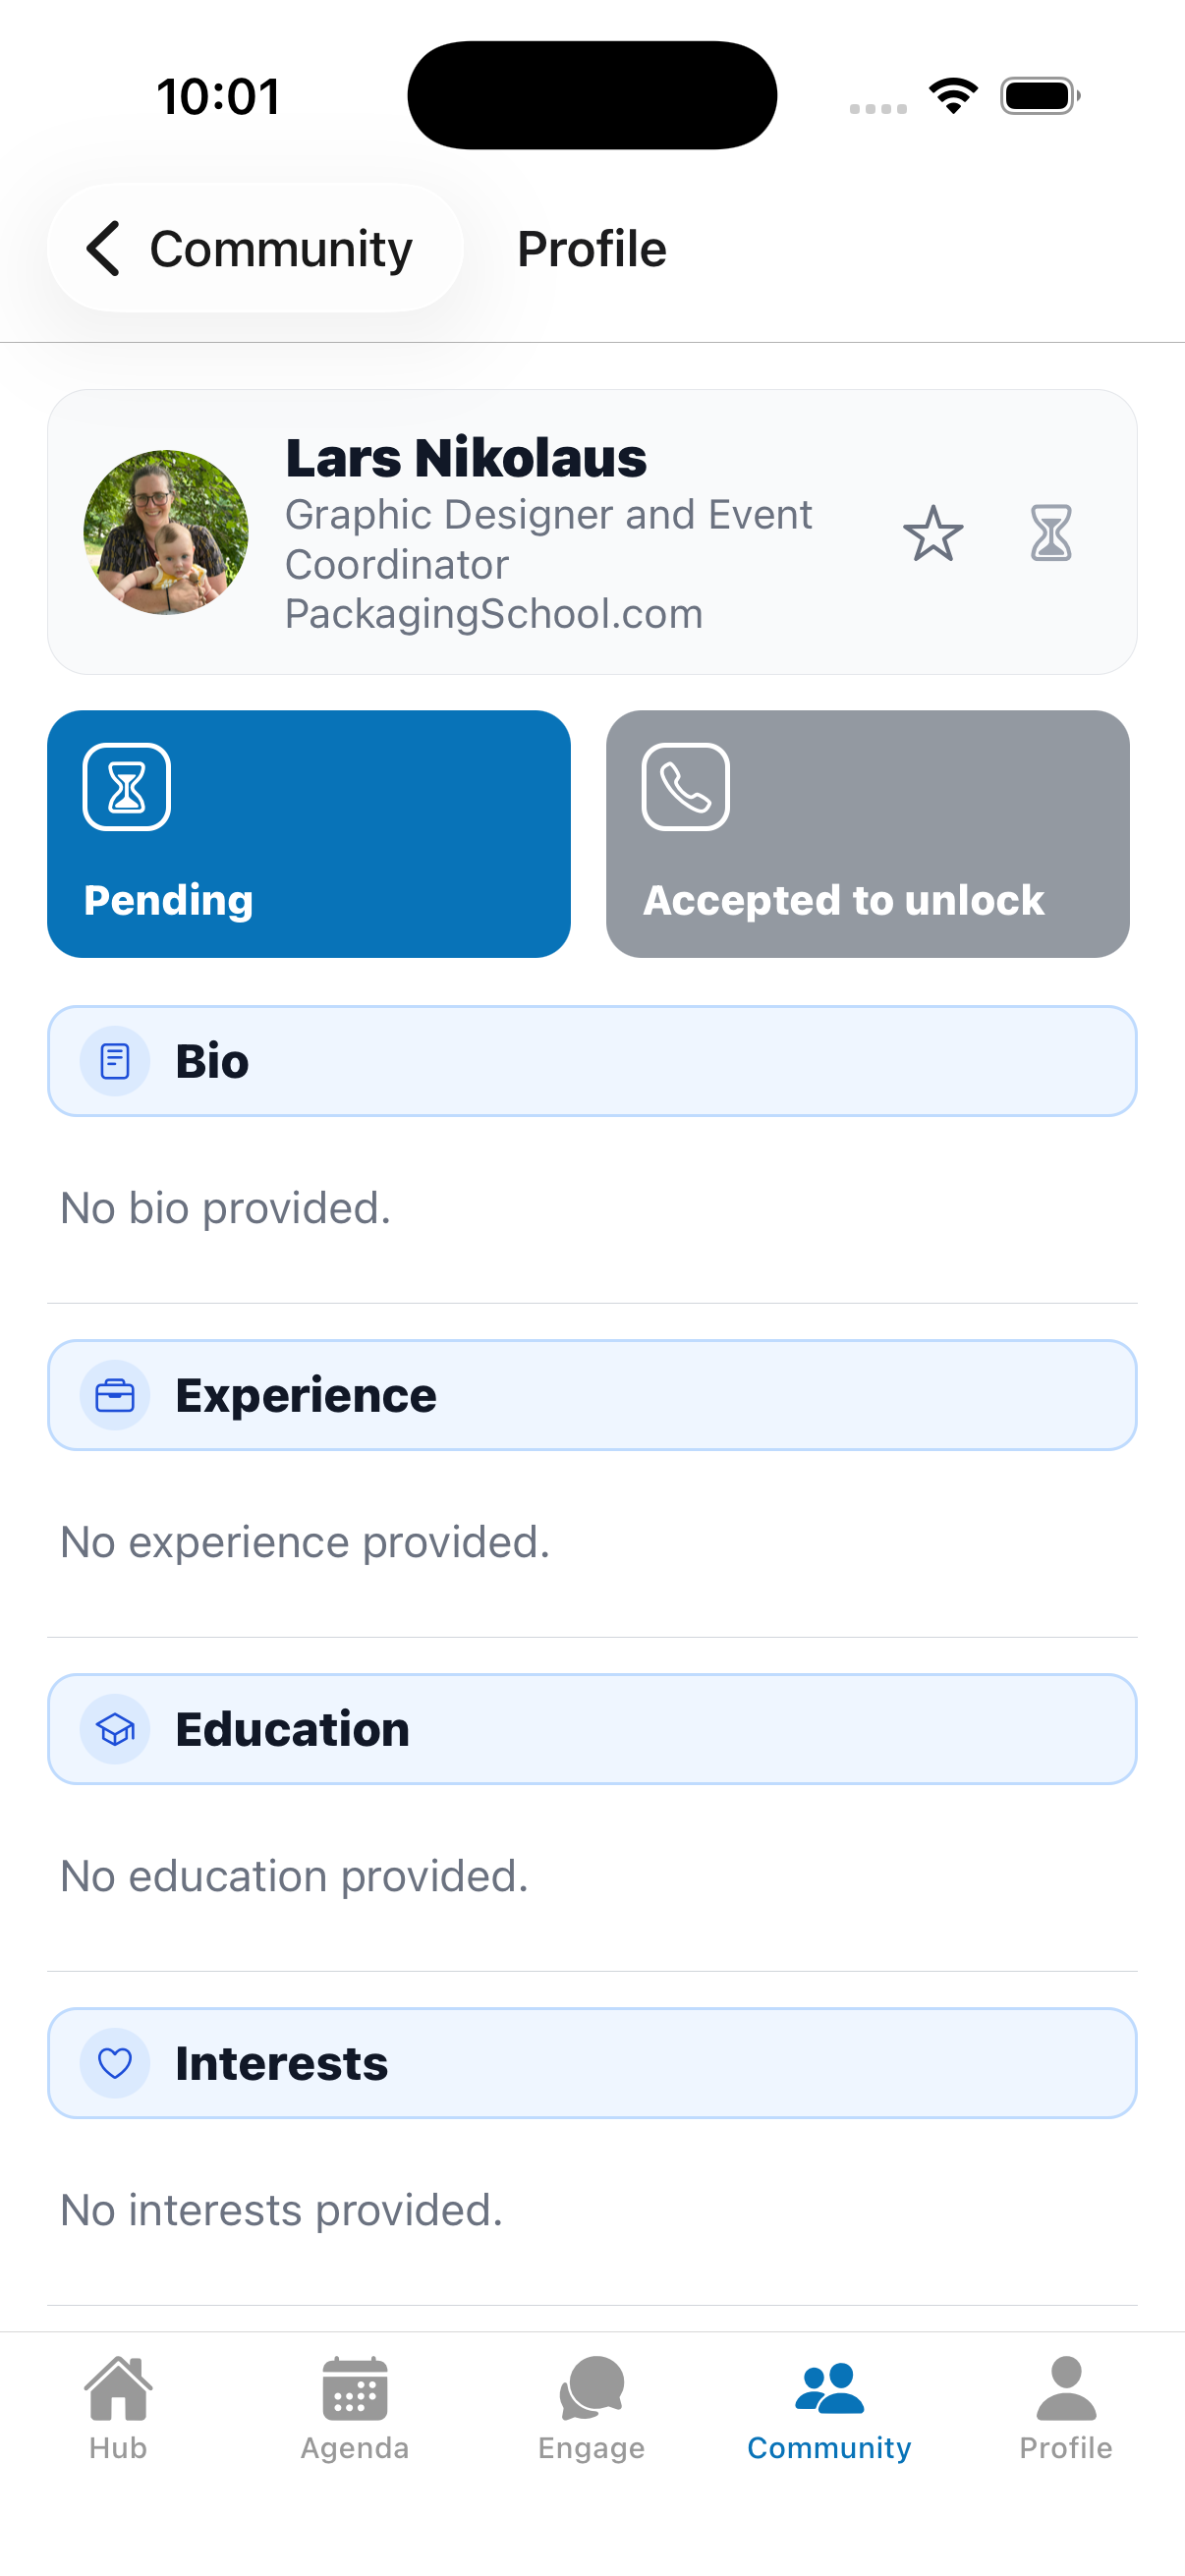
The tile now shows Pending (an hourglass) until they respond. Once they accept, the tile changes to Accepted, and you can start a chat or save them to your phone contacts.
Tip: This is the “chat approval.” You can’t message someone until they accept your contact request.
6.4 Favoriting a Person
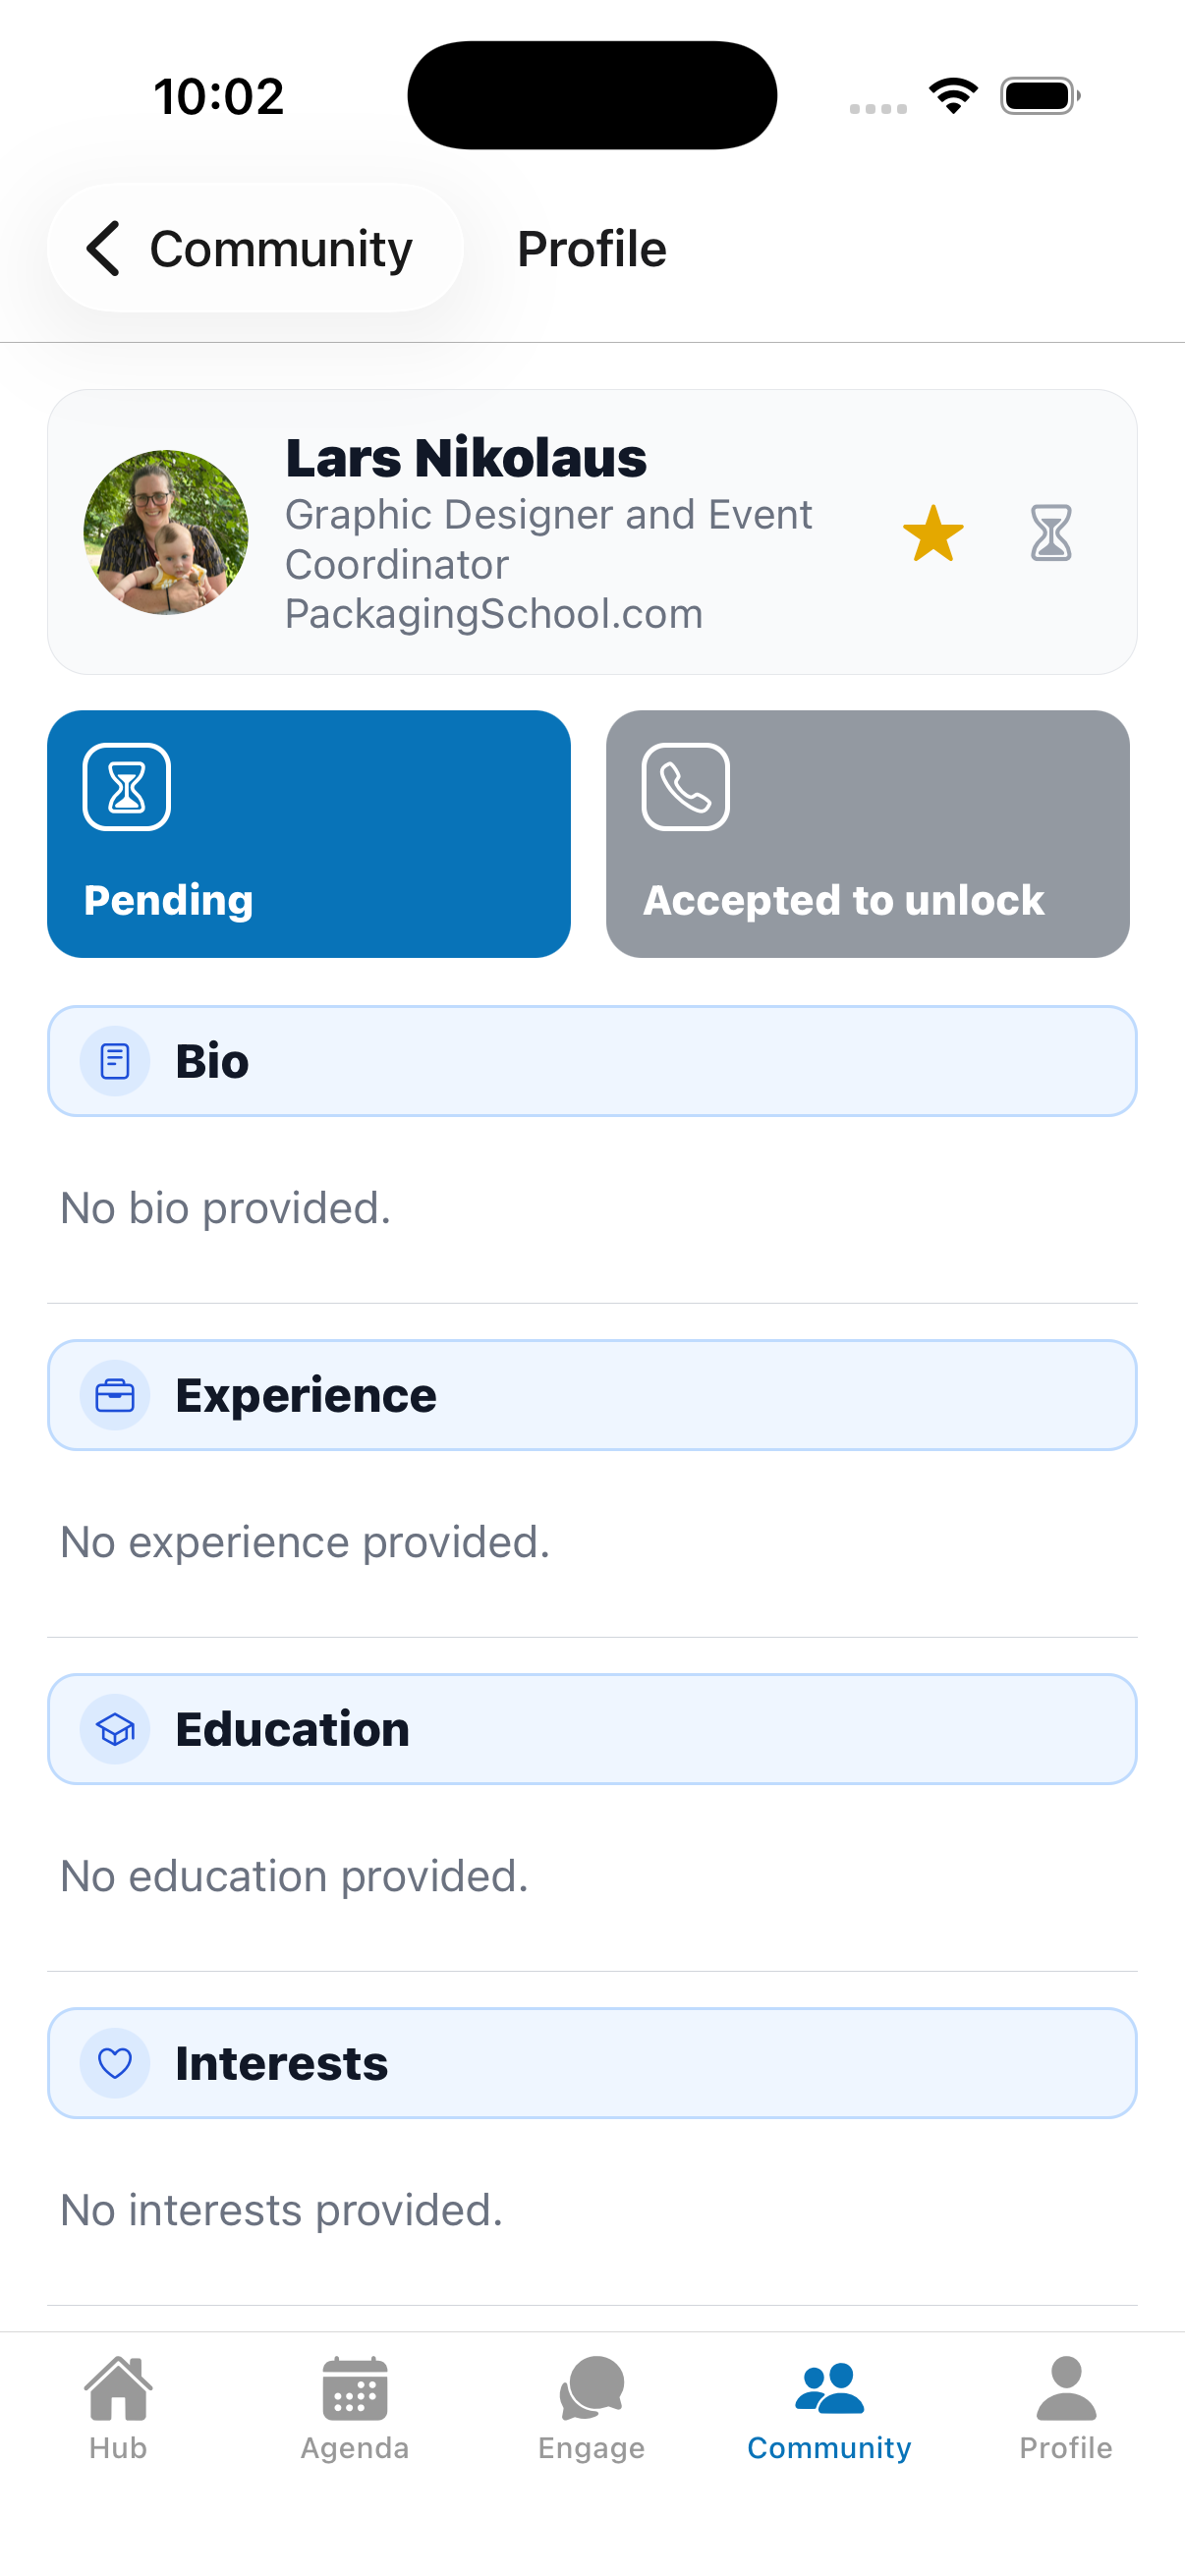
Tap the star icon on a person’s profile (or in the directory) to favorite them for quick access later. Find them again under Favorites.
6.5 Scanning an Attendee’s QR Code
In person, you can scan someone’s QR code (usually shown at the top of their Hub) to jump straight to their profile.
- From Profile, tap Scan Contact (or use the Scan tool).
- Point your camera at the other person’s QR code on their Hub (or their full-screen QR).
- Their profile opens so you can send a request.
- Tap Scan again to scan another person.
6.6 Saving a Contact to Your Phone
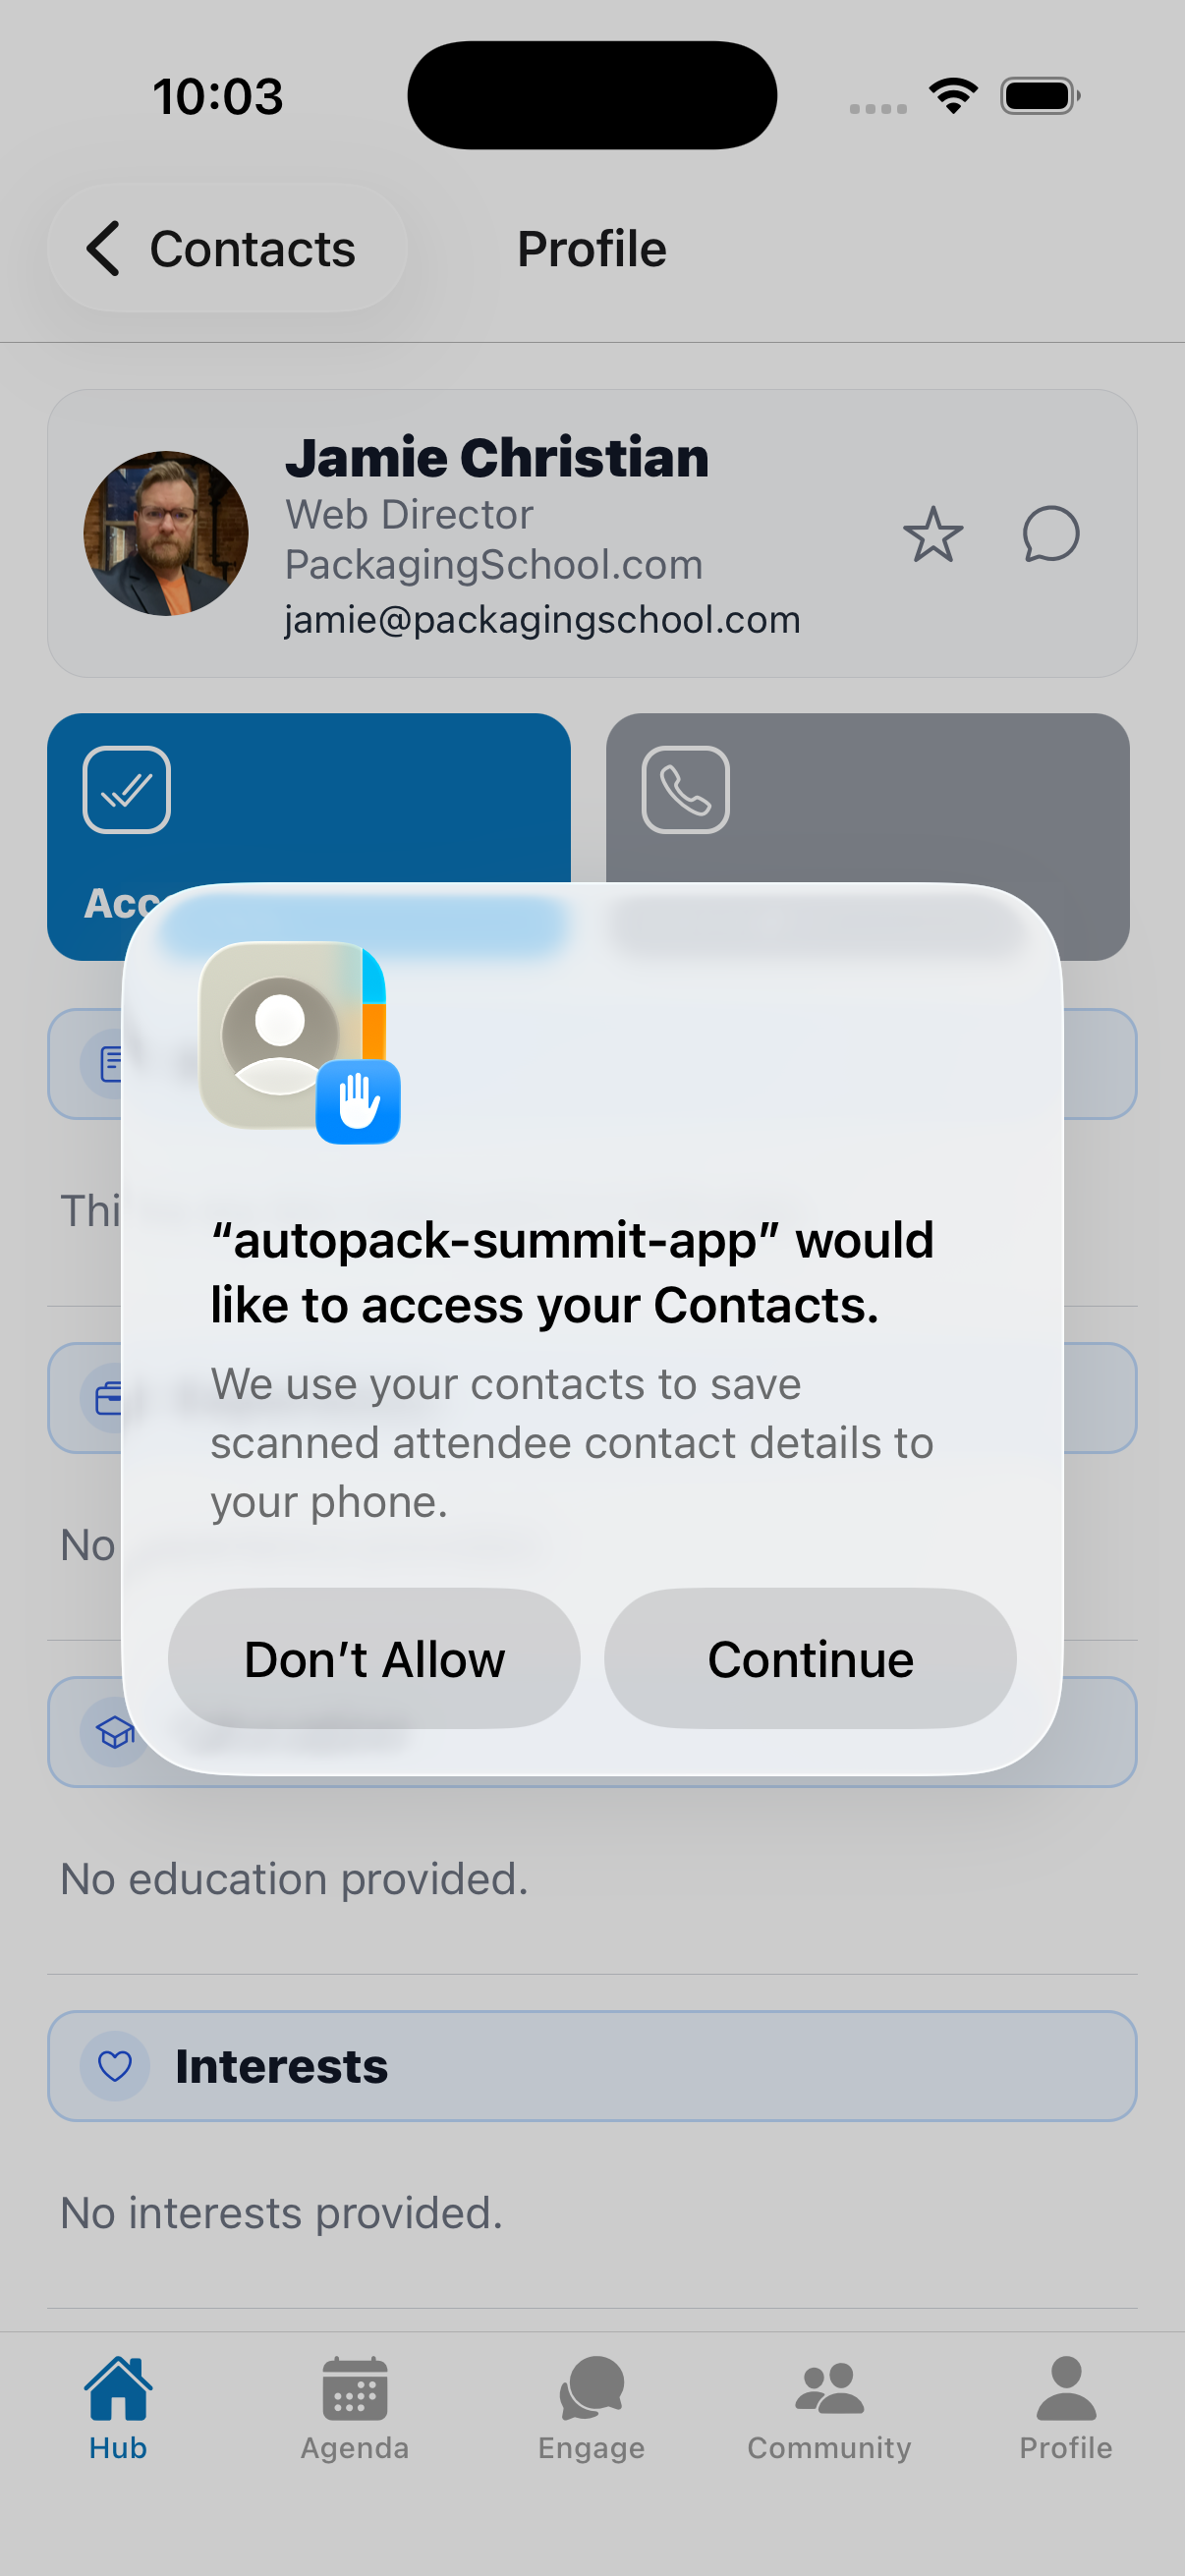
Once a request is accepted, the Add to phone contacts tile unlocks on that person’s profile. Tap it (allow Contacts access if asked) to save their name, company, title, email, phone, and website to your phone’s address book.
6.7 Contact Notes
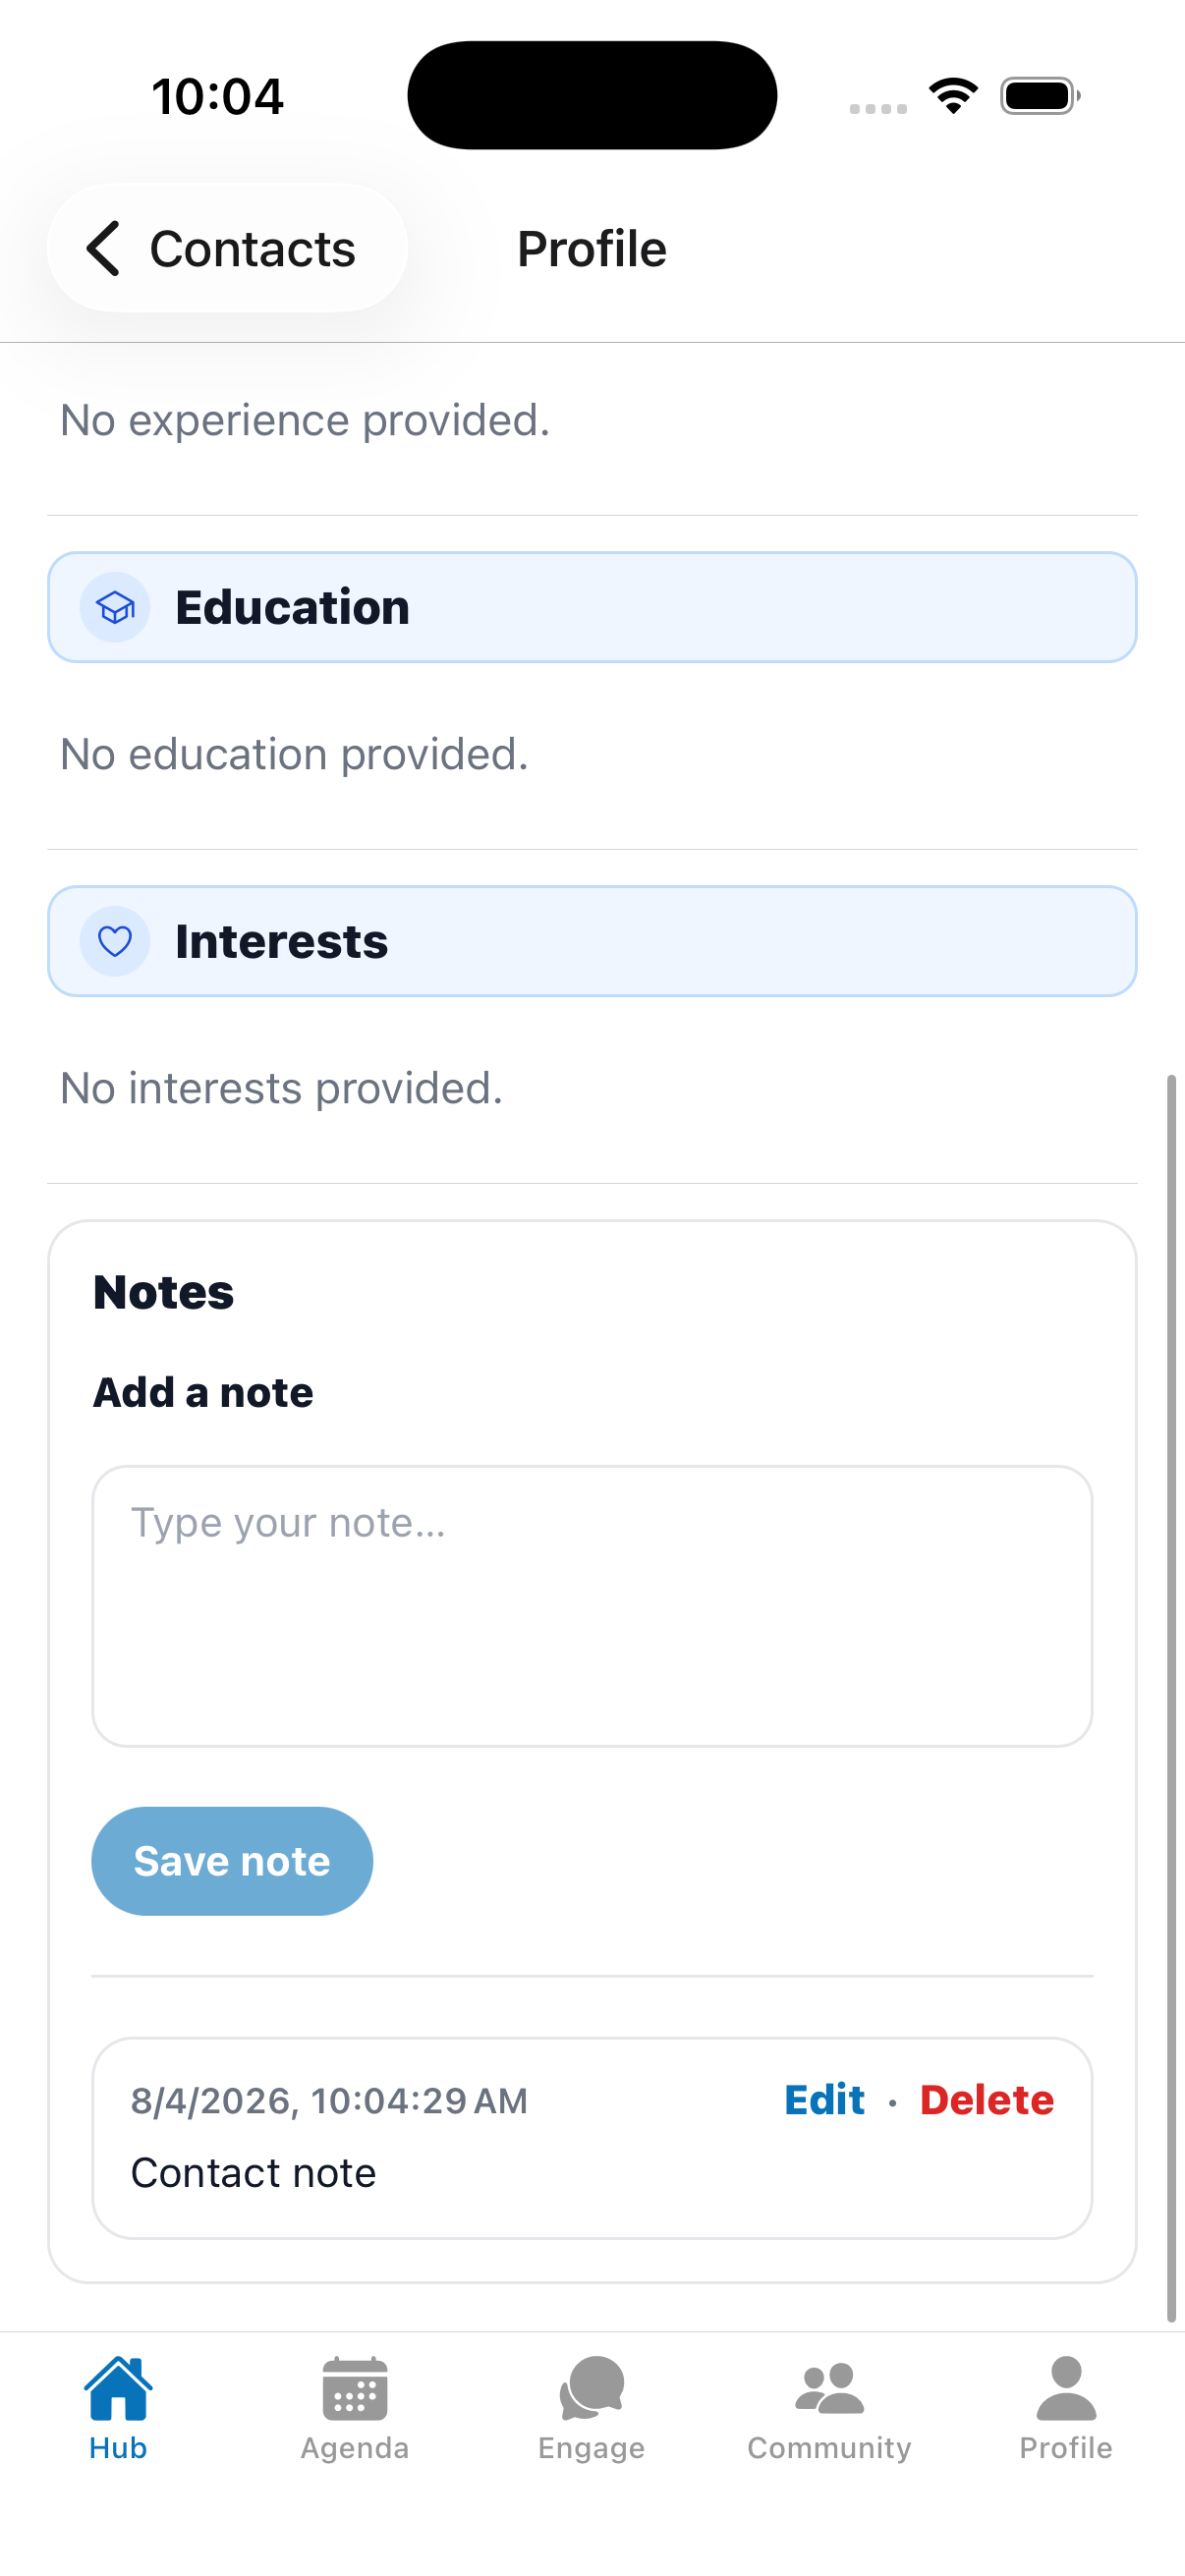
At the bottom of any person’s profile is a Notes section where you can keep private notes about that person (e.g., where you met, follow-ups). Add, edit, and delete notes just like session notes.
7. Requests & Chat Approvals
Manage all your connections from Engage → Requests (also on the Hub as the Requests quick tool). There are three tabs.
7.1 Received Requests (Approve or Decline)
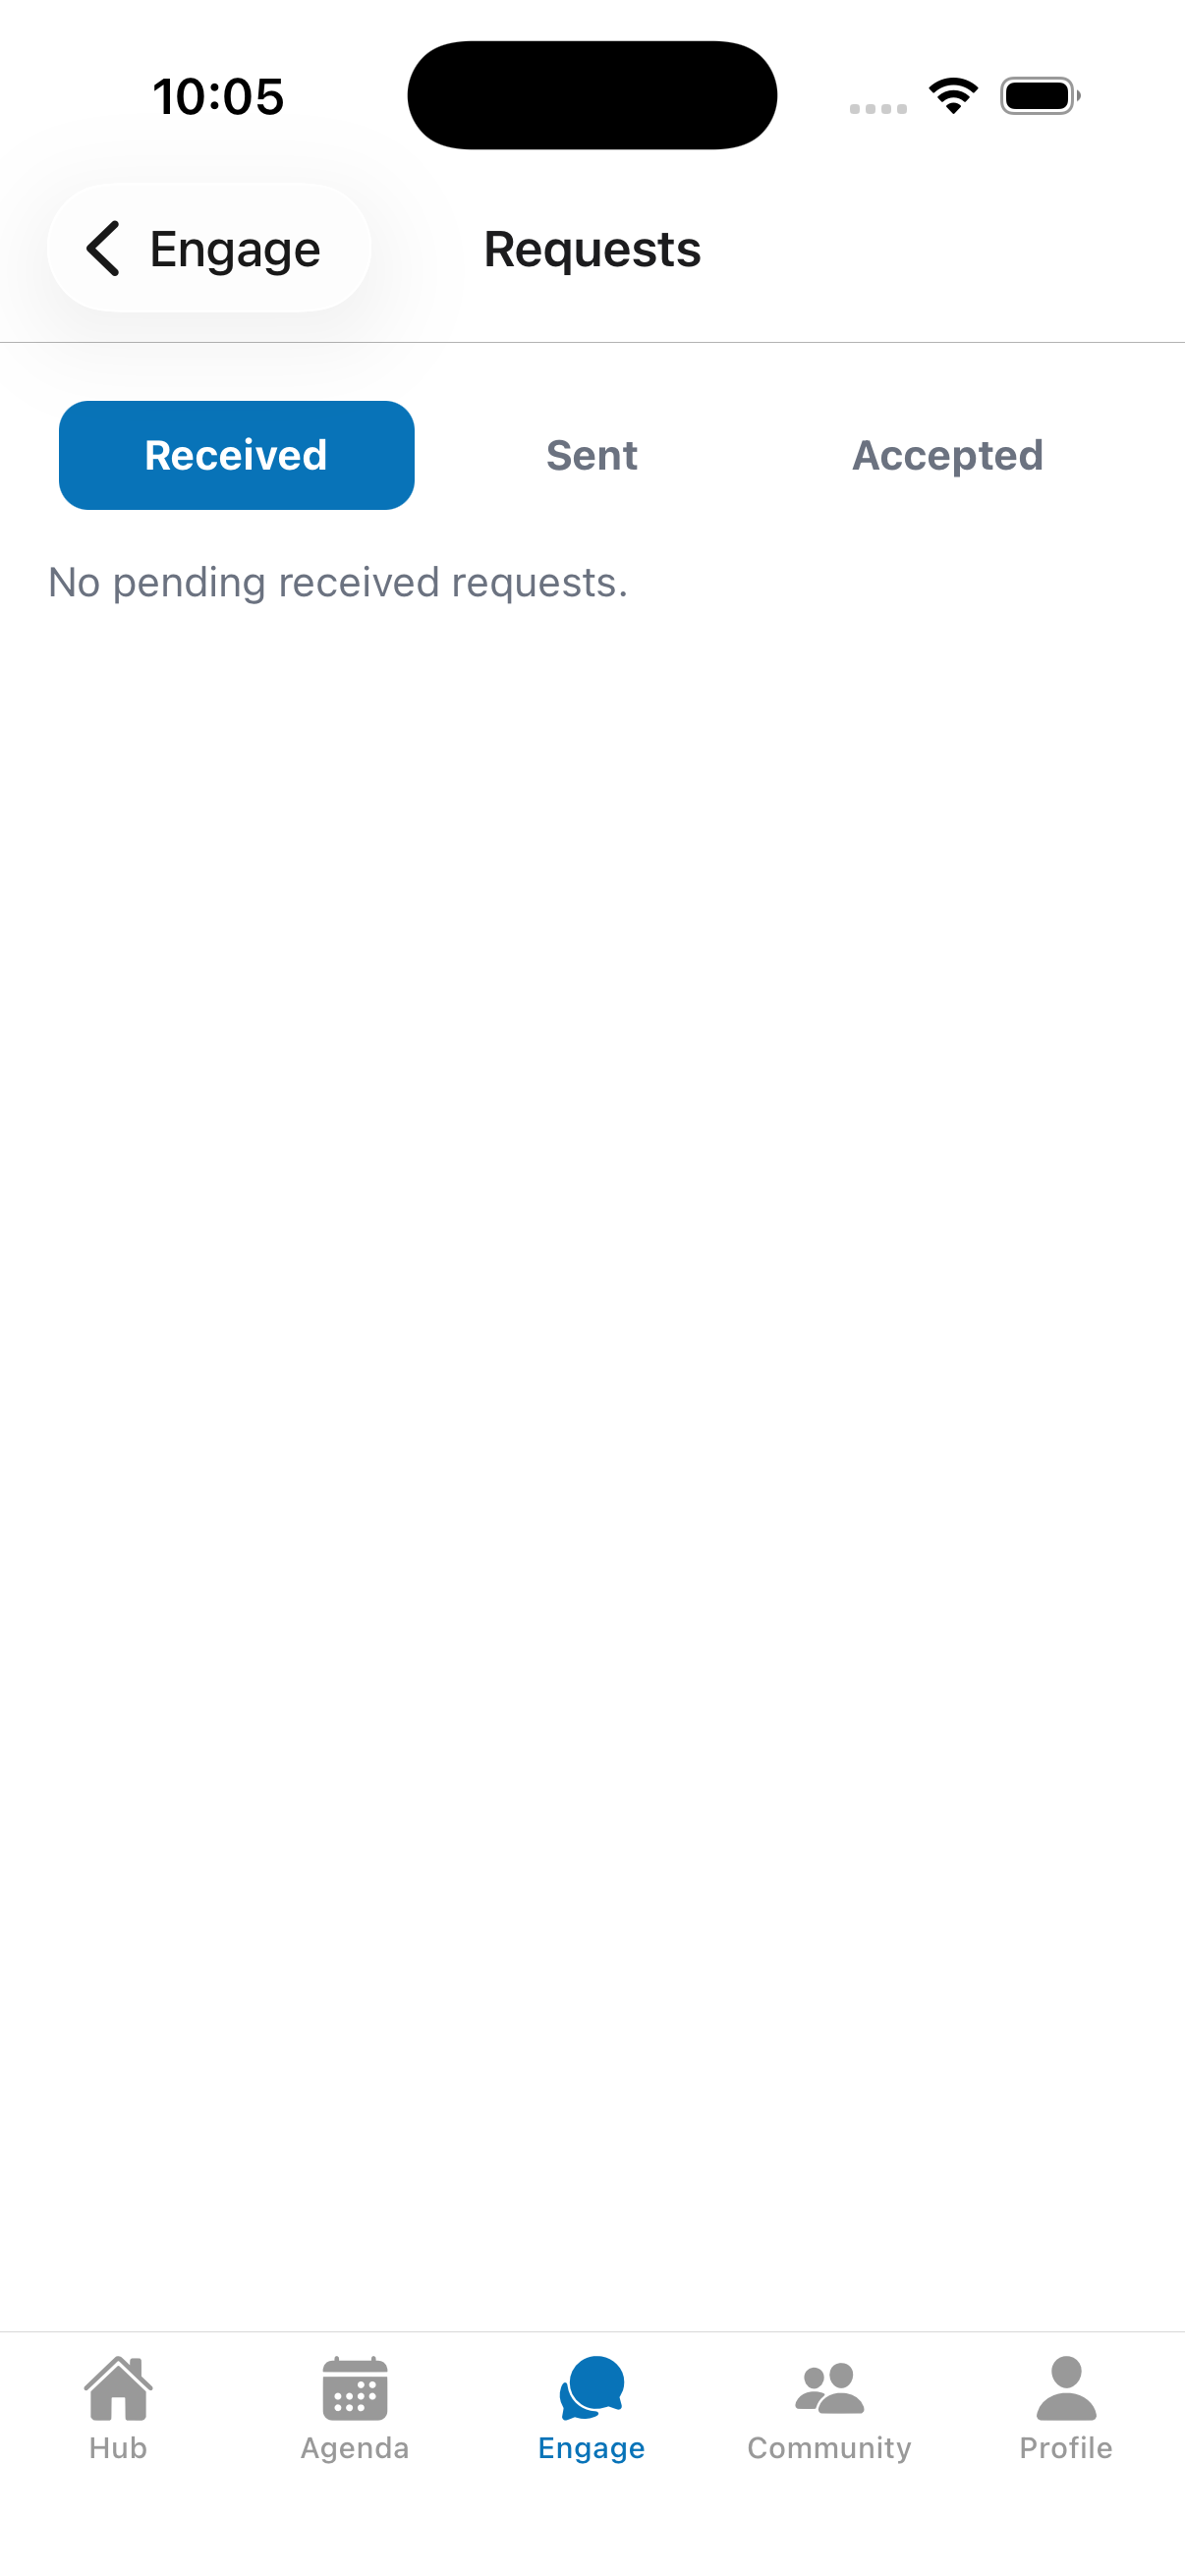
The Received tab lists people who want to connect with you, including their intro message.
- Tap Accept to approve — this instantly opens a chat with them.
- Tap Decline to dismiss the request.
7.2 Sent Requests
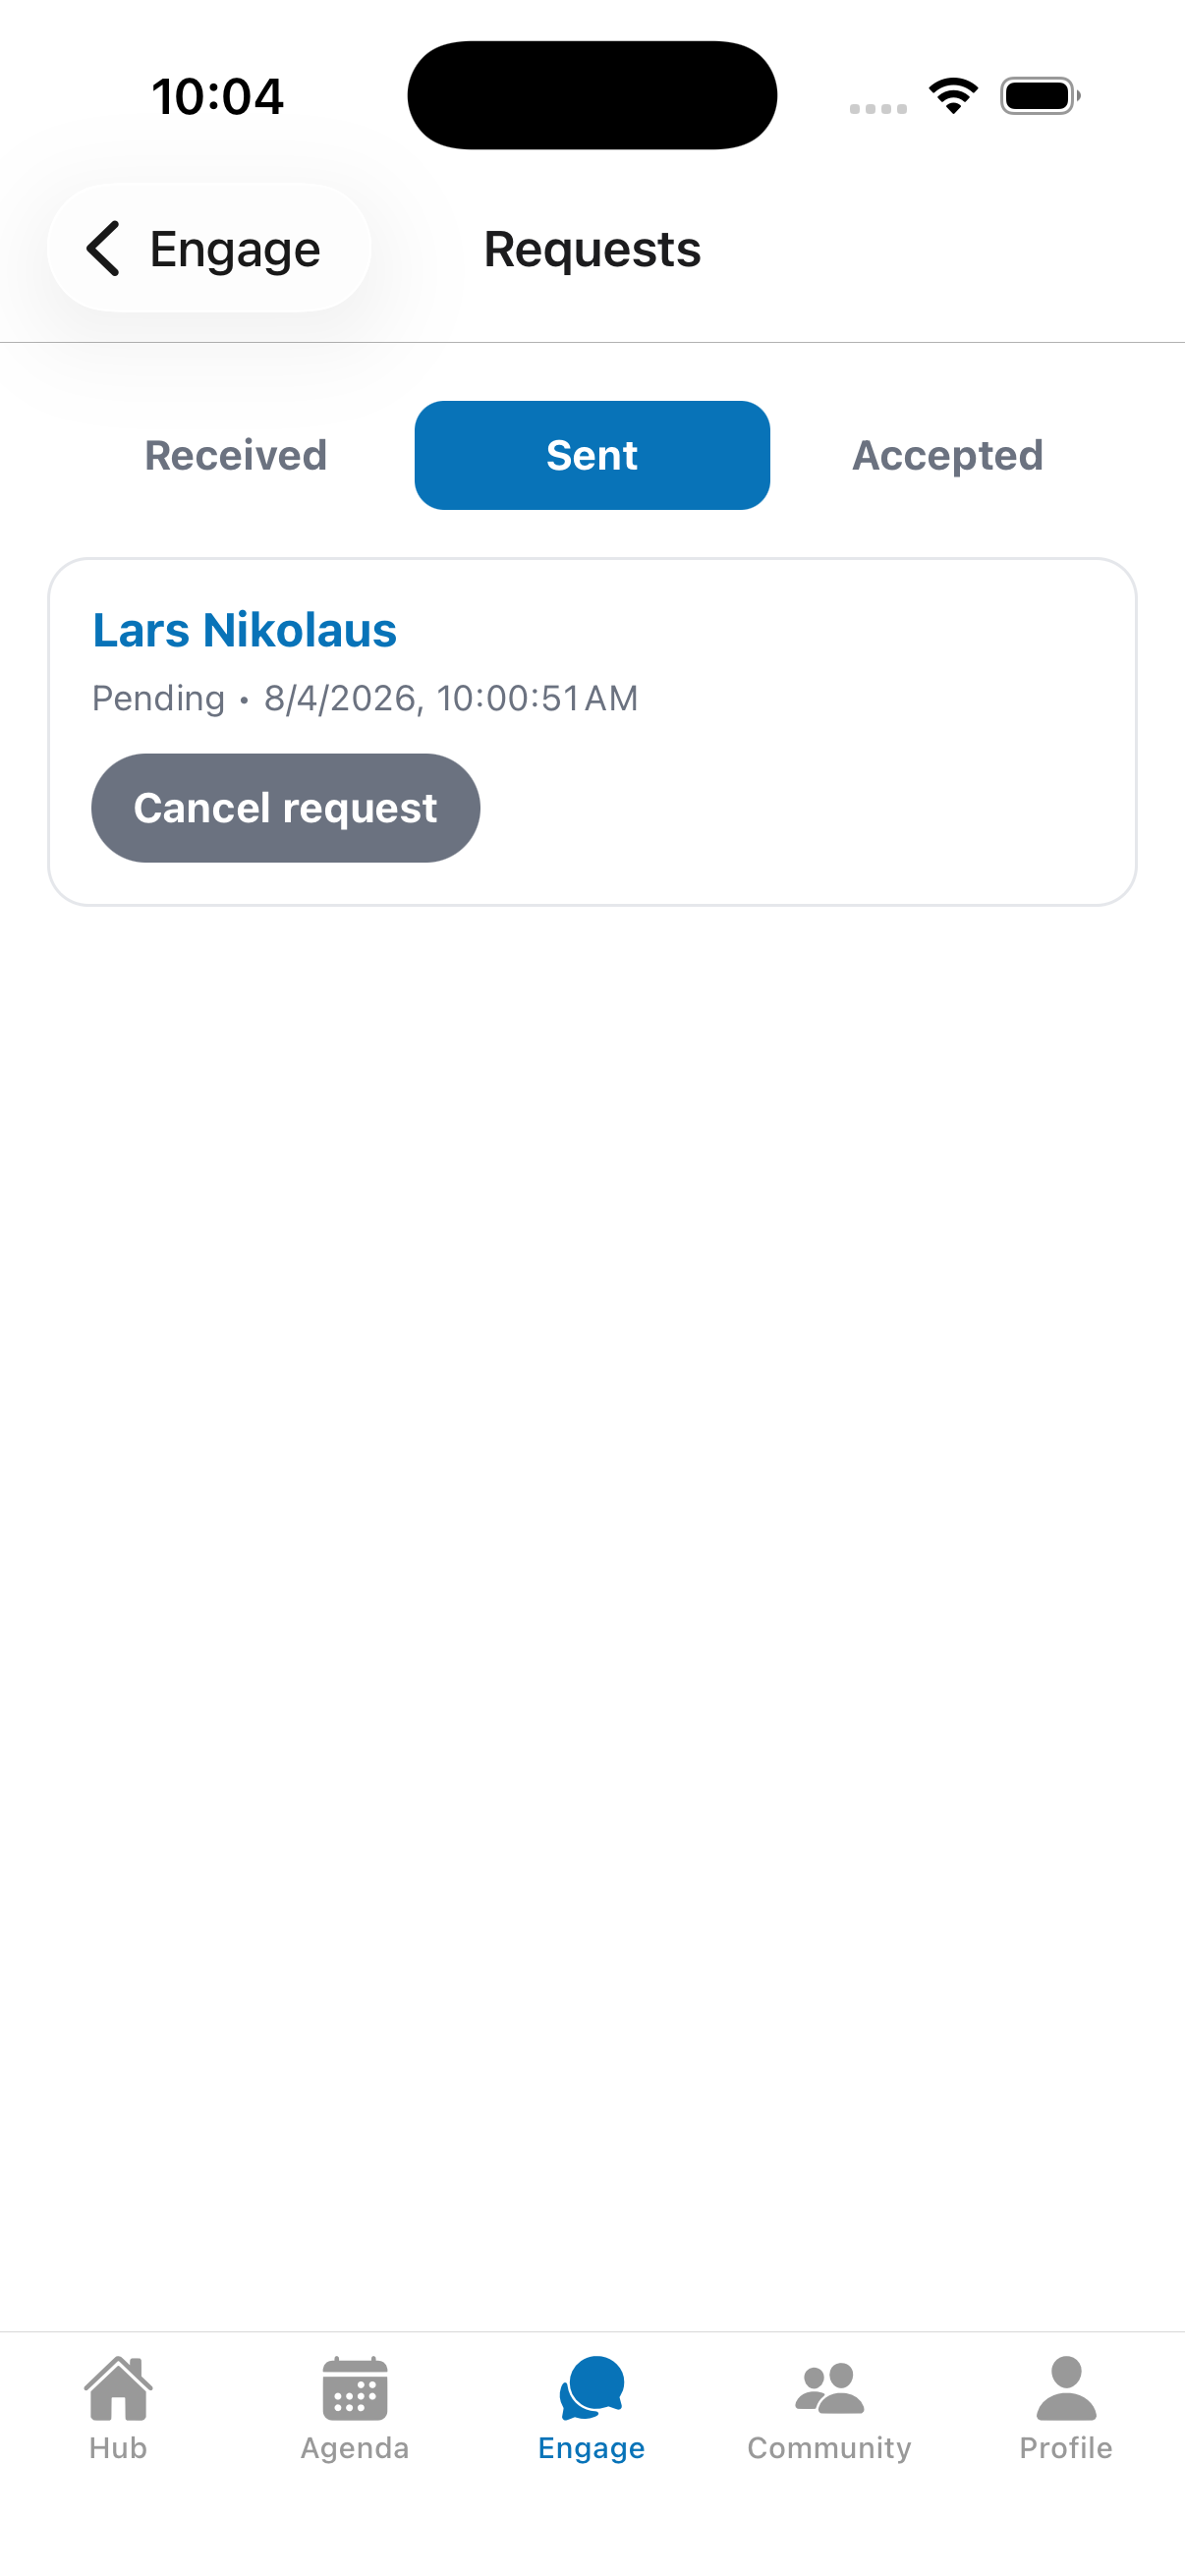
The Sent tab shows requests you’ve sent that are still pending. Tap Cancel request to withdraw one (you’ll be asked to confirm).
7.3 Accepted Connections
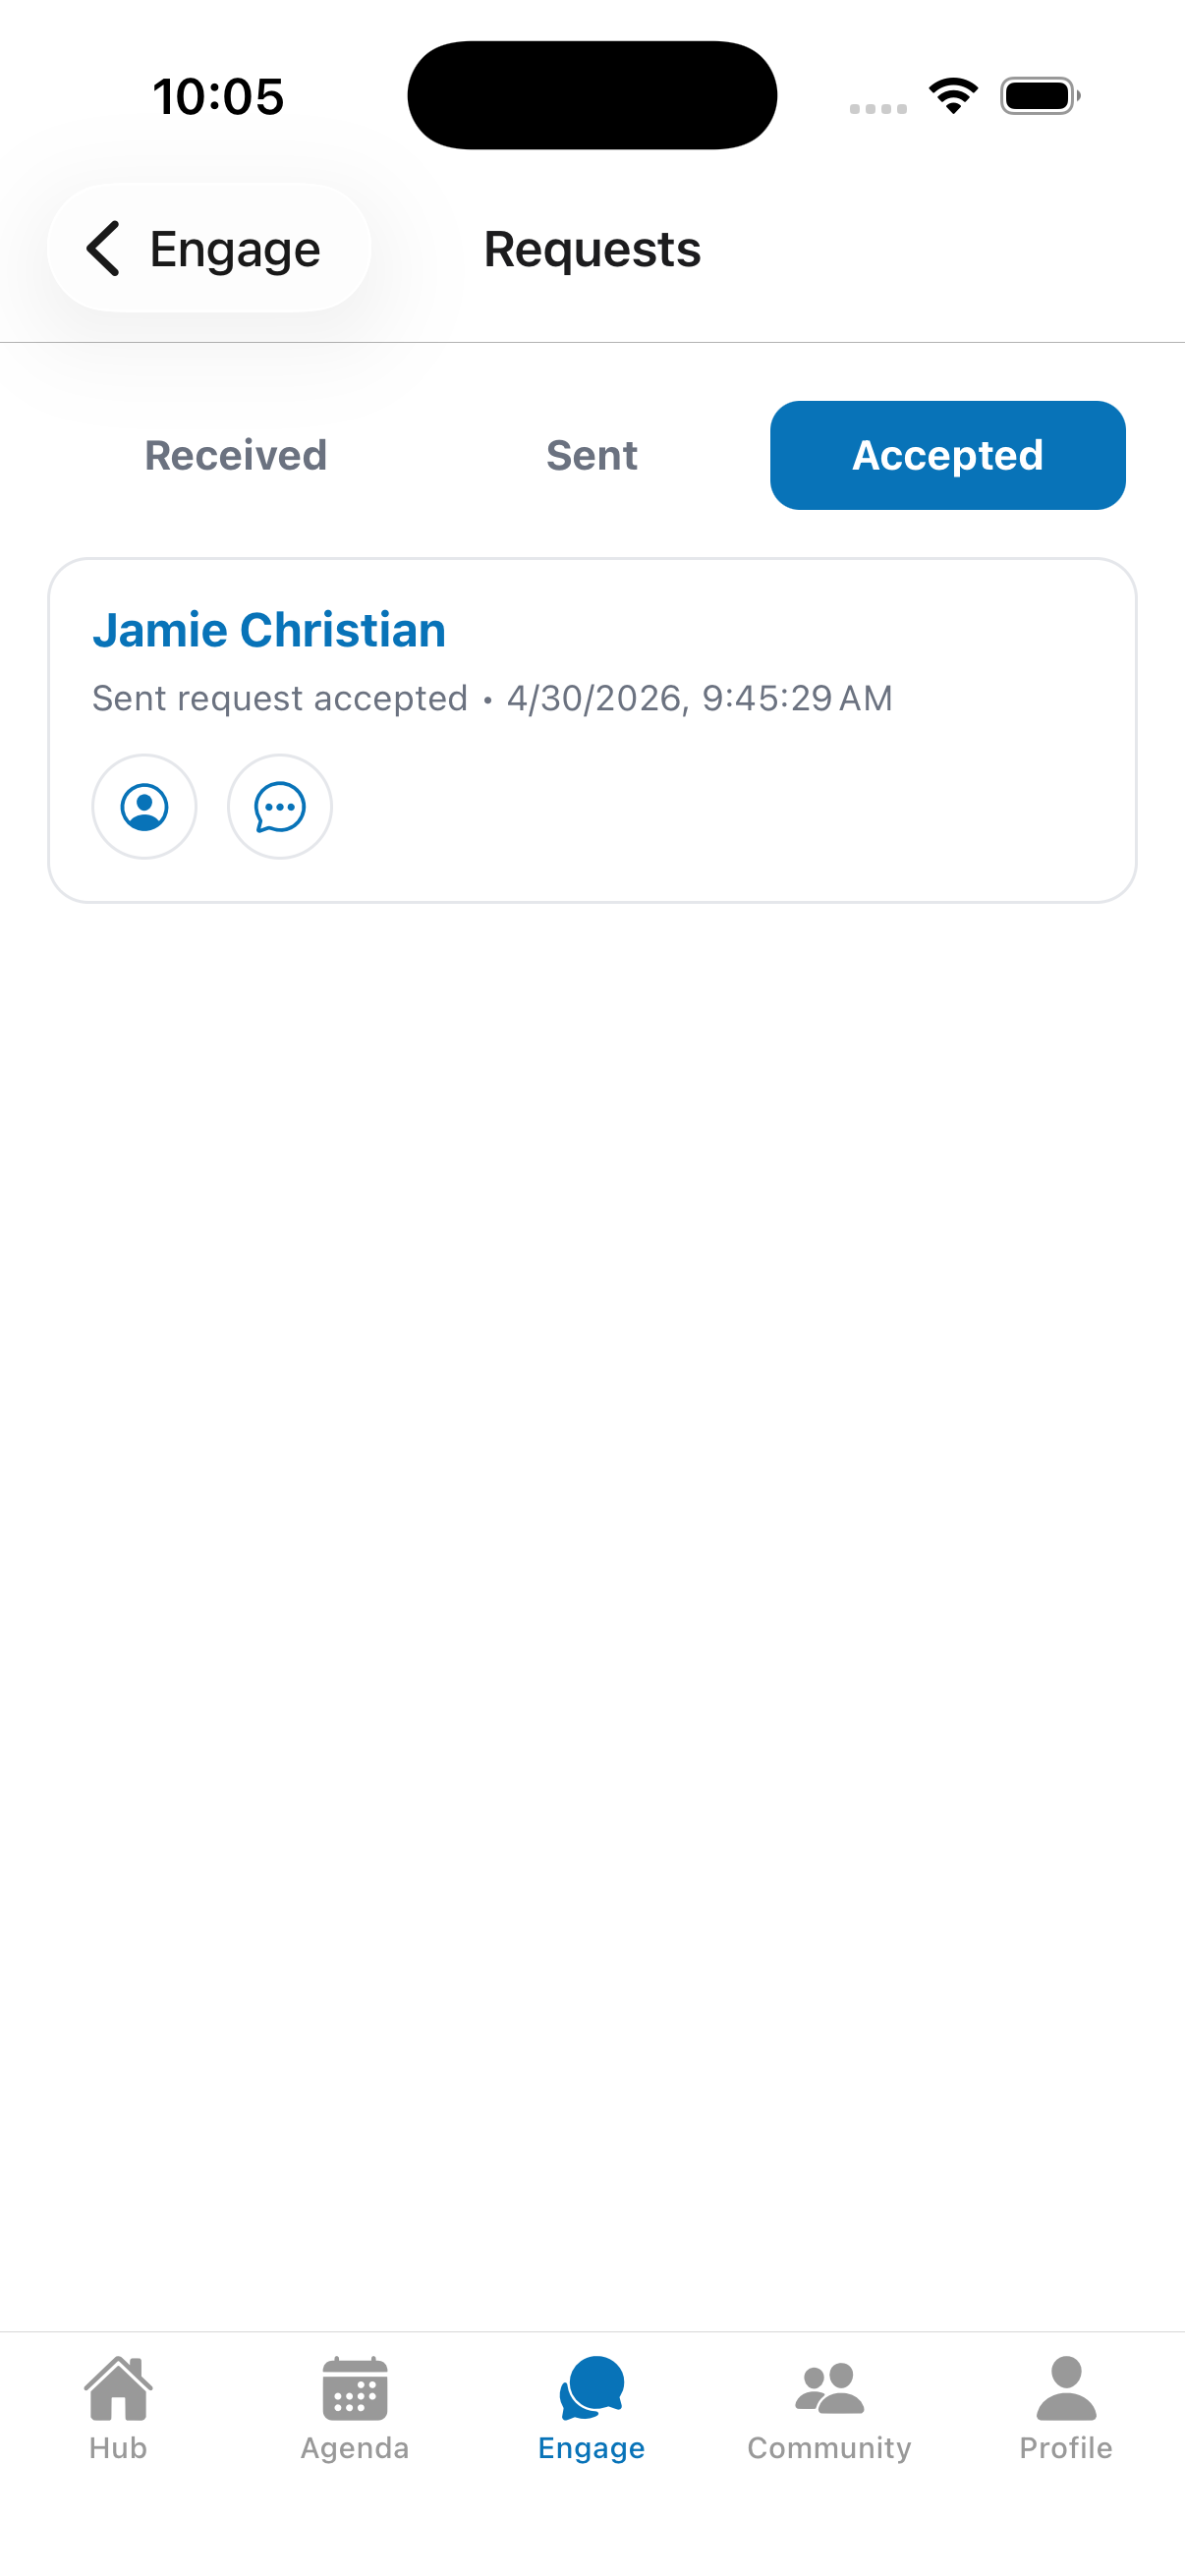
The Accepted tab lists everyone you’re now connected with. For each, you can:
- Tap the person icon to open their profile.
- Tap the chat icon to open your conversation.
8. Messaging
You can message someone only after they’ve accepted your contact request (or you’ve accepted theirs).
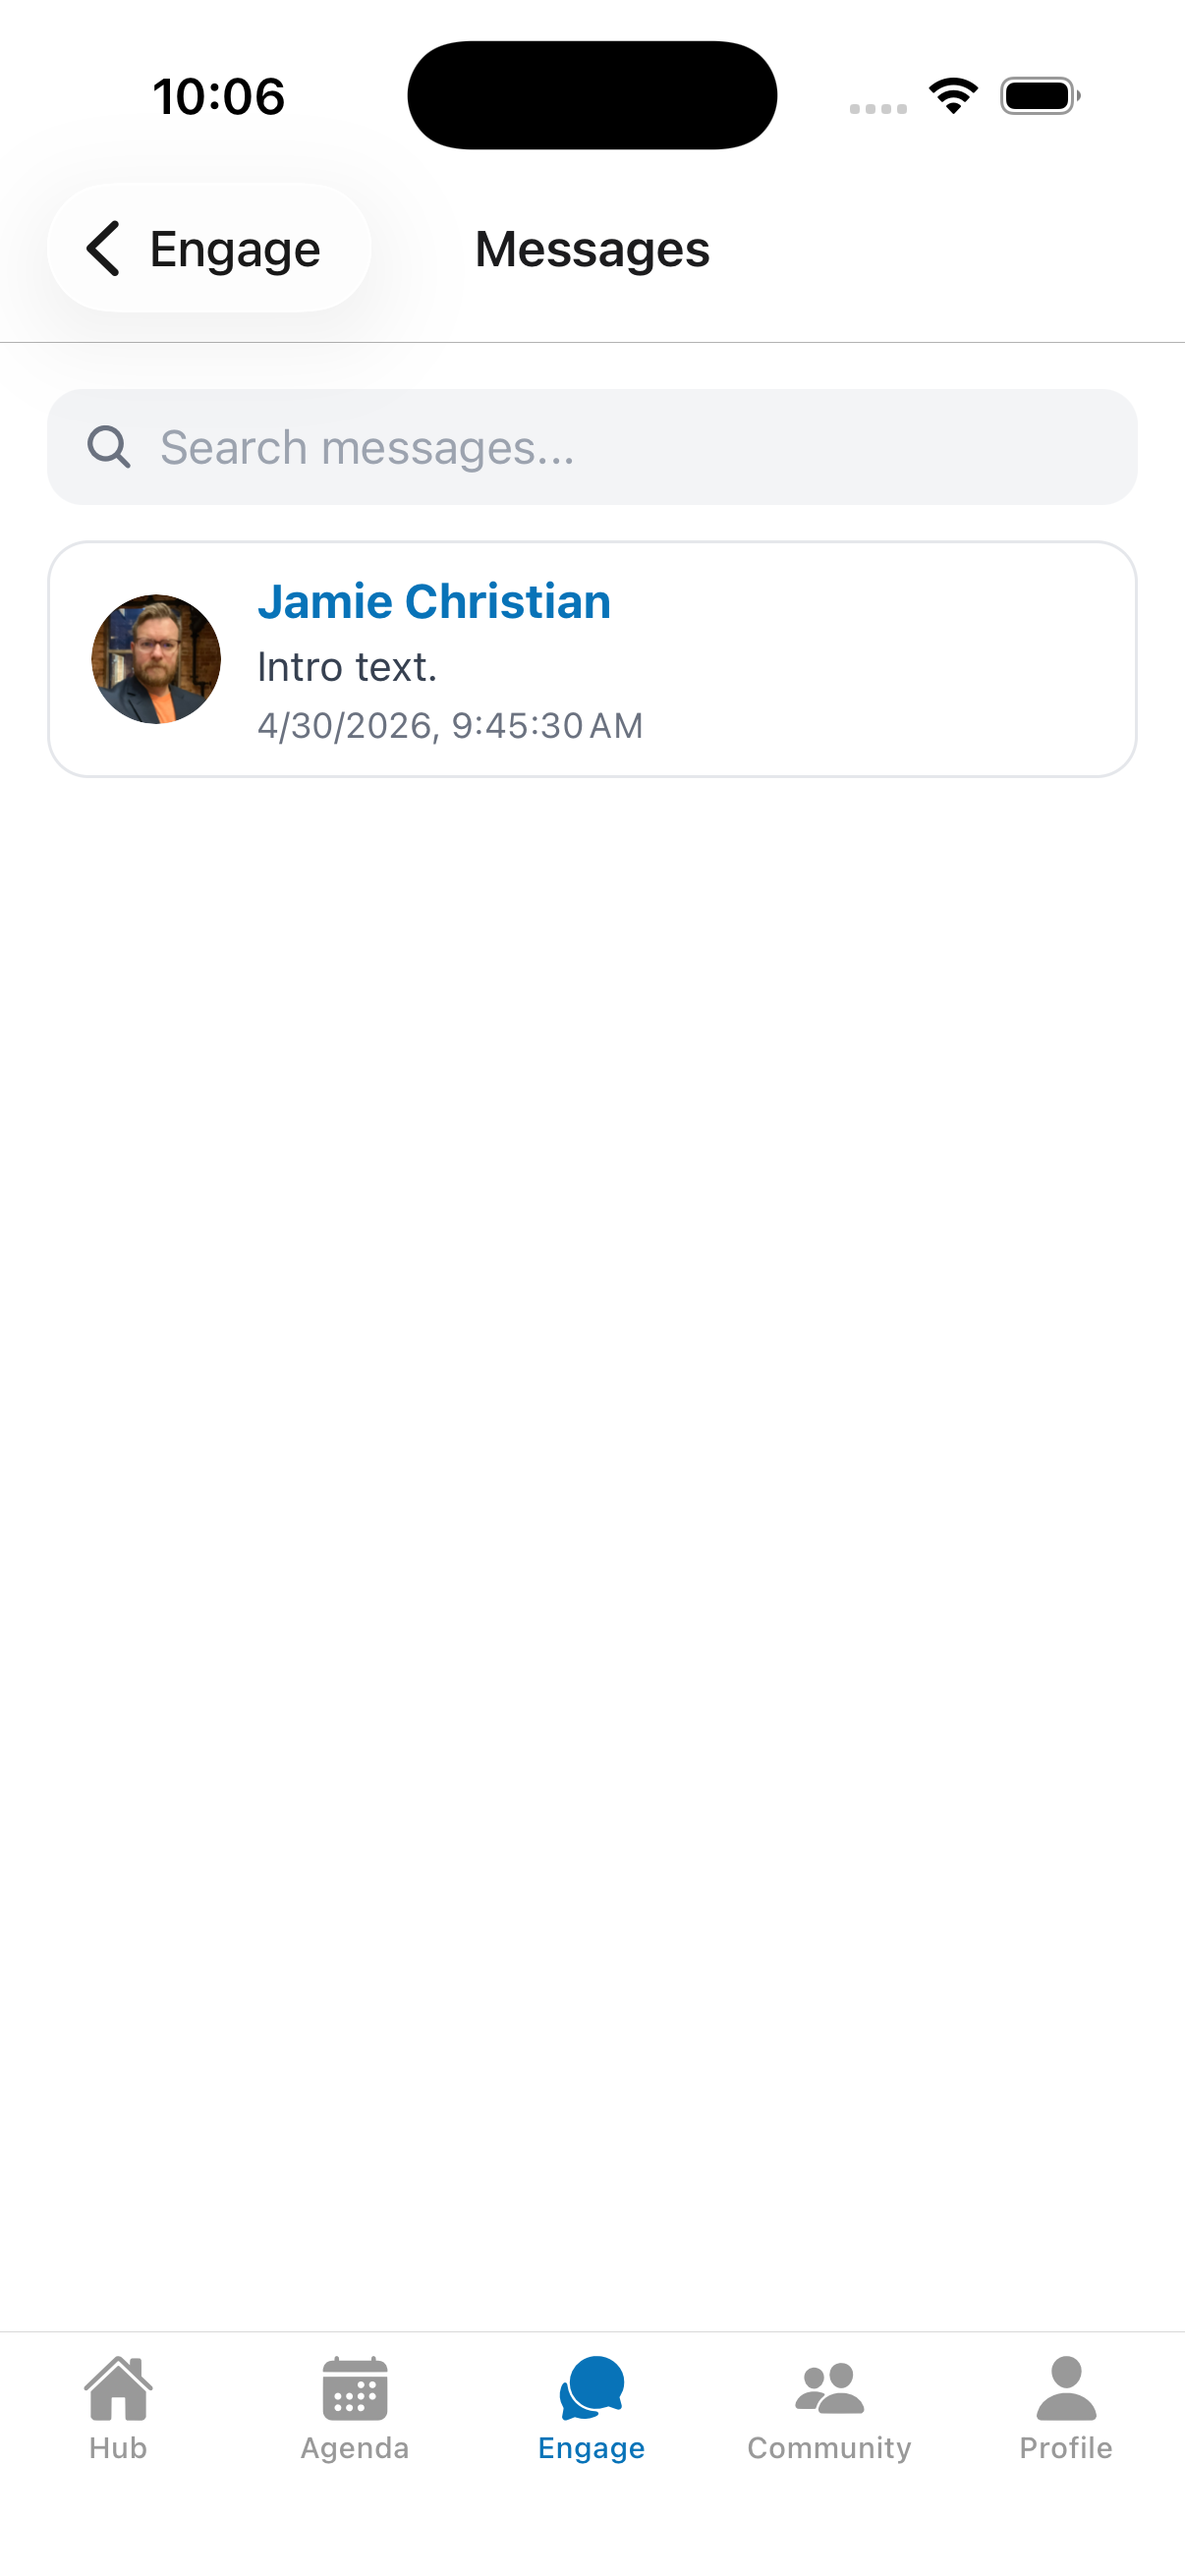
8.1 Messages Inbox
Open Engage → Messages (or the Messages quick tool) to see all your conversations. Unread conversations are indicated with a badge.
8.2 Chatting in a Conversation
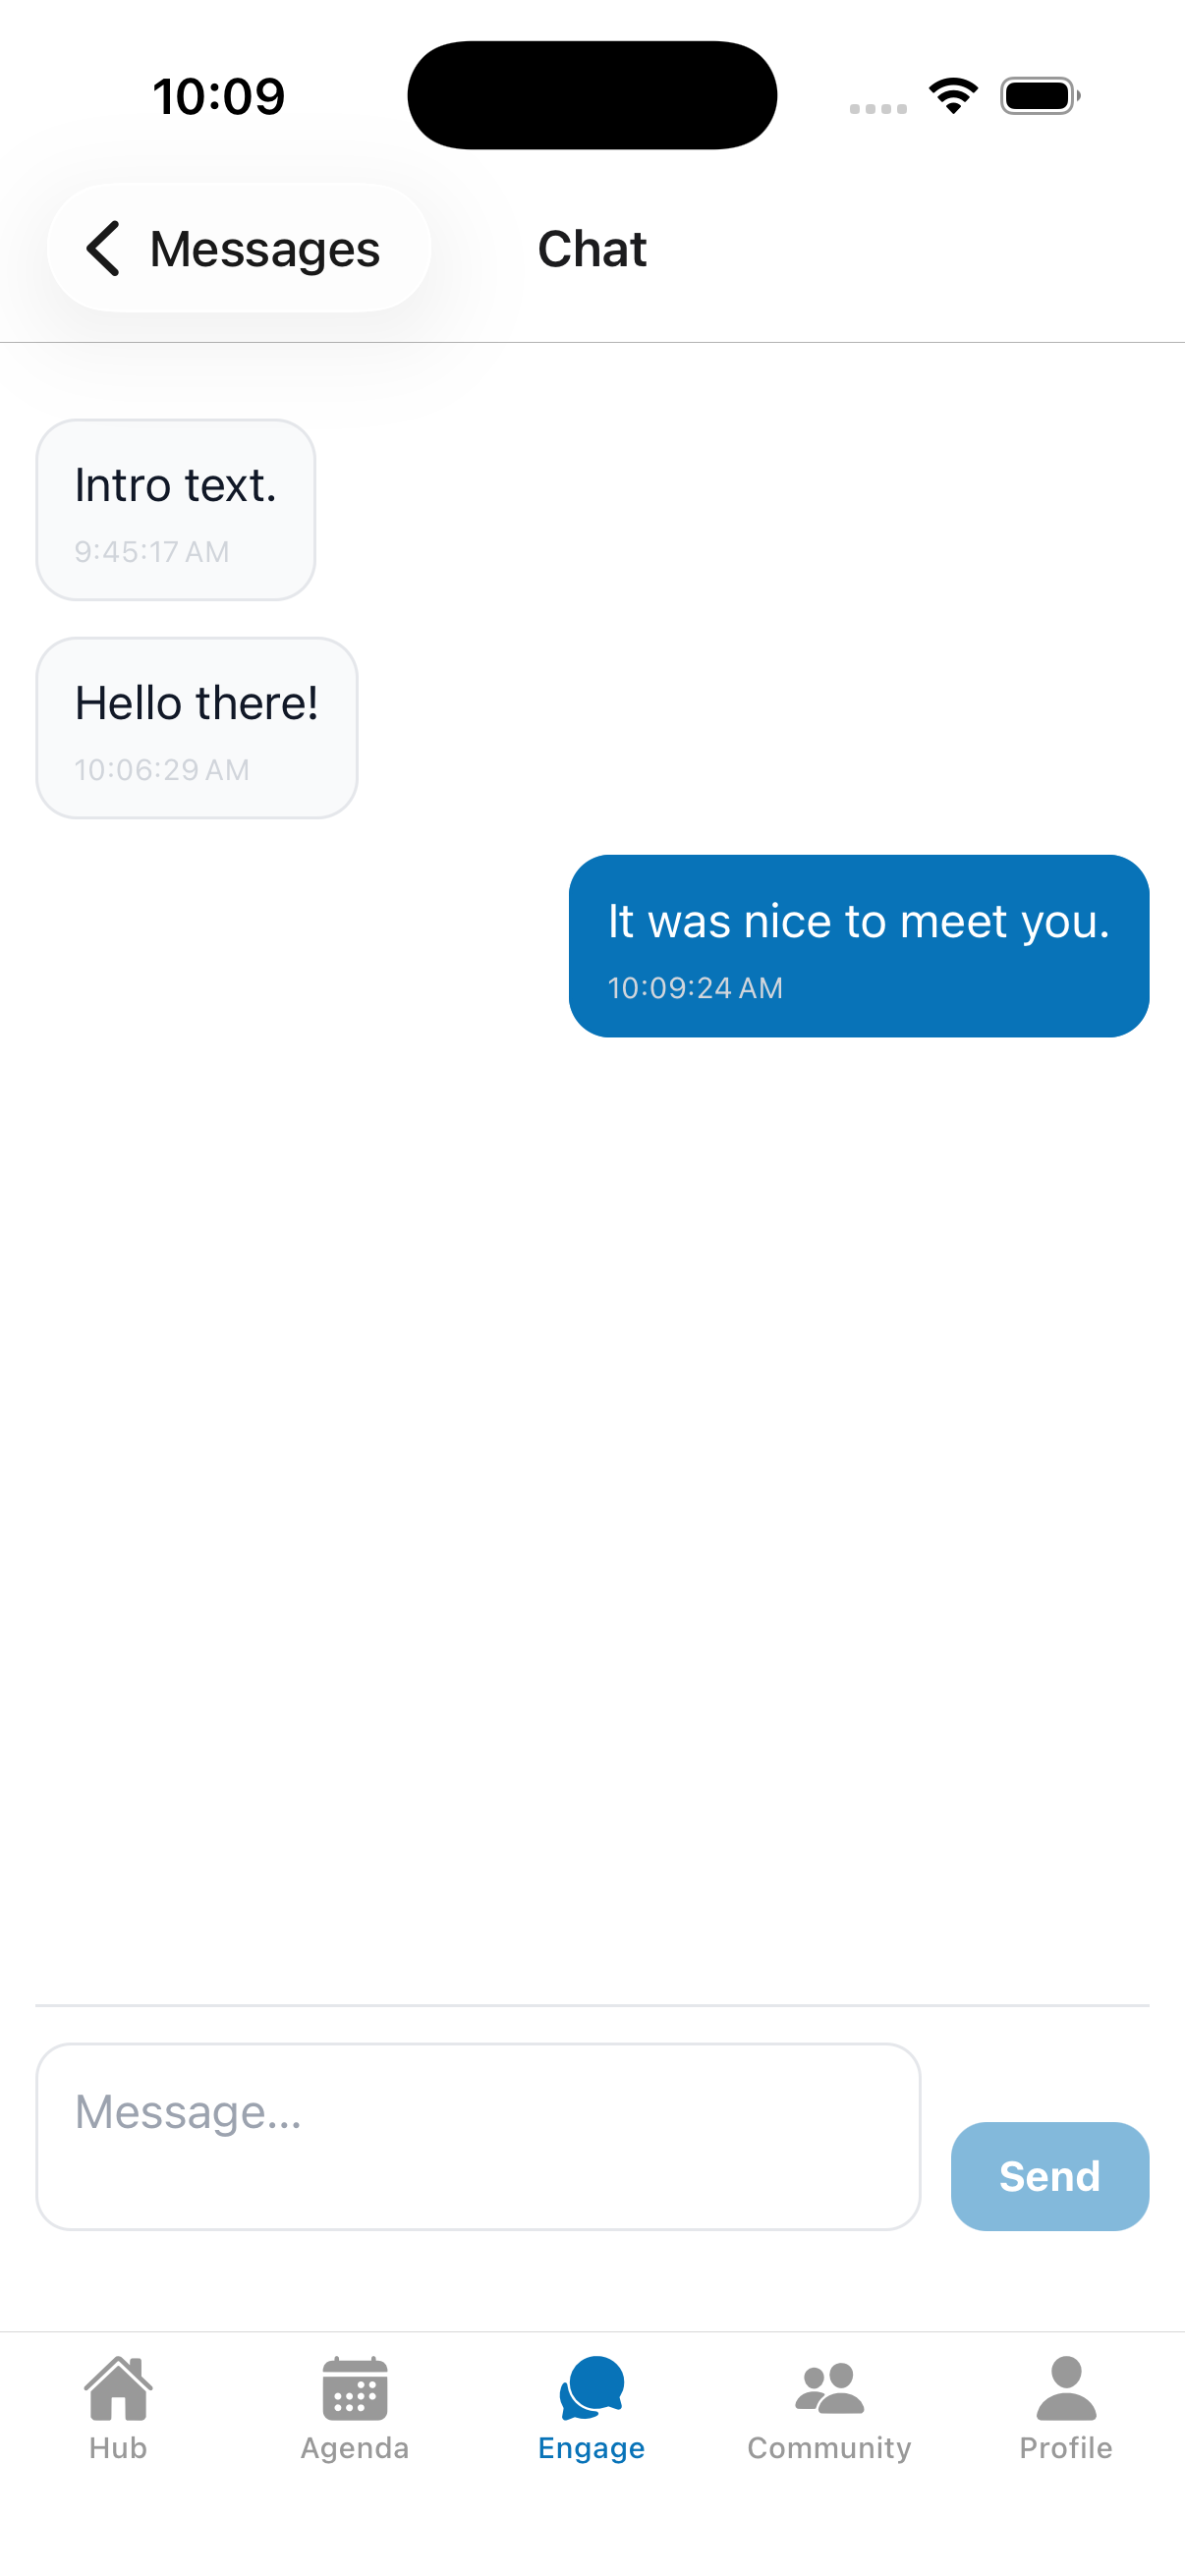
Tap a conversation to open it.
- Type in the box at the bottom and tap Send.
- Your messages appear on the right; theirs on the left.
- Messages update in real time, and a “Sending…” label shows briefly while a message is delivered.
9. Passport Challenge
The Passport Challenge encourages you to visit exhibitor booths. Each booth has a QR code — scan it to collect a stamp. Fill your passport to reach 100%.
9.1 Viewing Your Passport
Open the passport from the Passport Challenge card on the Hub or Engage screen.
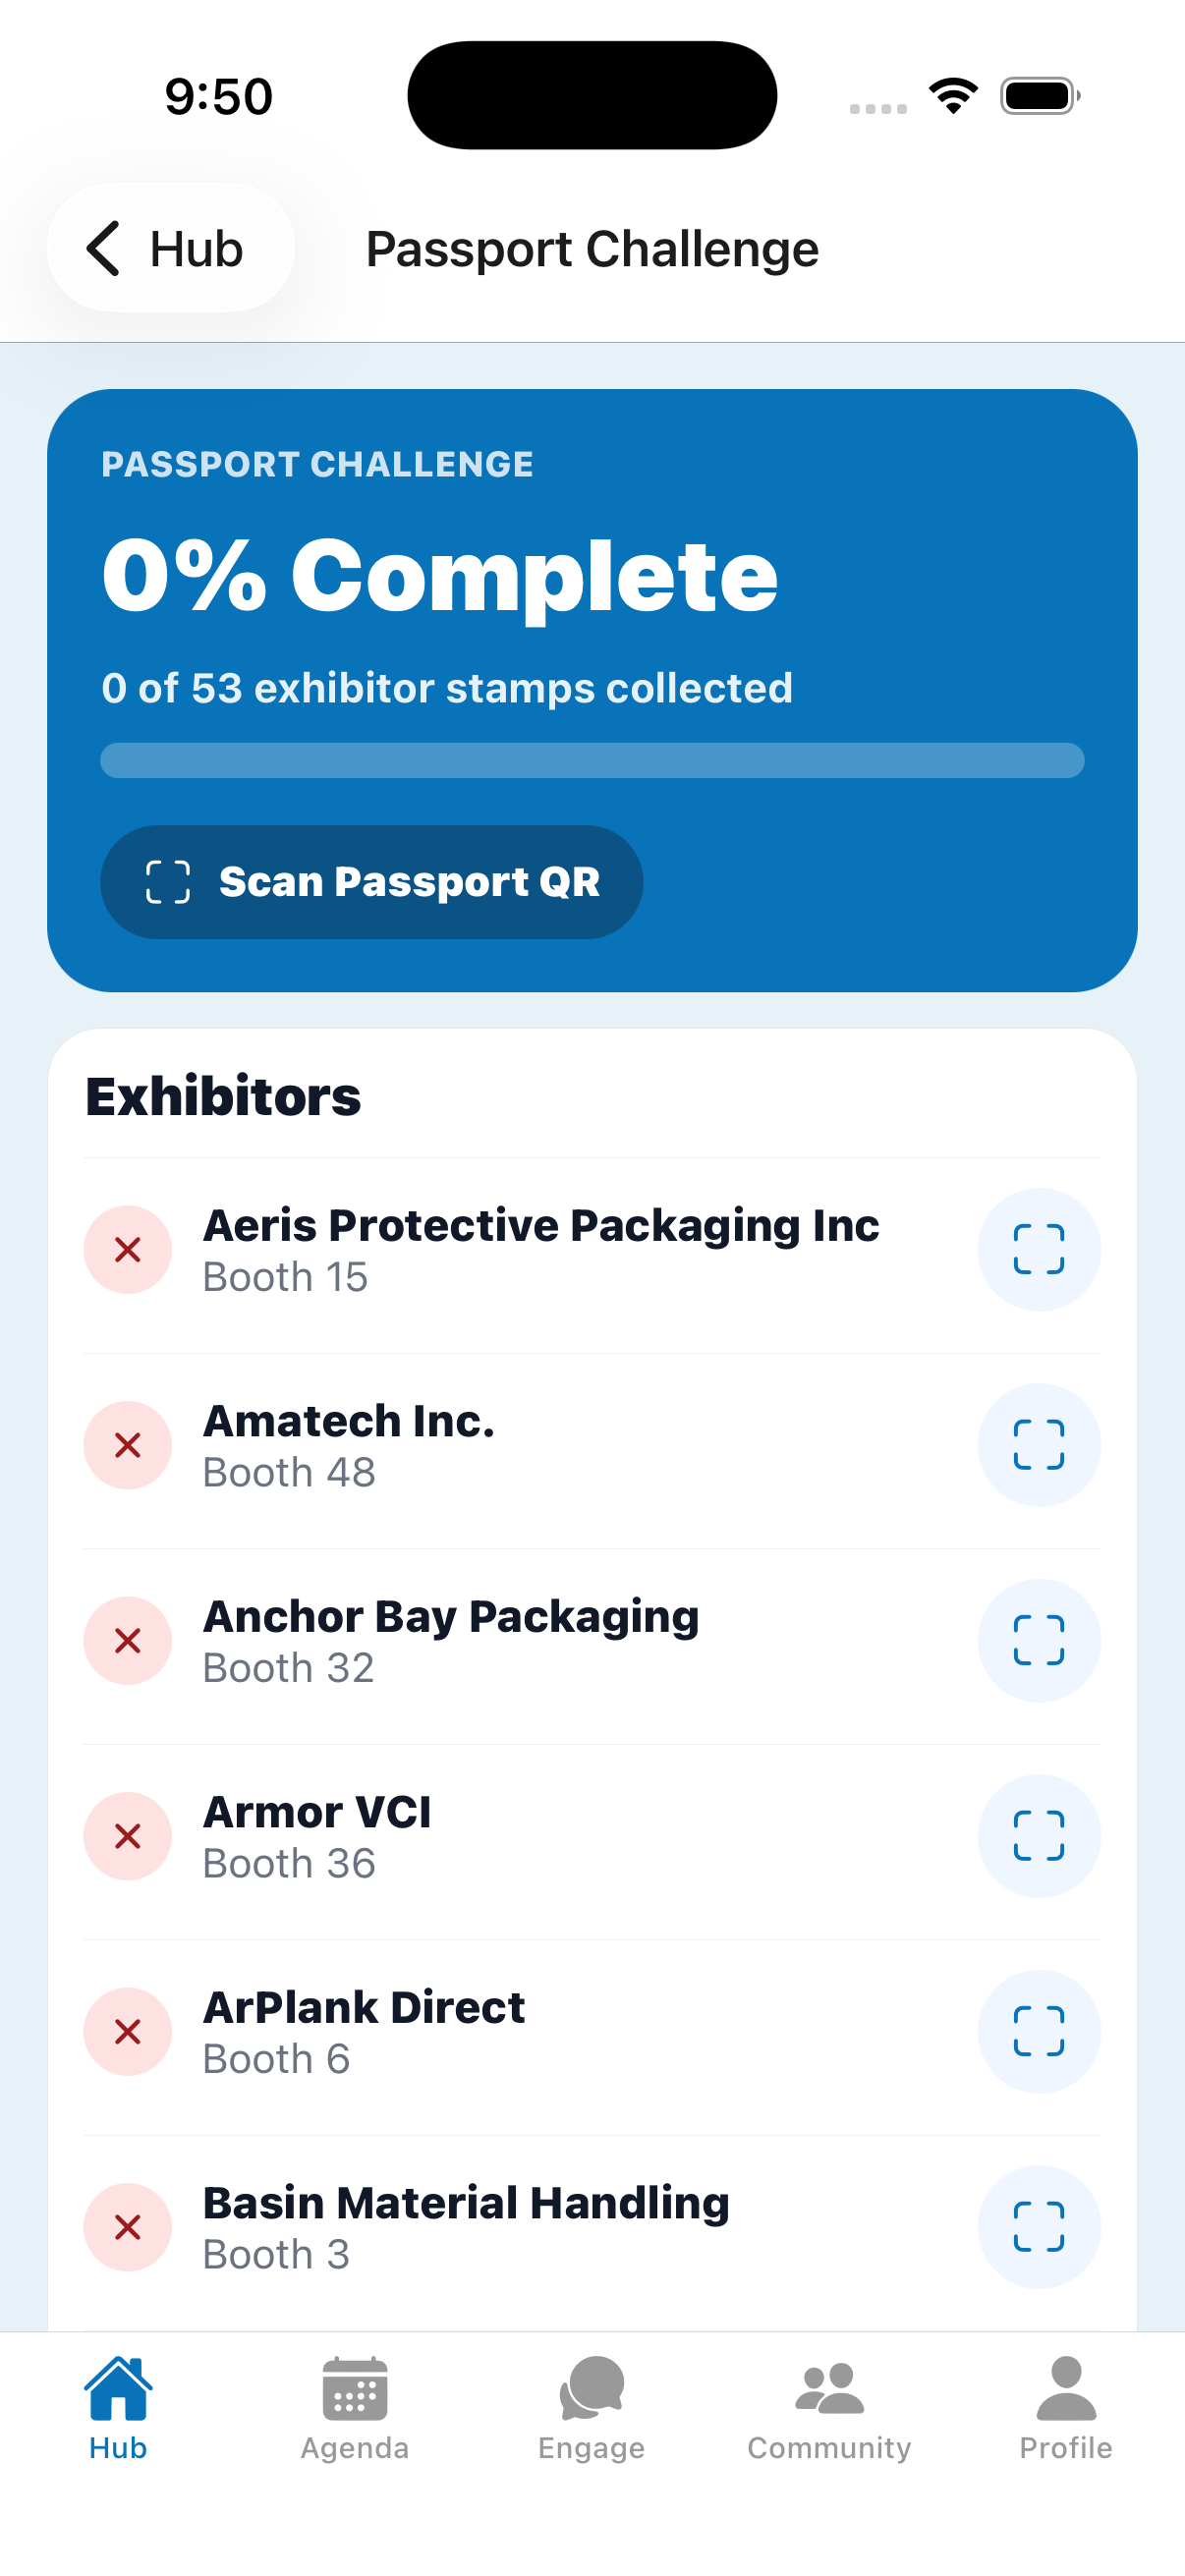
- The top shows your completion percentage and stamp count.
- Below is the list of exhibitors, each marked collected (green check) or not yet (red).
- Pull down to refresh.
9.2 Collecting Stamps by Scanning
- Tap Scan Passport QR at the top, or the scan icon next to a specific exhibitor.
- Allow camera access if prompted.
- Point your camera at the exhibitor’s passport QR code.
- A success screen confirms the stamp was added. Already-collected booths are recognized automatically.
10. Exhibitors, Sponsors & Speakers
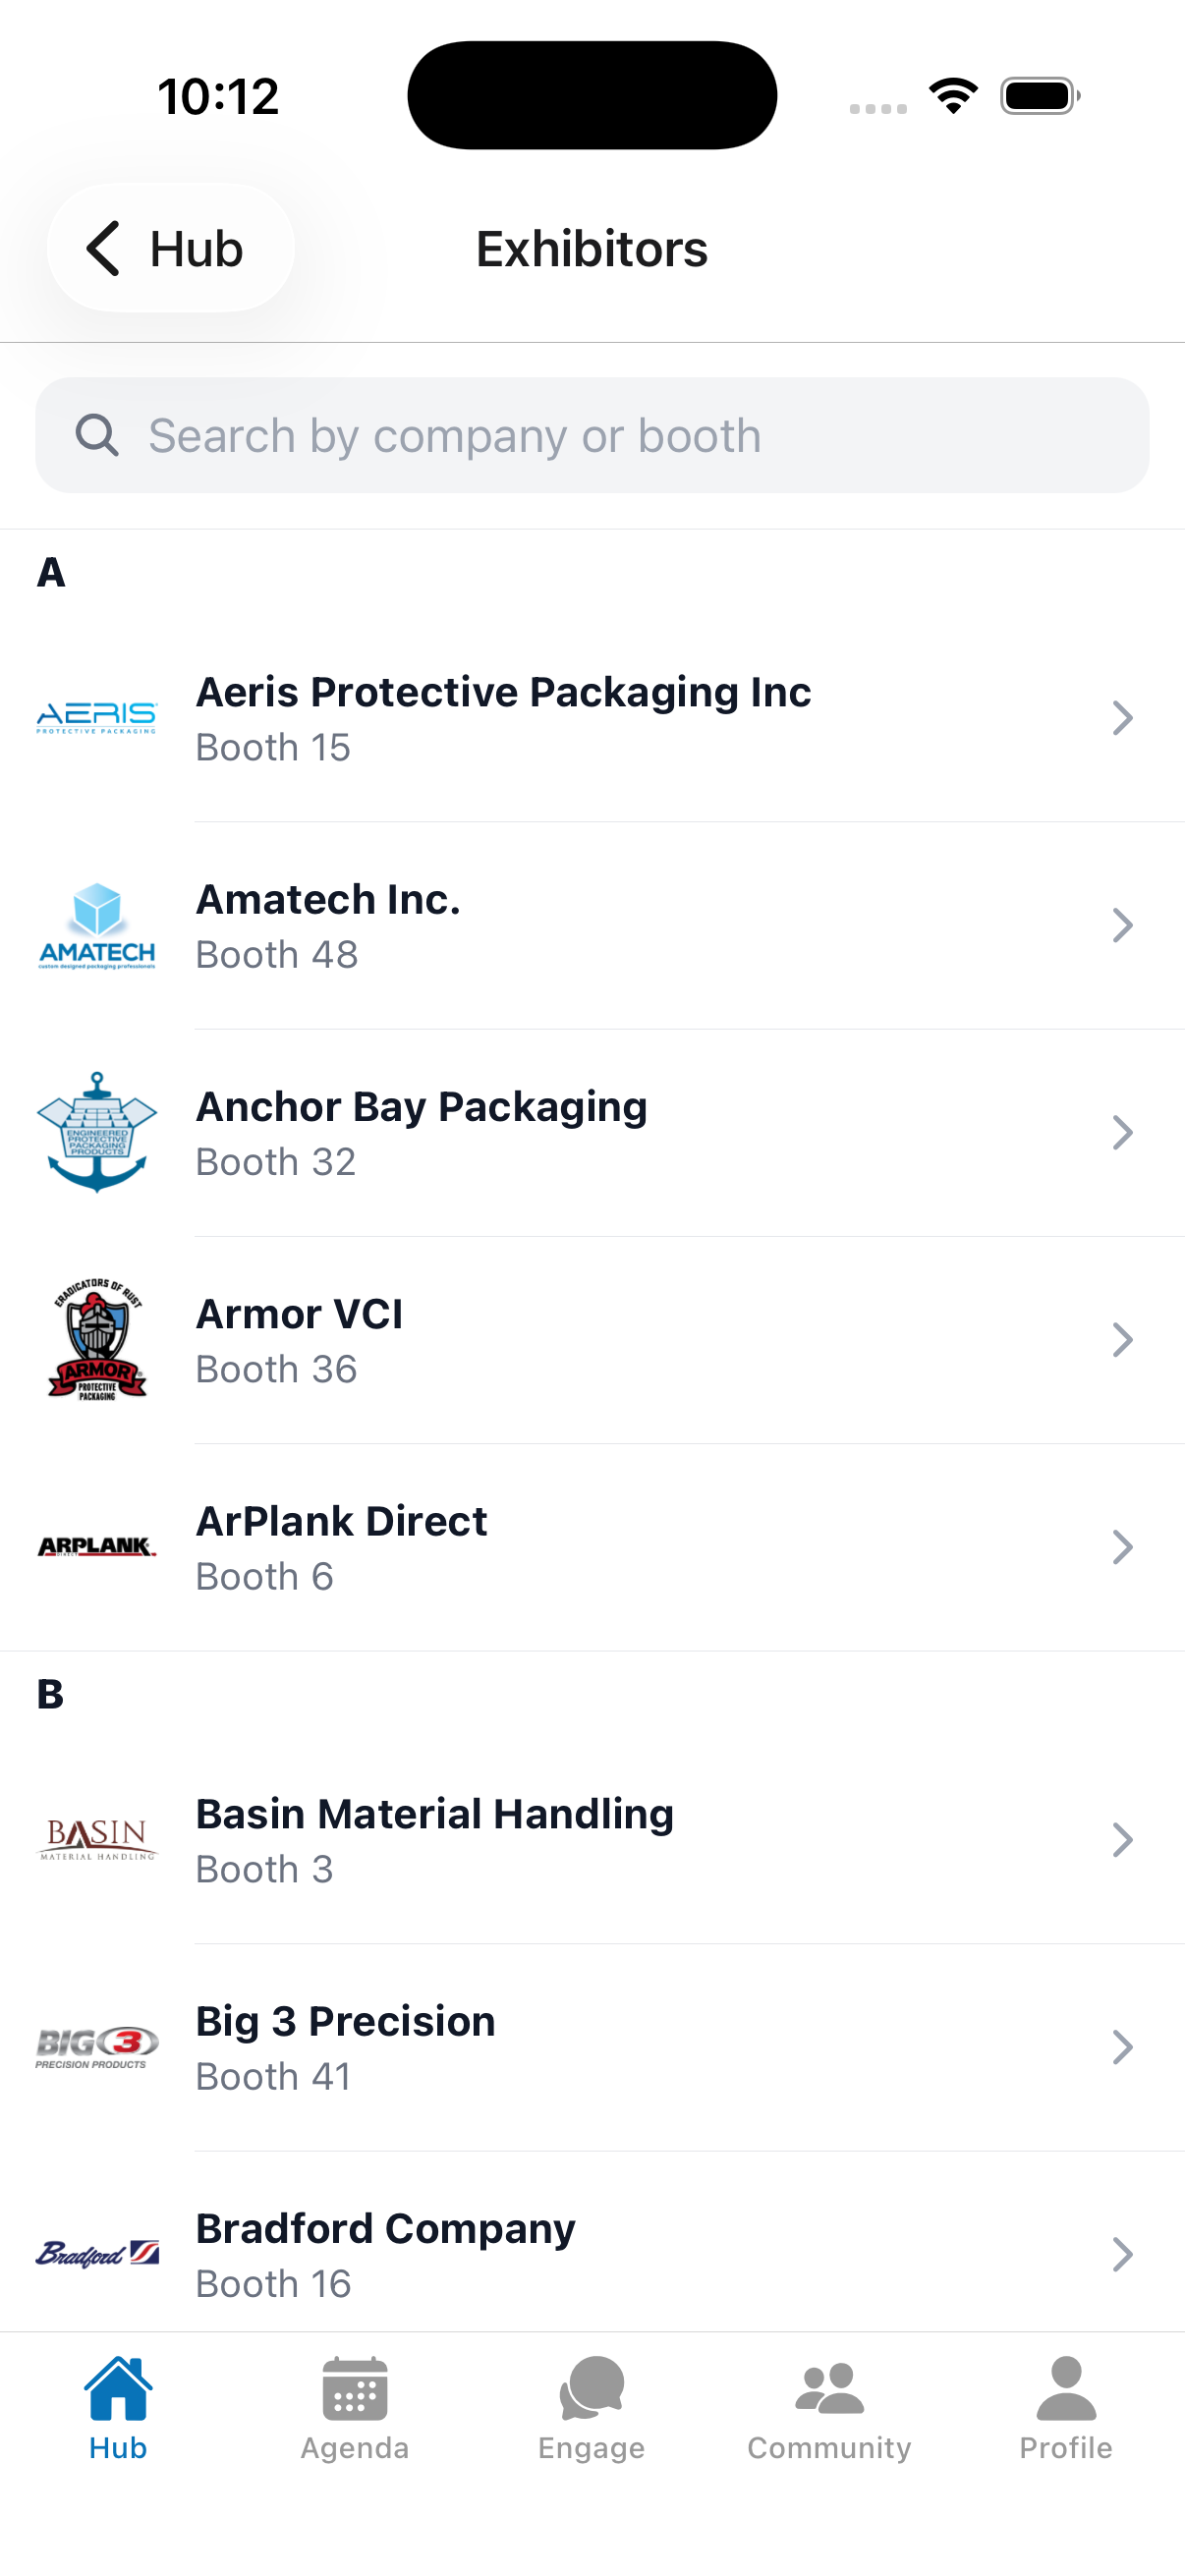
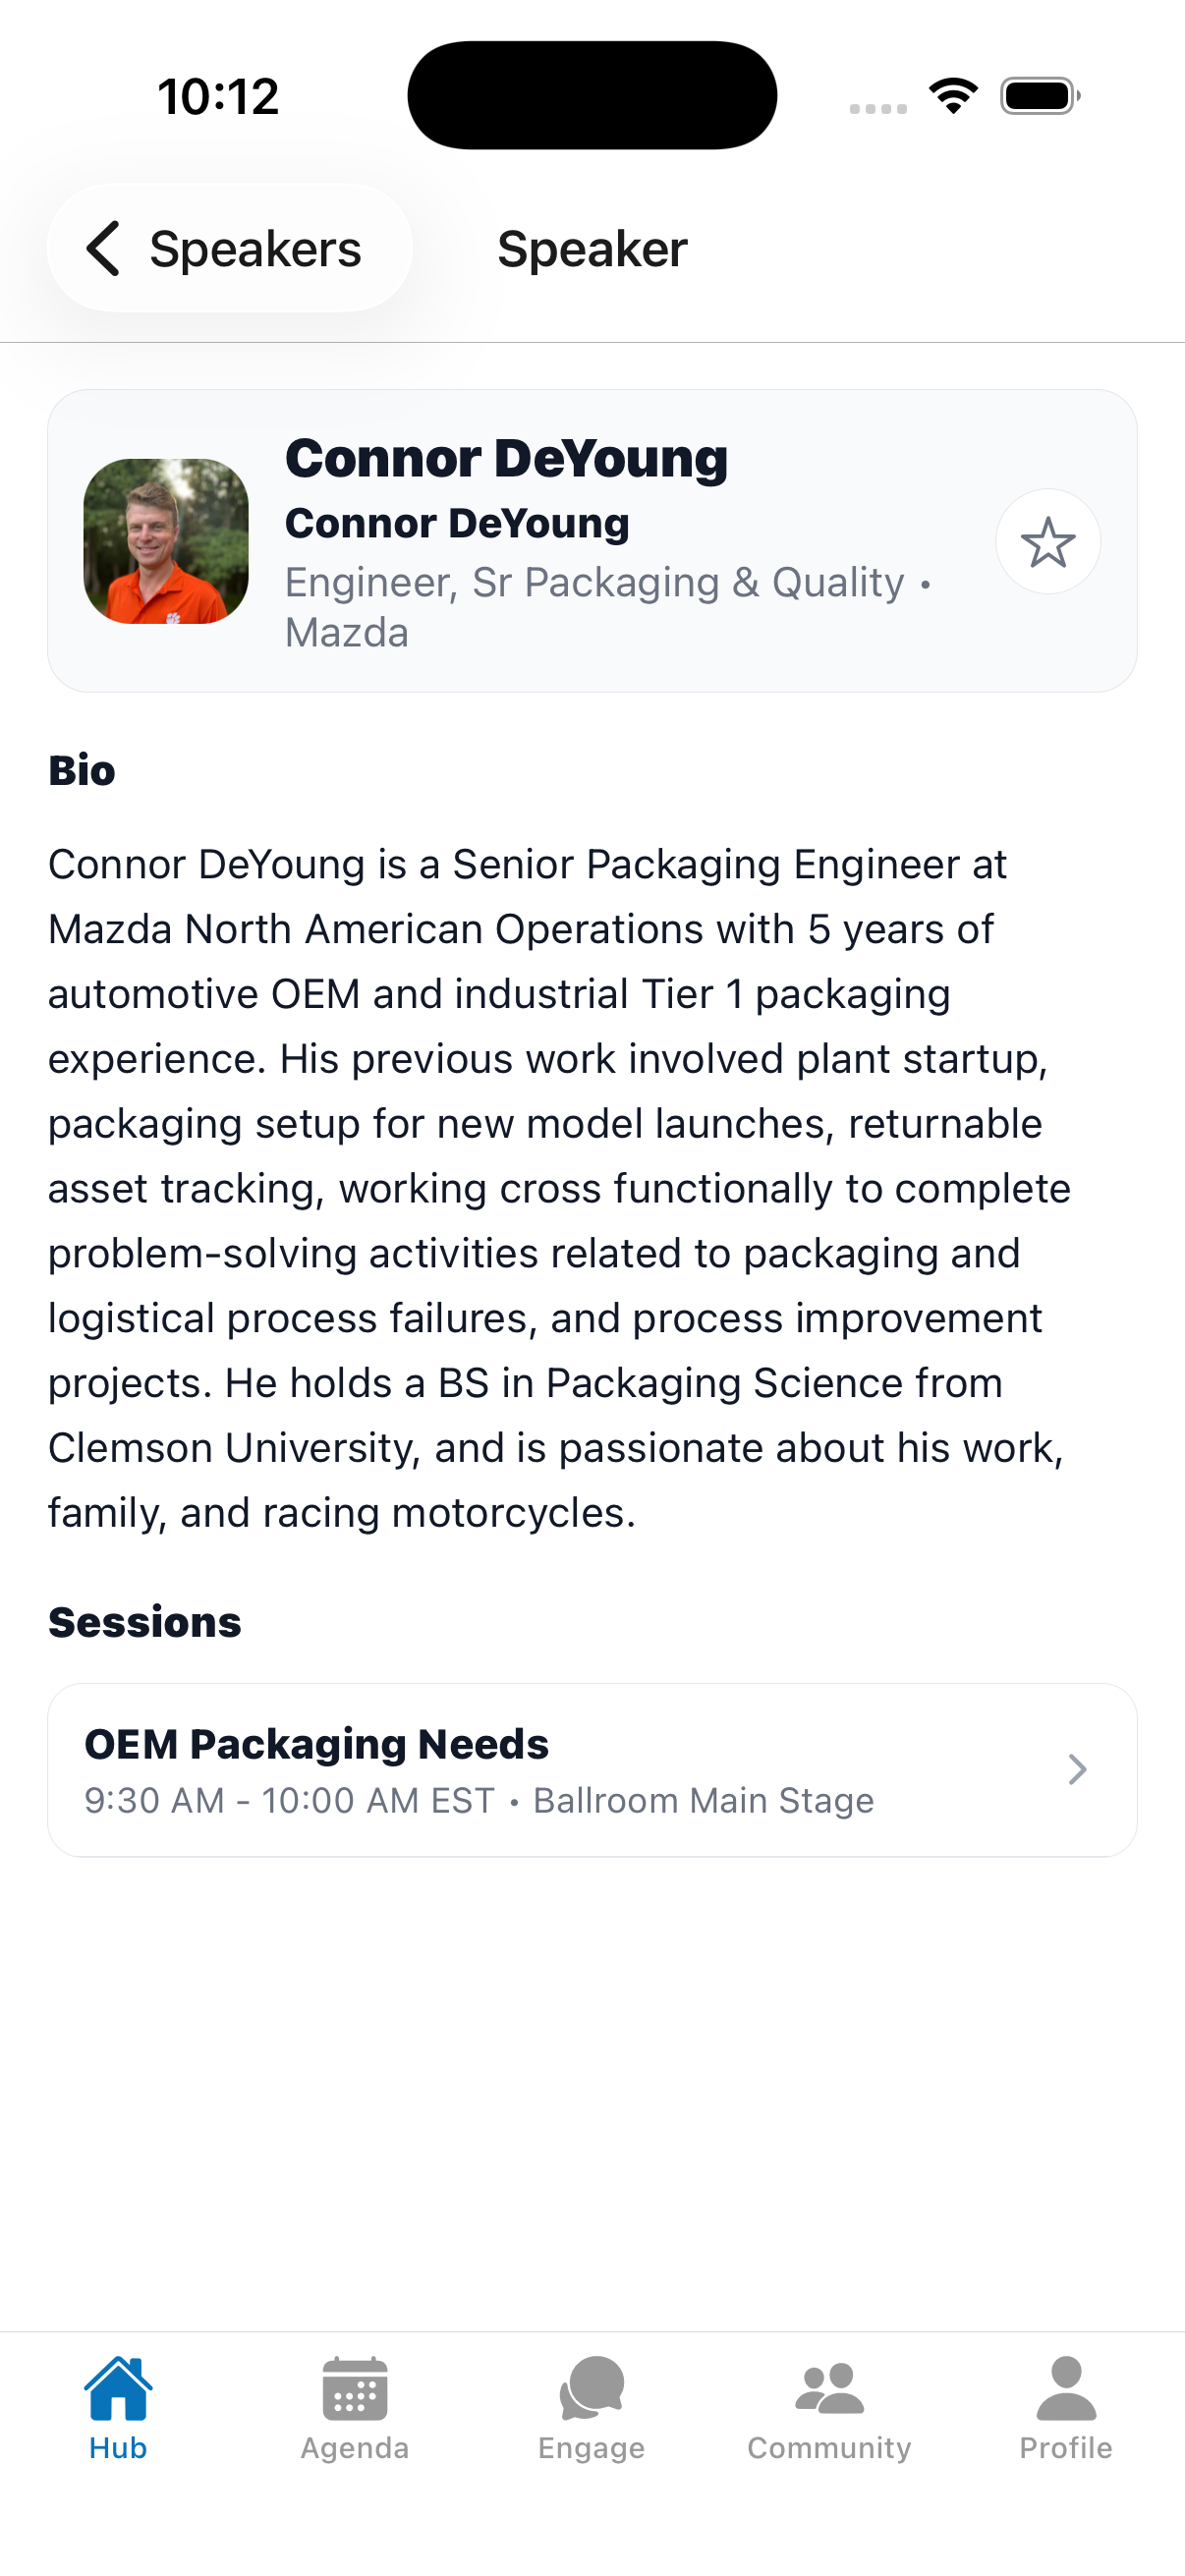
Browse event participants from Engage or via the Exhibitors, Sponsors, and Speakers quick tools.
- Search each directory to find a specific company or person.
- Tap any entry to view its full profile (company info, booth number, presentation details, etc.).
- Tap the star to add exhibitors, sponsors, or speakers to your Favorites.
11. Announcements & Notifications
Announcements are event-wide updates from the organizers.
- Open Engage → Announcements to read them; unread items are badged.
- Tap an announcement to read the full message.
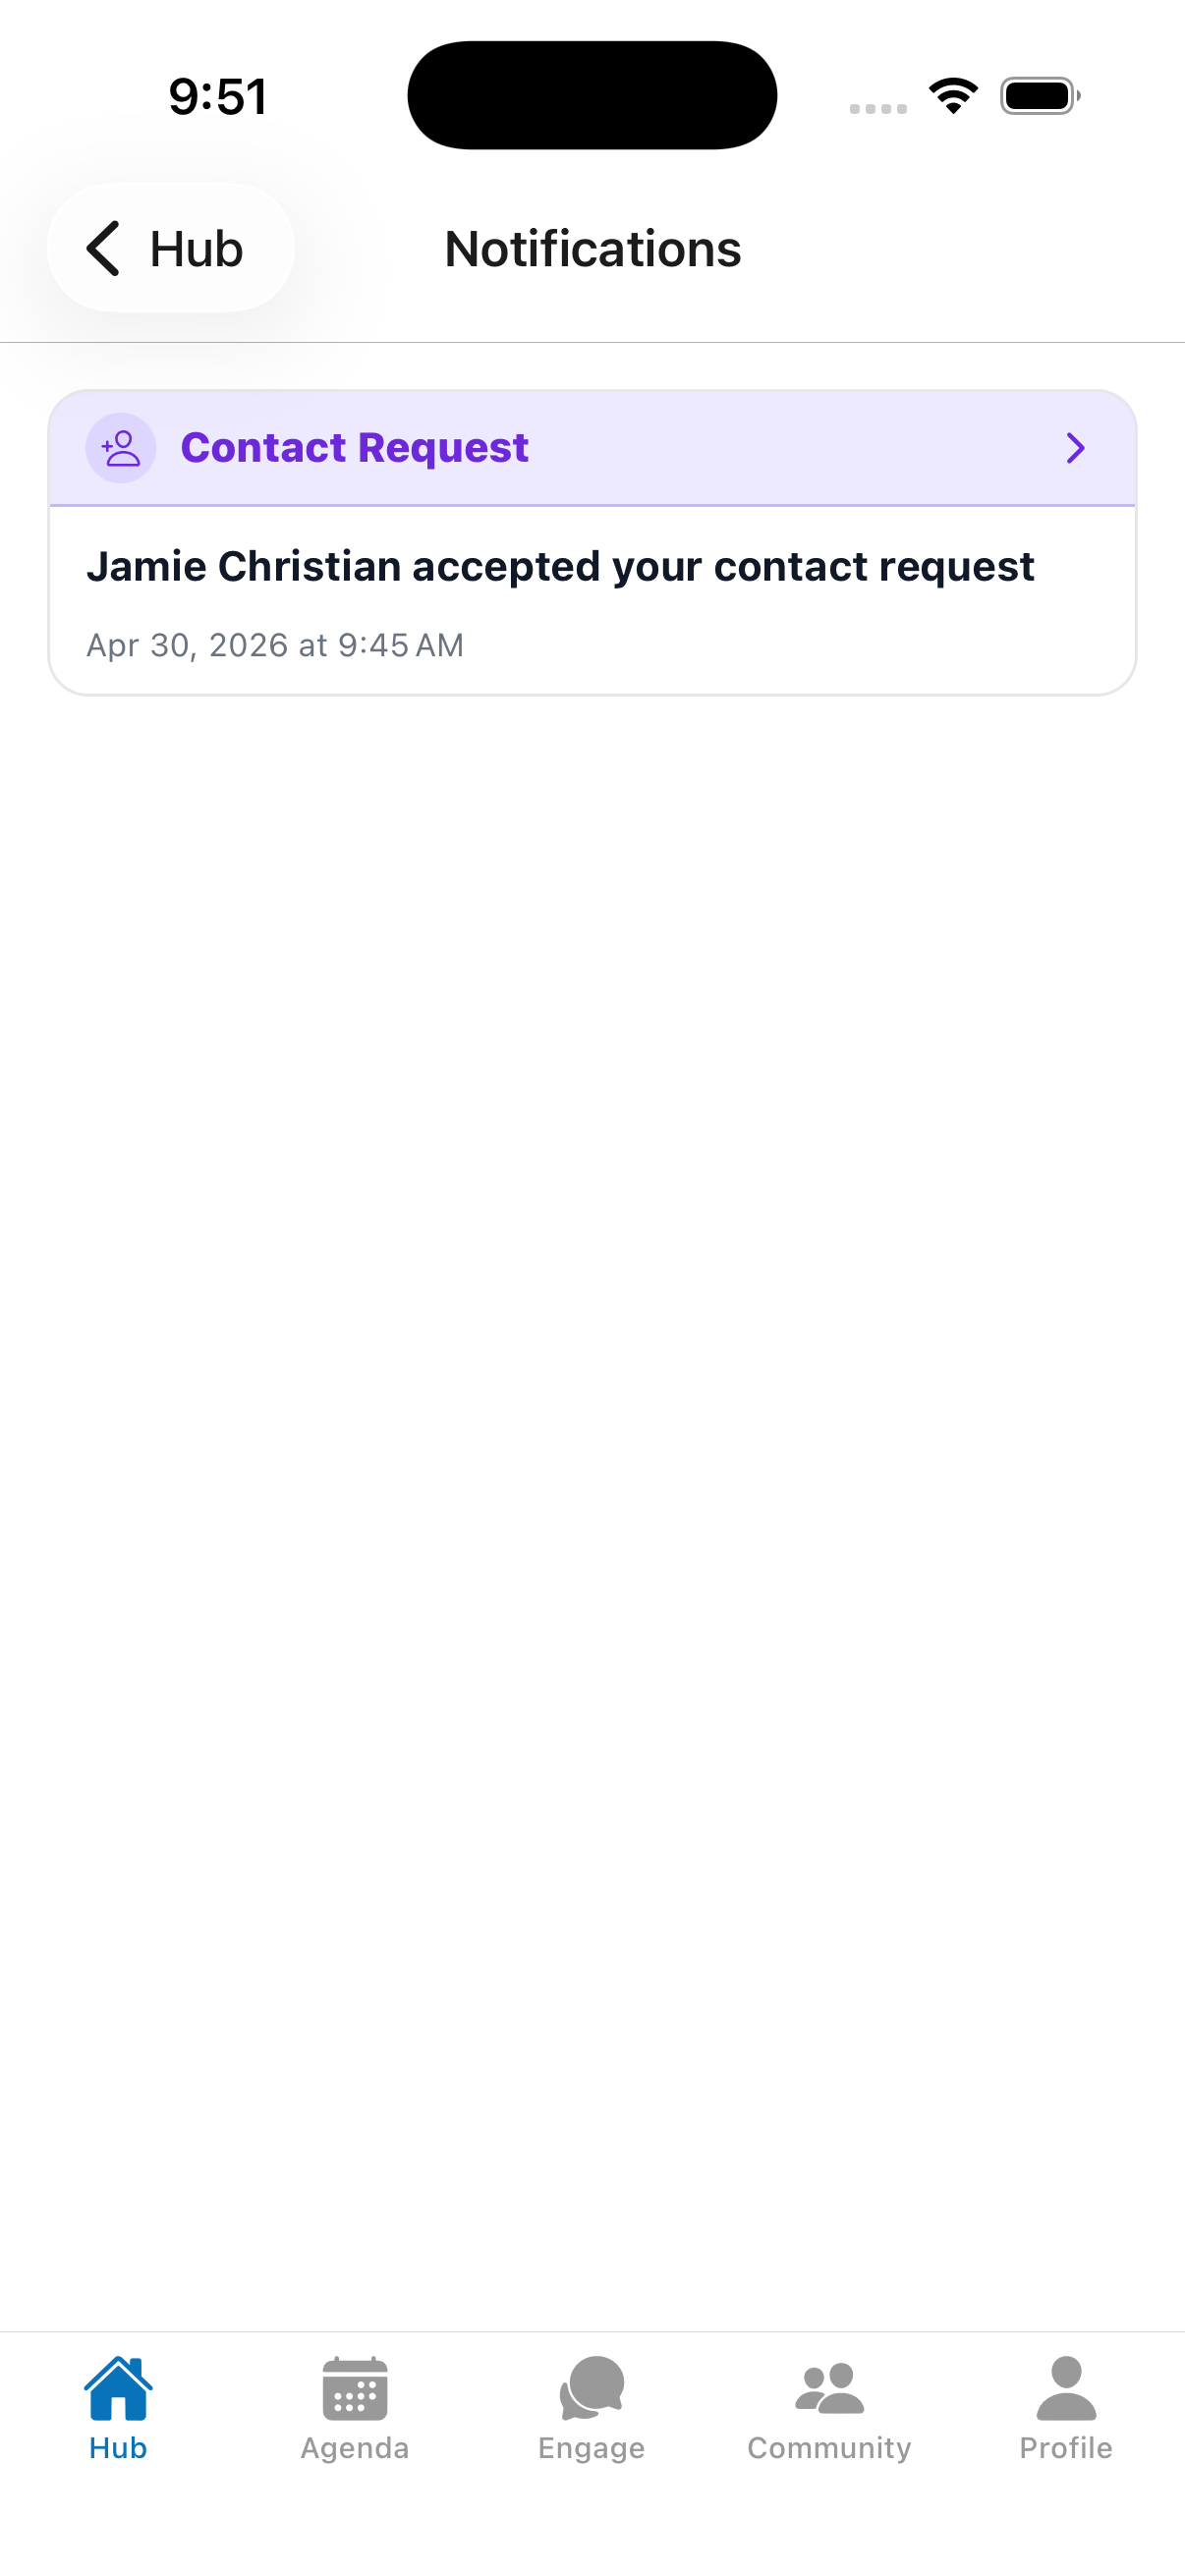
The Notifications center (bell icon on the Hub) brings everything together in one feed:
- New announcements
- Unread messages
- Contact request activity (received and accepted)
Tap any notification to jump straight to the relevant screen.
12. Favorites
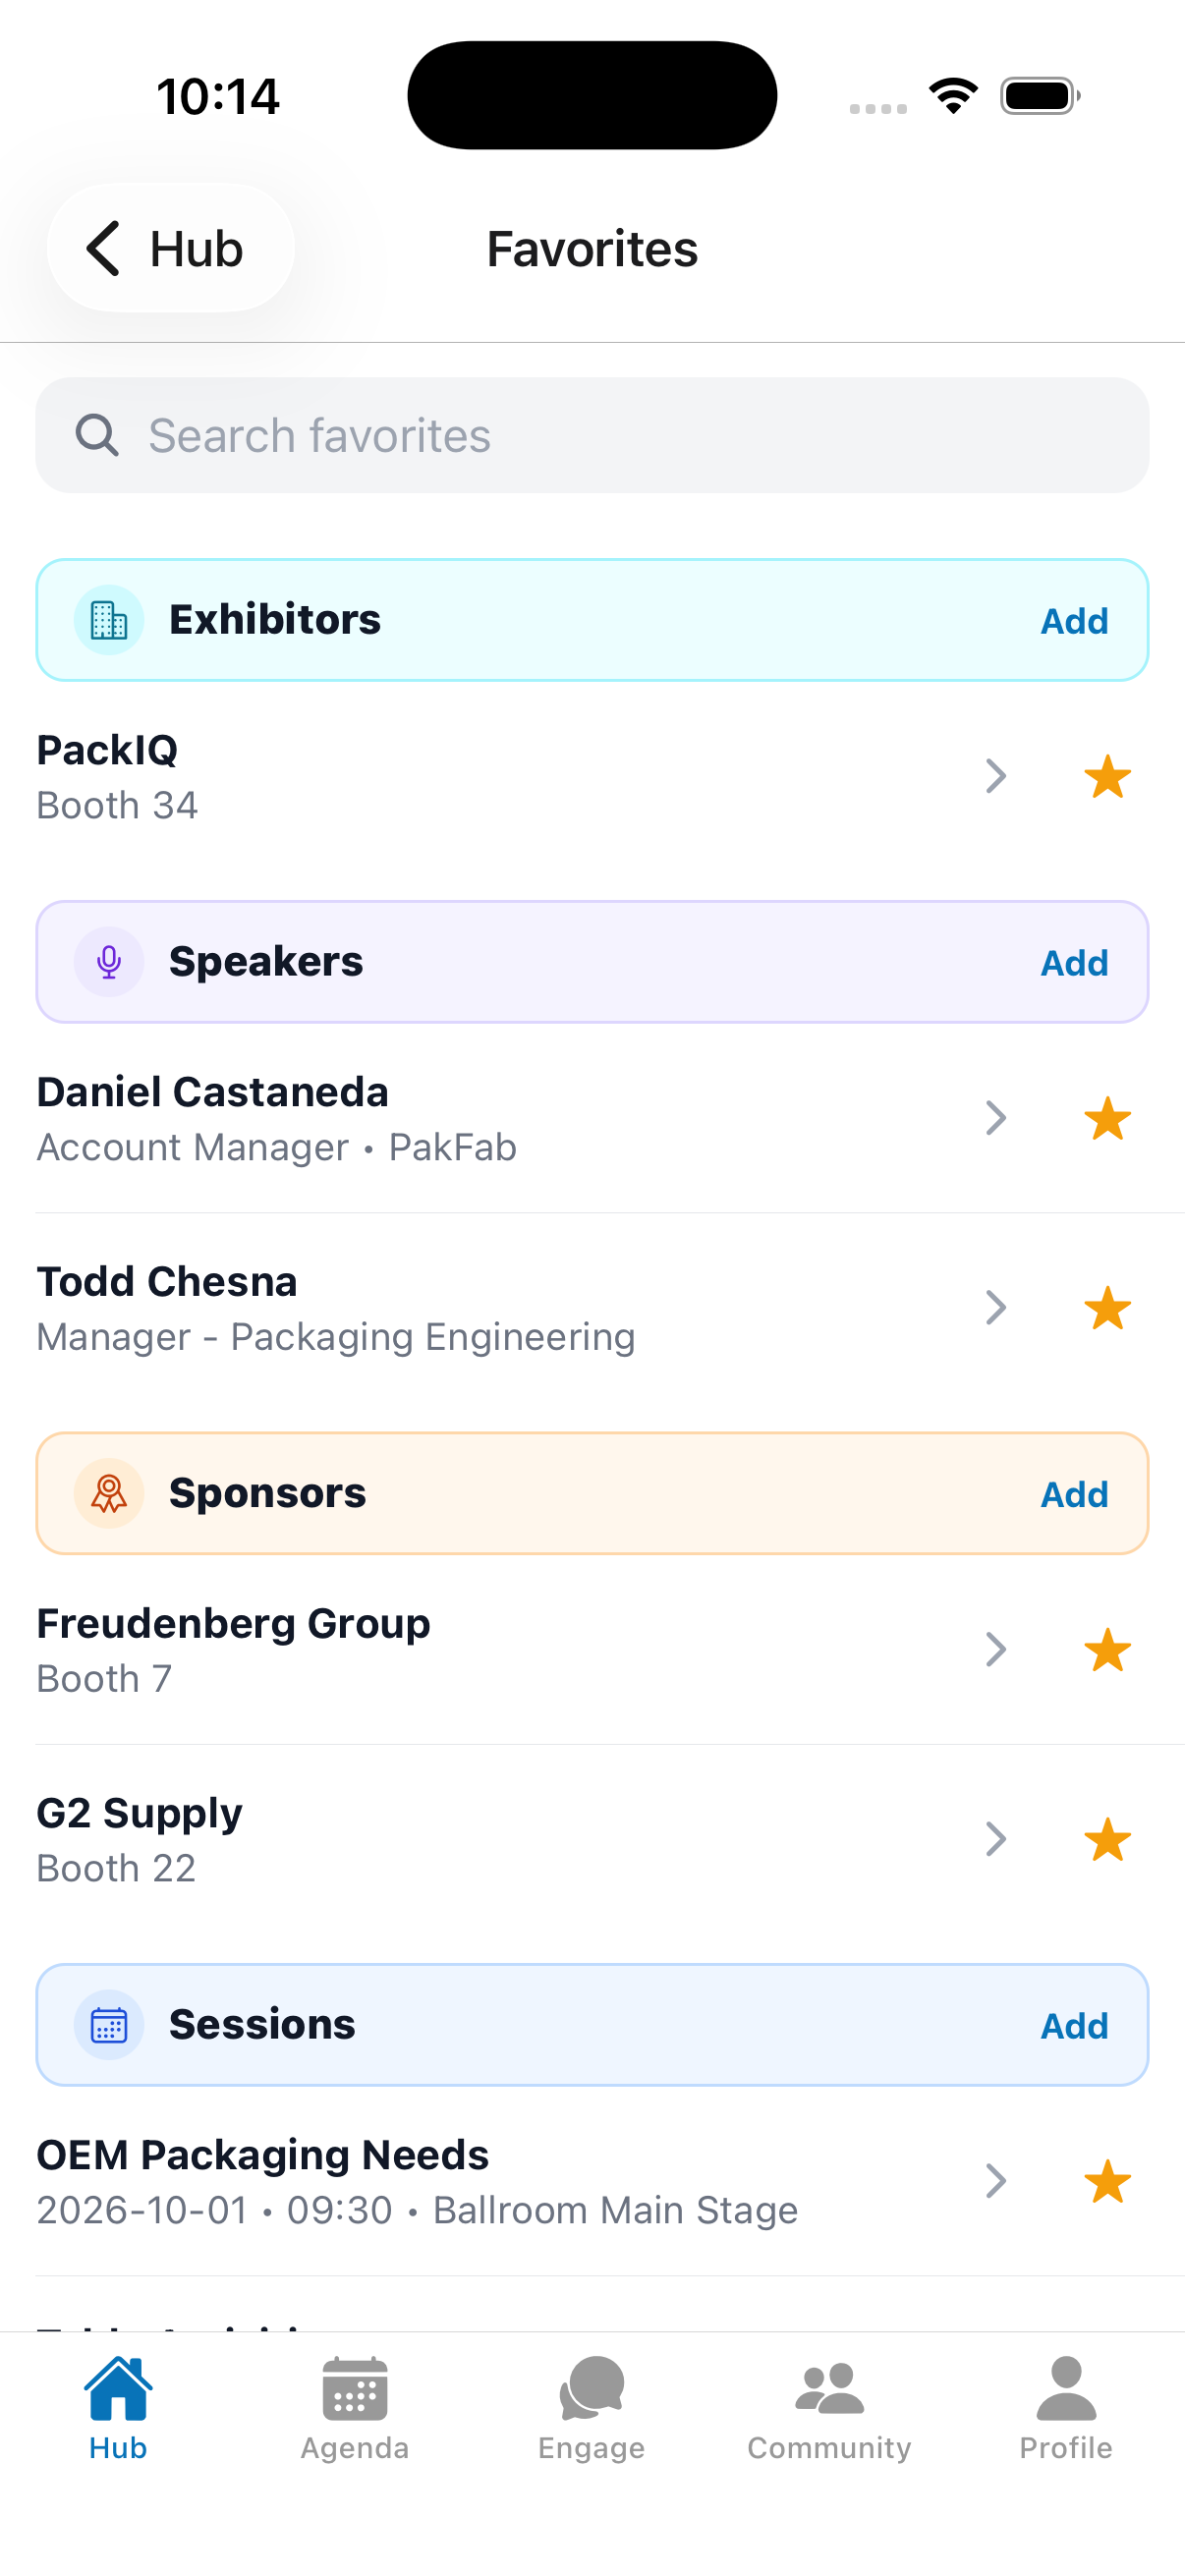
Favorites is your saved-items hub. Open it from the Profile tab or the Favorites quick tool. Items are grouped into categories:
- Exhibitors
- Speakers
- Sponsors
- Sessions
- Contacts
For each item you can:
- Tap it to open the full profile or session.
- Tap the star to remove it from favorites.
- Use Add on a category header to jump to that directory and favorite more.
- Search to filter across all favorites.
13. Notes
Notes collects everything you’ve written in one place. Open it from the Profile tab or the Notes quick tool.
- Switch between the Sessions and Contacts tabs.
- Search your notes by session title, person name, or company.
- Tap a note to jump to the session or person it belongs to.
Notes are always private to you. You create and edit them from within a session or a person’s profile (see 5.4 and 6.7).
14. Exhibitor Tools (Booth Staff Only)
If your registration is tied to an exhibiting company, two extra tools become available (and Exhibitor Profile is automatically pinned to your Hub).
- Exhibitor Profile — opens your company’s booth profile so you can review/complete it. If none exists yet, ask an admin to create it.
- Capture Contact — a lead-capture scanner. Point your camera at an attendee’s QR code to quickly pull up and capture their contact details at your booth.
15. Quick Reference: Icon Glossary
| Icon | Meaning |
|---|---|
| ⭐ Star | Add/remove a favorite (session, person, exhibitor, sponsor, speaker). |
| 💬 Chat bubble | Start or open a conversation (available after a request is accepted). |
| ⏳ Hourglass | A contact request is pending. |
| ✅ Checkmark (double) | A contact request is accepted — you’re connected. |
| 👤➕ Person-add | Send a contact request. |
| 📷 / Scan icon | Open the camera to scan a QR code (attendee, passport, or lead capture). |
| 🔔 Bell | Notifications (red badge = unread items). |
| 📝 Note icon | This session or contact has a note attached. |
| 🏷️ QR code | Your personal QR code — always shown at the top of the Hub for others to scan. |
End of attendee guide. Admin features are covered separately and are intentionally not included here.